


Photoshop Tutorials: Quick Tip: Access the Hidden Photographic Toning Gradients in Photoshop CS6 | |

| Quick Tip: Access the Hidden Photographic Toning Gradients in Photoshop CS6 Posted: 29 Jan 2013 06:19 PM PST The Photographic Toning EffectsPhotoshop CS6 comes loaded with 39 presets to simulate traditional darkroom toning and split-toning effects. Click on the image to download the high-res version you can print.
Step 1Open an image you want to split tone in Photoshop. For this tutorial, we'll be using the image below as an example.
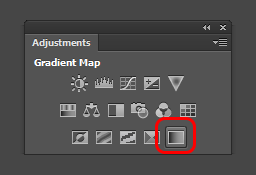
Step 2Add a new Gradient Map adjustment layer. You can do this by clicking on the Gradient Map fill layer button in the Adjustments panel (Window > Adjustments).
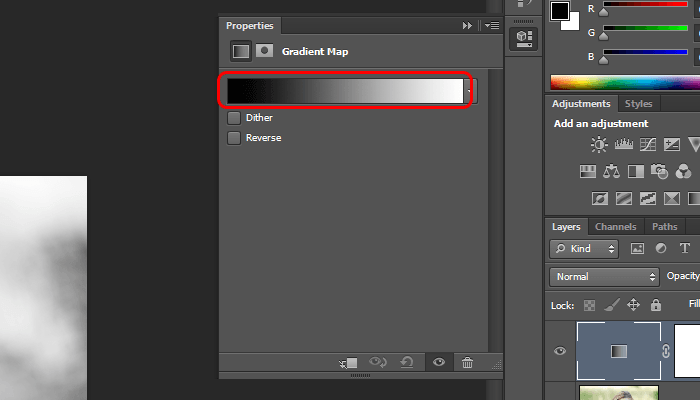
Step 3In the Properties panel (Window > Properties), click on the Gradient. This will bring up the Gradient Editor.
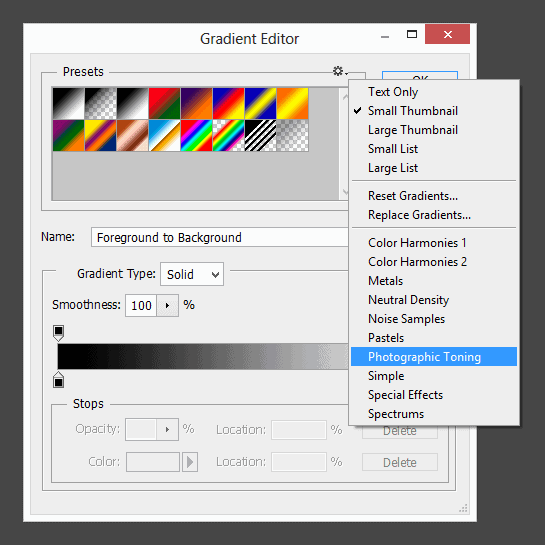
Step 4This is where the photographic toning presets are hidden. Click on the panel menu located on the top-right of the presets area then select Photographic Toning.
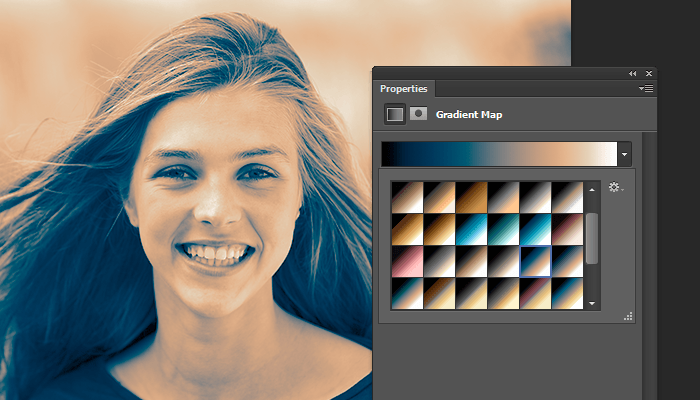
Step 5Try out the different gradients to find the one that you like. Most of them will look pretty strong, but we'll minimize this in the next step.
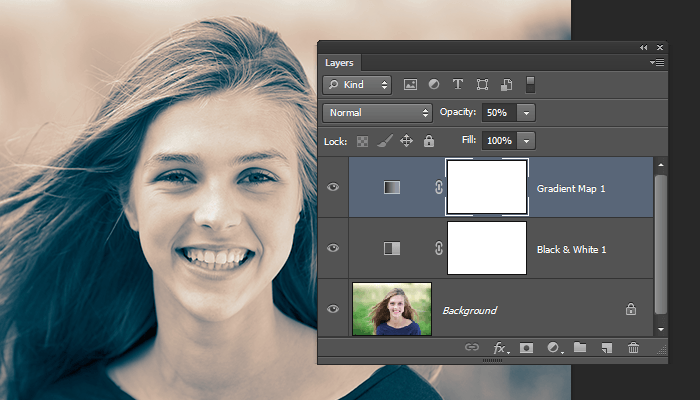
Step 6One way to reduce the look of it is to add a Black and White adjustment layer (Layer > New Adjustment Layer > Black & White). Position this layer between the two layers then adjust the opacity of your Gradient Map. Here's what ours look like with the Gradient Map at 50%.
Final Results  |

| You are subscribed to email updates from Photoshop Tutorials To stop receiving these emails, you may unsubscribe now. | Email delivery powered by Google |
| Google Inc., 20 West Kinzie, Chicago IL USA 60610 | |


0 comments:
Post a Comment