Photoshop Tutorials: Create a Romantic Cutlery Artwork Inspired by Salvador Dali |  |
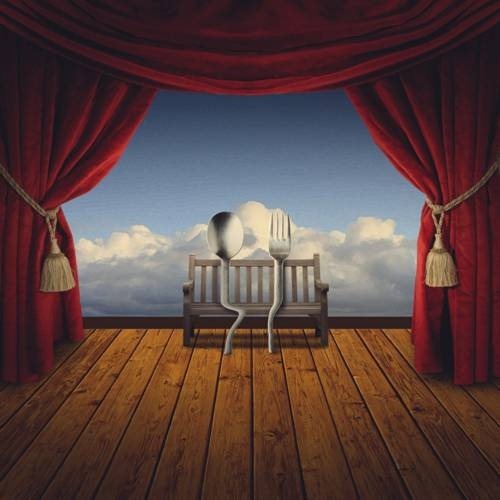
| Create a Romantic Cutlery Artwork Inspired by Salvador Dali Posted: 07 Jan 2013 11:46 AM PST Preview of Final Results
Download the PSDBig Fish.zip | 99.21 MB Romantic Cutlery Artwork Photoshop TutorialTutorial Resources
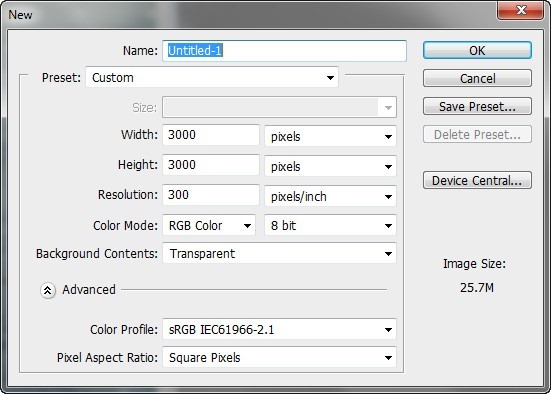
Step 1: Create a New Photoshop Image FileNow, let's start by creating a new image file, go to the Menu bar and click File > New, and then input the following values on their respective fields:
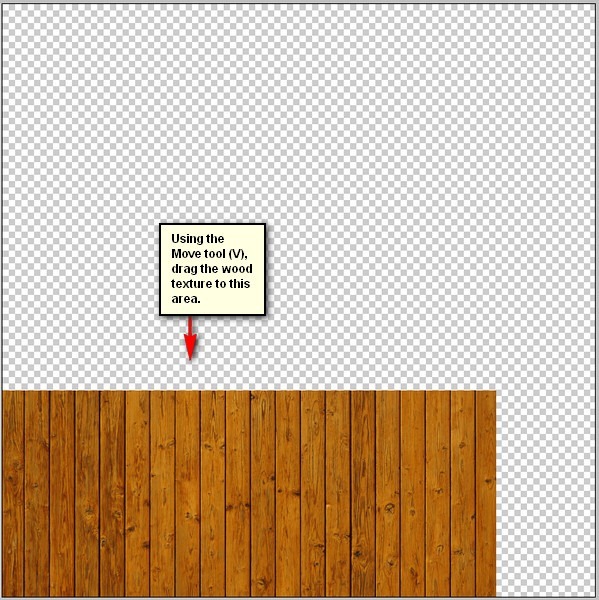
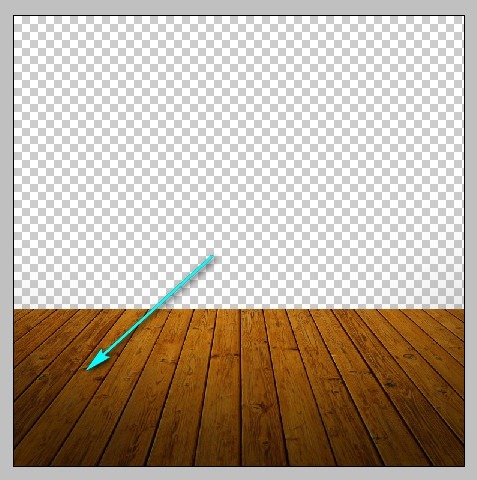
Step 2: Create the Wooden FloorIn this step, we will be creating the wooden floor of our artwork. To start, let's open "Old Wood Texture" by kovik. Once open, activate the Move tool by pressing V on your keyboard and then left-click on the wood texture while dragging it to our 3000×3000 pixel canvas. Once that has been done, position it on the canvas as shown below:
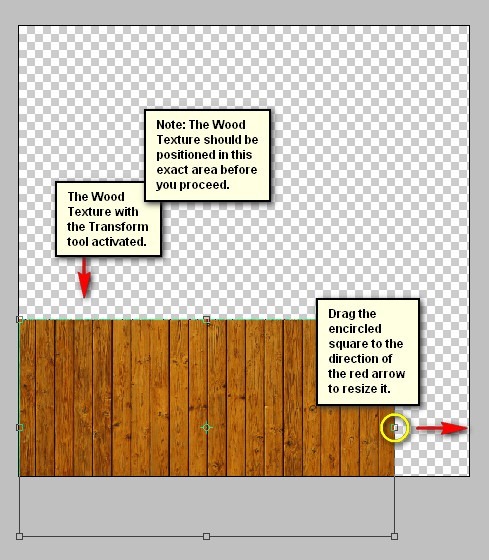
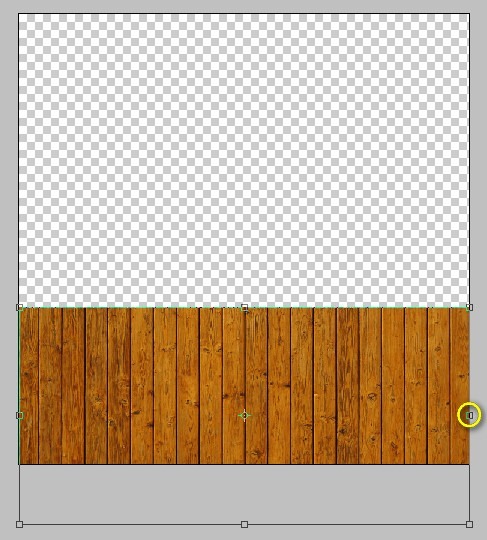
Step 3Next, we would need to resize the wood texture to properly play its part. First, activate the Transform tool by pressing Ctrl/Cmd + T, once this has been done, you'll notice a series of squares surrounding the wood texture – that is the Transform tool. Now, let's resize the wood texture by following the instructions shown on the image below:
The result:
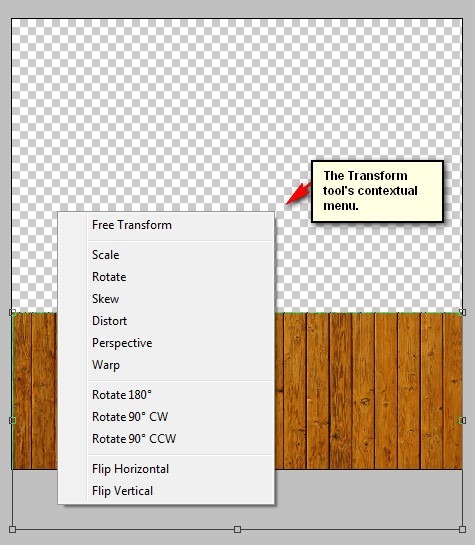
Step 4Next, we will need to give the proper perspective for the floor. To do that, we would need the help of the Transform tool once again. Activate the Transform tool (Ctrl/Cmd + T) and then right click on the canvas to bring up the contextual menu. It should look like this:
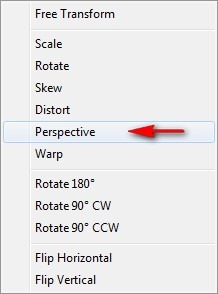
Now, once activated, click on Perspective.
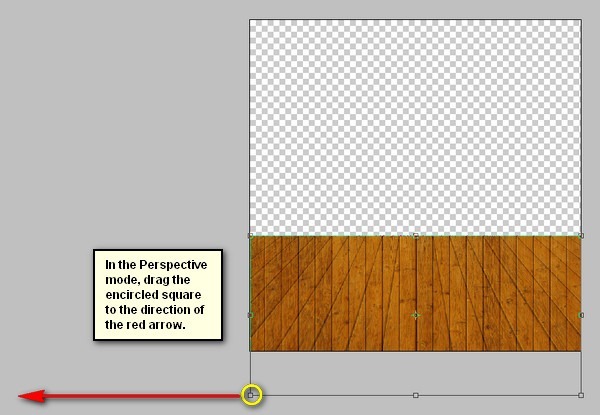
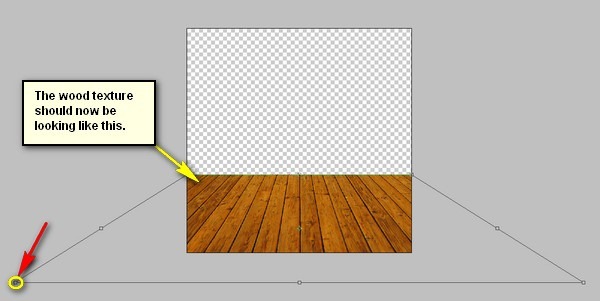
Let's now fix the wood texture's perspective!
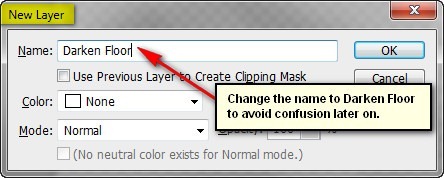
Step 5Next, we will now enhance the shadows on the wood texture. First let's create a new layer above the wood texture by pressing Ctrl/Cmd + Shift + N. Once done, a box as shown below would appear:
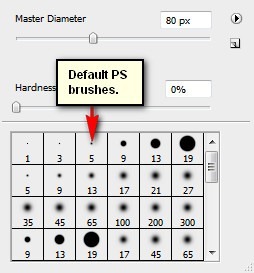
Step 6Now that we've also given this new layer a name, let us activate the Brush tool by pressing B. Before you proceed, make sure that the Brushes to be used are the default PS brushes. The default Photoshop brushes are shown on the image below, if that's not what you see, then follow the instructions below:
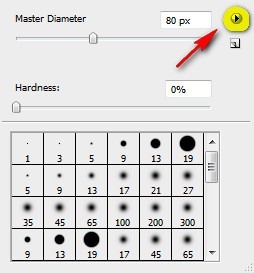
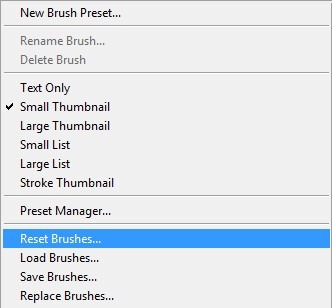
Right click the canvas while a layer is selected and while the Brush tool (B) is activated and then click on the button highlighted below:
Then click on "Reset Brushes" from the contextual menu.
Now, that that is done input the following settings for our Brush tool (B):
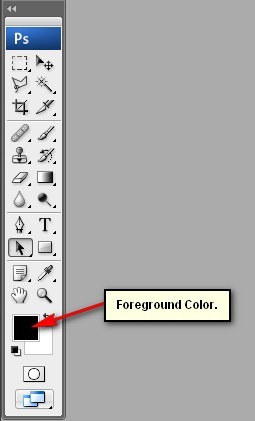
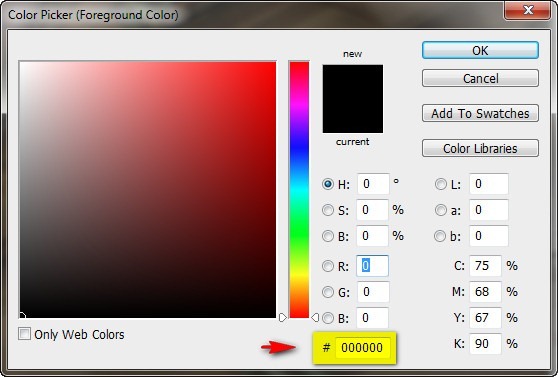
Note: #:000000 is the Brush's color. You can change that by left-clicking on the Foreground color box.
The Color Picker box opens once you click the Foreground Color box.
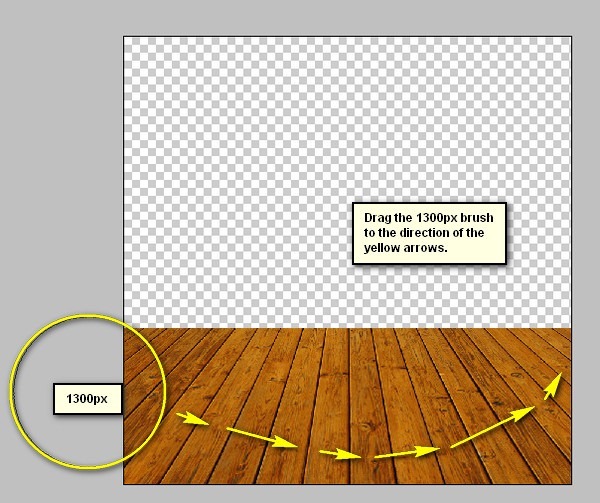
Step 7Now that the Brush tool's color has been changed, we can now begin:
The result of that should be similar to this:
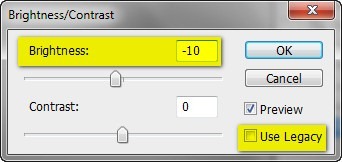
Step 8Note: A single 15% Opacity stroke wouldn't do the trick, you'd have to brush in several times to achieve that darkness. The reason for 15% Opacity is just to make the shadows gradual, not so strong, yet not so soft. Next, let's reduce the Brightness of the wood texture. To do that, left-click on the wood texture layer and then go to Image > Adjustments > Brightness/Contrast; once open, input the following:
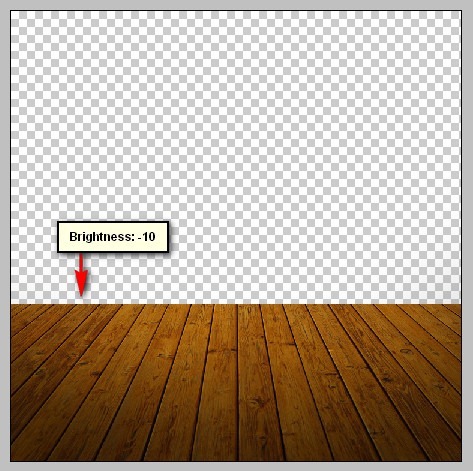
The result:
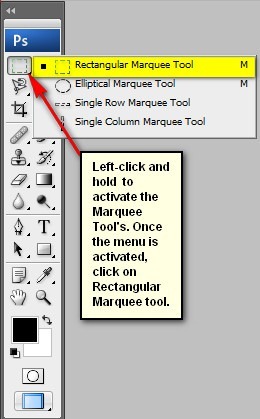
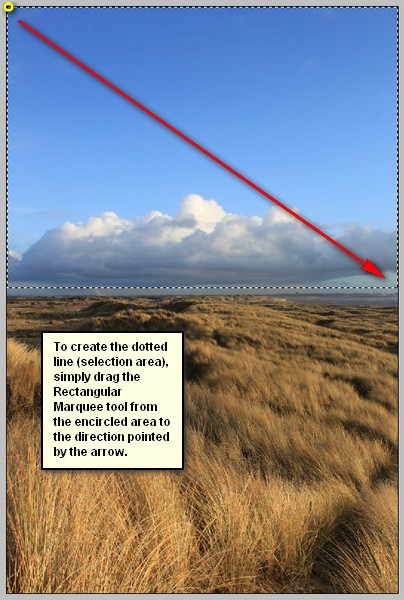
STEP 9: Create the Painted SkyIn this step, we will be creating the wallpaper of the room – a painted sky background. To start, let's open "Formby Dunes 8" by Tasastock. In this image, we would only be utilizing the sky, so how do we move only the sky part of the stock image? Easy – Rectangular Marquee Tool!
Now, let's use the Rectangular Marquee tool on the sky of "Formby Dunes 8":
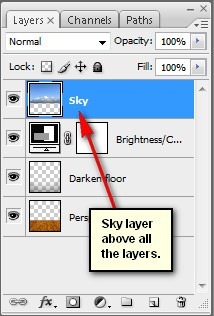
Step 10Once the selection area has been created, activate the Move tool (V) and drag the selected area (the sky) to our canvas. Put the sky above all the layers that we've created.
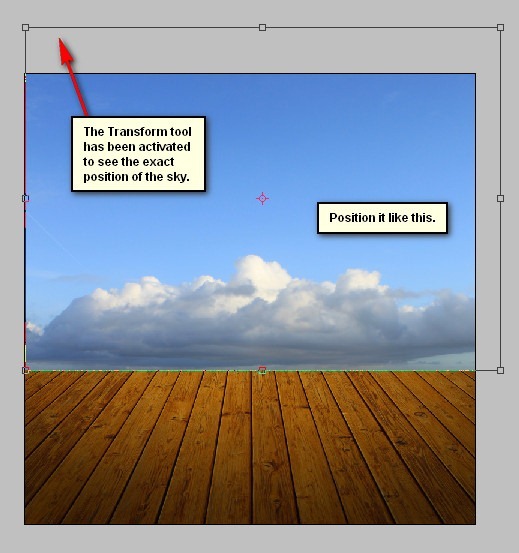
Position the sky on the 3000×3000 pixel canvas as shown on the image below:
|
| You are subscribed to email updates from Photoshop Tutorials To stop receiving these emails, you may unsubscribe now. | Email delivery powered by Google |
| Google Inc., 20 West Kinzie, Chicago IL USA 60610 | |



0 comments:
Post a Comment