Photoshop Tutorials: How to Paint a Lovely Pair of Birds in Photoshop |  |
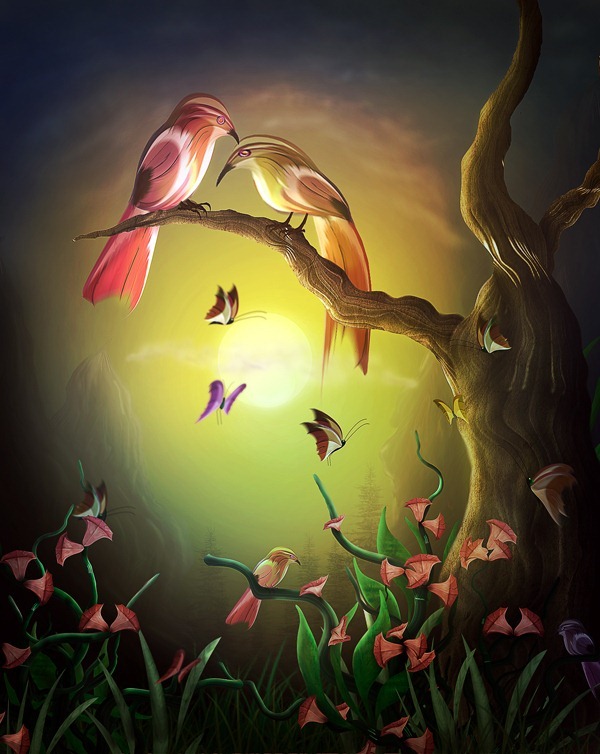
| How to Paint a Lovely Pair of Birds in Photoshop Posted: 28 Jan 2013 11:46 AM PST Preview of Final Results
Download the PSDBird Painting.zip | 18.09 MB Pair of Birds Painting Photoshop TutorialTutorial Resources
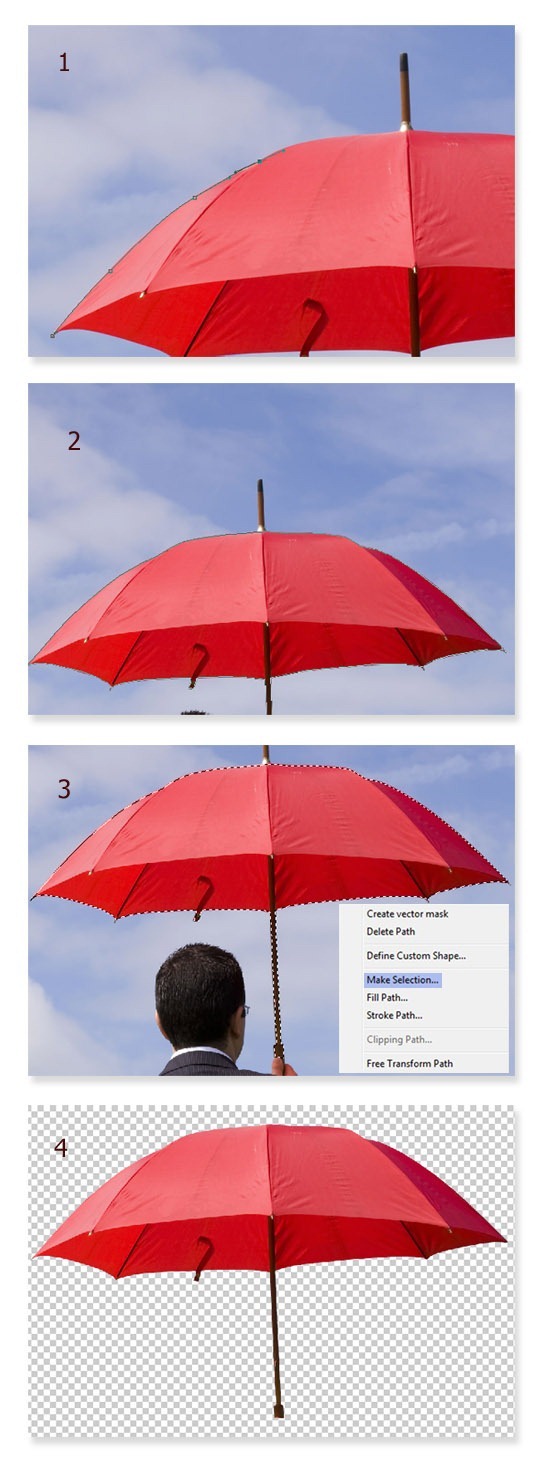
Step 1 (Preparing Stock)Firstly, open the picture provided :
Next, activate the pen tool in the tool panel. We will crop the umbrella from the picture. All we have to do is click on the edge of the umbrella to make a starting point anchor. Trace the edges of the umbrella with the pen tool by keeping on clicking until the path is closed. When the path is closed, right click on it to show path command option box. Choose make path selection to change the path into selection. Hit Shift+Ctrl+I to inverse the selection and then hit Del to clean the background.
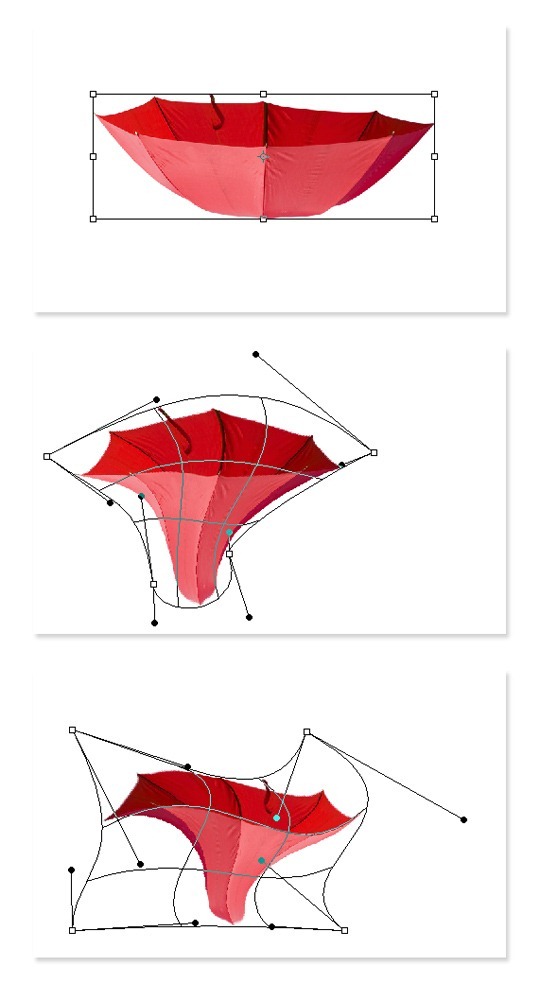
Step 2 (Creating Flowers)Now we have the umbrella with which we will create some shapes needed. In this step we will create flowers. Duplicate the umbrella. Hit Ctrl+T to activate free transform tool which is indicated by small squares as transforming points around the selected picture. Now right click on the duplicated umbrella to show transform command option window and choose Warp. Let’s tweak the umbrella to alter the shape of it by clicking and dragging to the directions needed to find desired shape. Duplicate the umbrella again and do the similar step to find the other desired shapes. See the illustration picture to guide us what to do in this step.
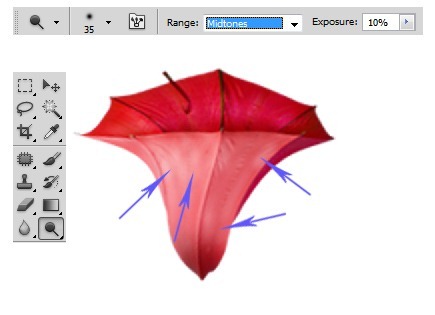
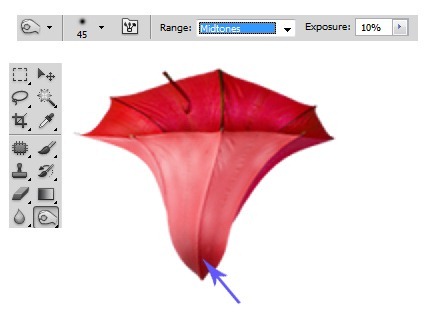
After finding the flower looking like shape, we need to give it some shadow and highlight. To do this, we just use the dodge tool. Please see the illustration picture to know the setting of the dodge tool. Dodge some parts of the shape to define the highlight.
Now switch to burn tool to give some shadow to the shape. Please see the illustration picture :
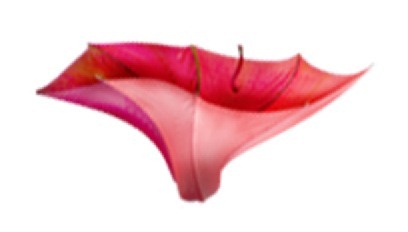
Do similar ways as in previous steps to give shadow and highlight to the other shape :
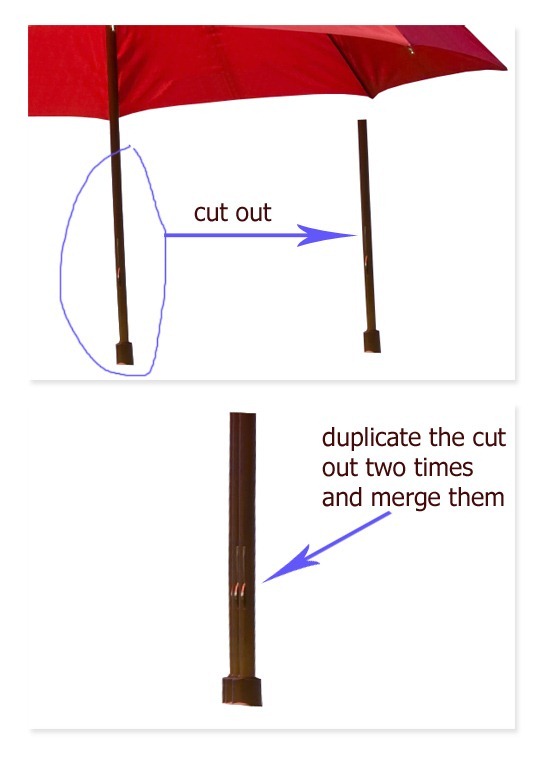
Step 3 (Creating Twigs)From this step on, we will create twigs for the flowers. To achieve this, firstly go to the cropped umbrella again and cut out the stick of it. Duplicate the cut out two times and then merge them into a single layer. Duplicate this new single layer as many times as needed.
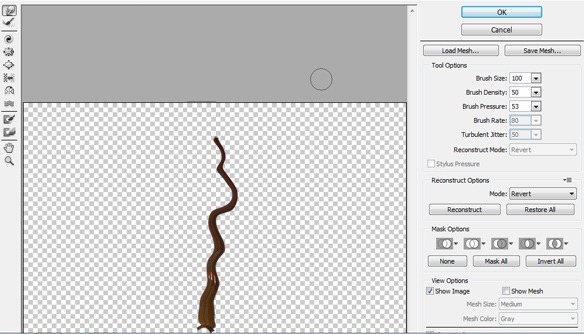
Select one of the duplications and then go to filter > liquify. Choose forward warp tool and tweak the shape of picture:
Next, do similar ways to the other duplication pictures. Try to vary the shapes we are creating in order not to look uniform. Once we have created the shapes, arrange them in such position that they look like twigs of a tree. Then alter the color of the twigs by giving them an adjustment layer: hue/saturation.
|
| You are subscribed to email updates from Photoshop Tutorials To stop receiving these emails, you may unsubscribe now. | Email delivery powered by Google |
| Google Inc., 20 West Kinzie, Chicago IL USA 60610 | |





0 comments:
Post a Comment