Photoshop Tutorials: Create a Halloween Photo Manipulation in Photoshop |  |
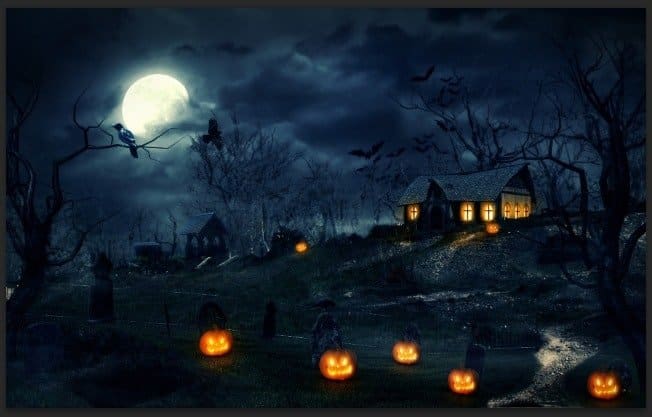
| Create a Halloween Photo Manipulation in Photoshop Posted: 28 Oct 2013 12:00 AM PDT Preview of Final Results
Tutorial Resources
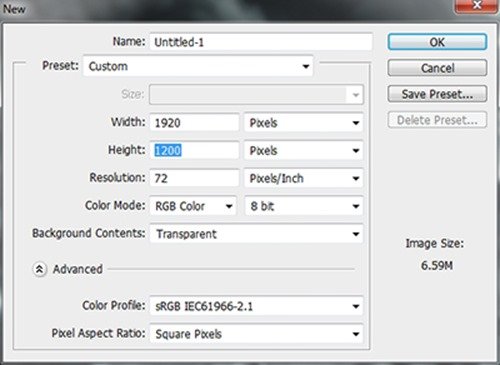
Step 1 – Create A New FileOpen Photoshop and create a new document with Width 1920 and Height 1200, leave the Background Contents as Transparent.
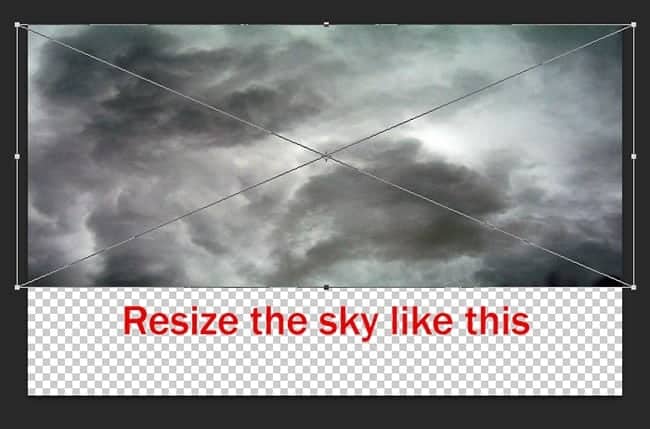
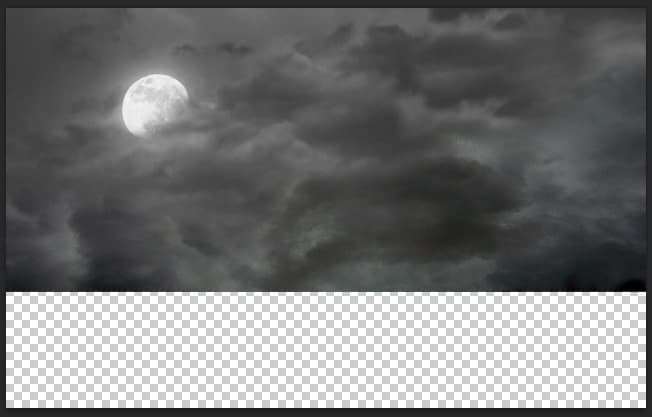
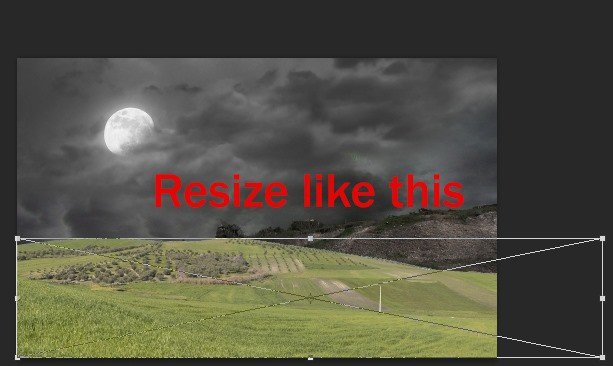
Step 2 – Create The SkyFirstly we will work on the sky first by combining two different images : Moon Sky and Dark Cloud Sky. Place the Dark Cloud Sky into the document first by go to File -> Place, by doing this the image will be set as Smart Object – allows you to work with it indestructibly, this step should be used all along this tutorial for every images. You can also transform any normal layer to Smart Object by right clicking on it and select Convert to Smart Object. Resize the Sky like below. (Ctrl + T to open Transform tool)
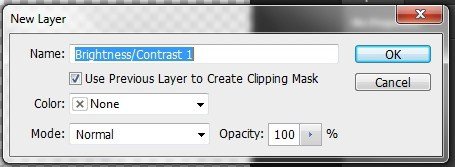
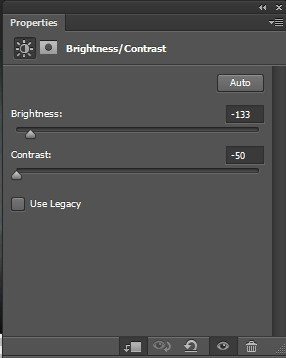
Adjust the Sky a little bit with Brightness&Contrast (Layer -> New Adjustment Layer -> Brightness&Contrast). Remember to tick on the box “Use Previous Layer To Create Clipping Mask“, by this way the adjustment layer will only be used on the Sky layer without affecting other layers below.
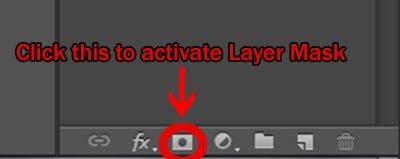
Next, open the Moon Sky image and apply Layer Mask. Layer Mask is a great way to erase unneccesary part on an image and you can still restore the erased part after that if you need to. Quick access to Layer Mask via the panel below the layer area.
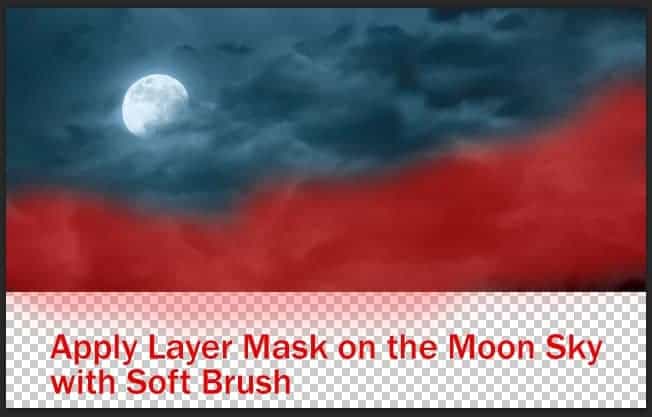
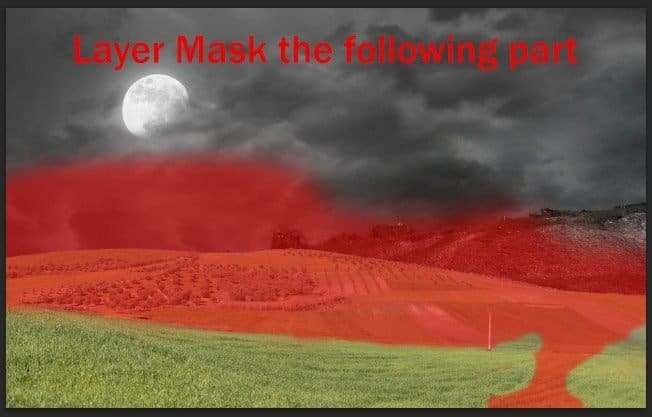
Now grab a big Soft Brush with Black color and start painting on the Moon Sky’s layer mask, the masking part will be indicate with red color. Mask all the white part of this Moon Sky layer.
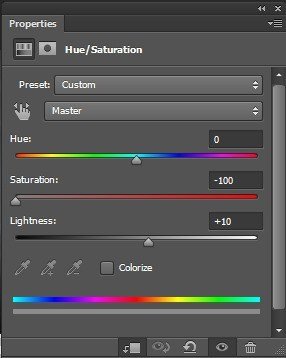
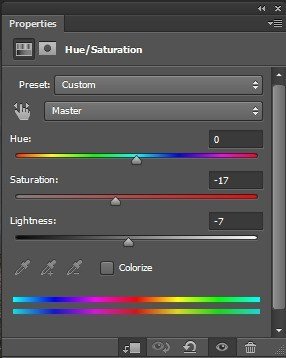
Apply Hue/Saturation adjustment layer to the Moon Sky layer.
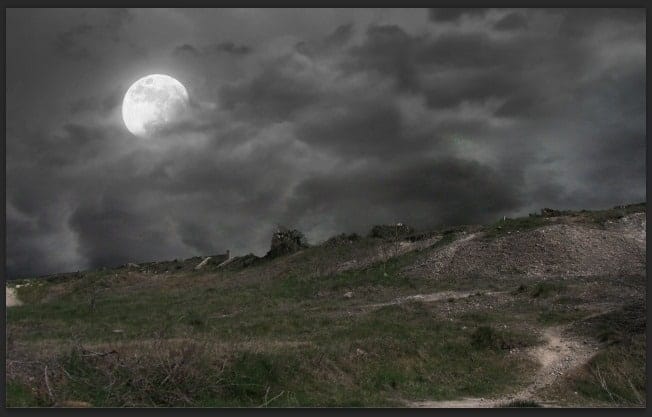
And we’re done with the sky, here is the result.
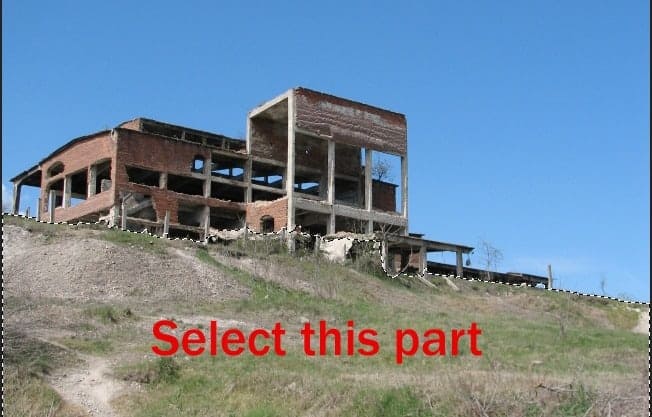
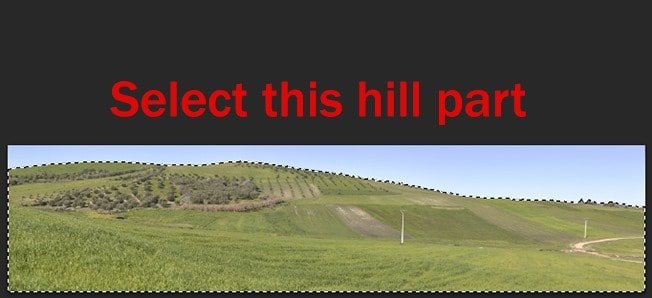
Step 3 – Create the GroundNow we will make the ground with a Hill part and a Field part. Open the Hill image first, use Quick Selection Tool and select the hill like this.
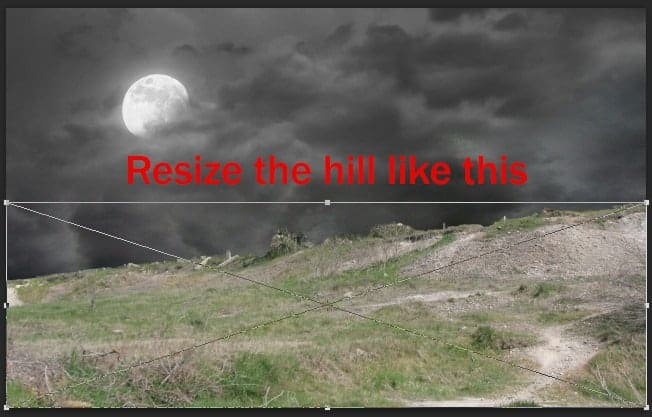
Place the selected part into our document, rotate it to the right like this.
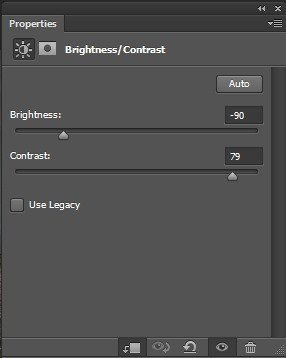
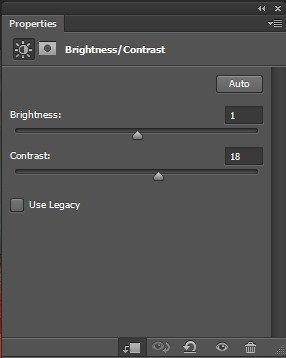
Apply these following adjustment layers to the Hill. Brightness/Contrast
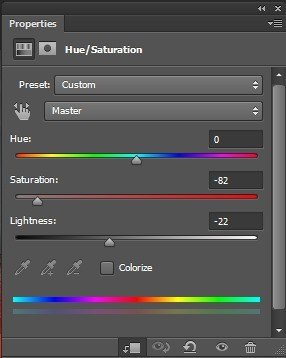
Hue/Saturation
And we will have the Hill look like this
Step 4 – Adding the FieldOpen the Field image and select the field like this.
Place the selected part into the document
Apply Layer Mask to the Field image.
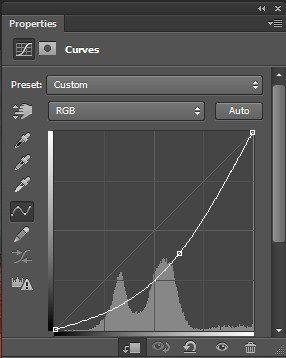
Continue adding some adjustment layers to the Field. Curves – Hue/Saturation – Brightness/Contrast
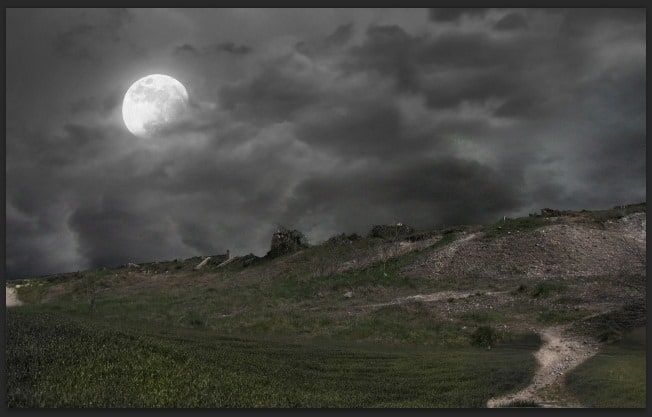
And we’re done with the basic background image for this piece.
|
| You are subscribed to email updates from Photoshop Tutorials To stop receiving these emails, you may unsubscribe now. | Email delivery powered by Google |
| Google Inc., 20 West Kinzie, Chicago IL USA 60610 | |



0 comments:
Post a Comment