Photoshop Tutorials: Create an Amazing CG Illustration of The Incredible Hulk |  |
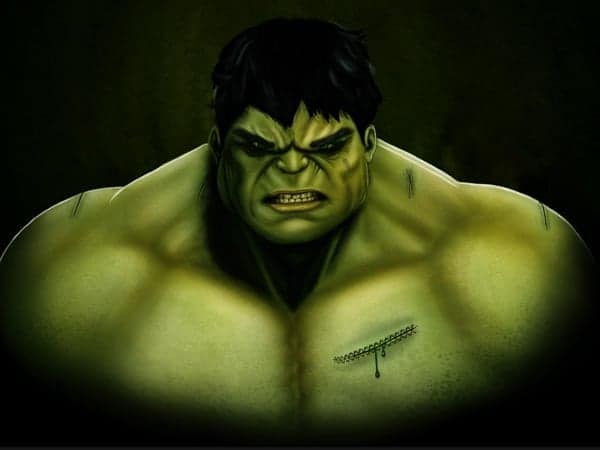
| Create an Amazing CG Illustration of The Incredible Hulk Posted: 13 Oct 2013 08:44 PM PDT Preview of Final Results
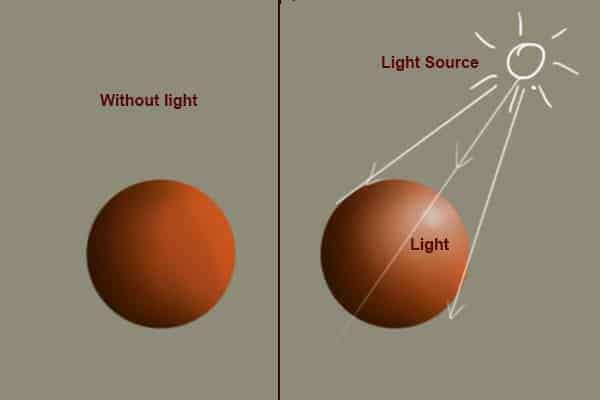
Tutorial ResourcesStep 1Before starting, we will first understand some basics important for digital painting. LightLights plays a crucial role in digital painting that affects several other factors like shadows, shading, environment, etc. It is important to decide your light source in the scene before going too far with painting to avoid the re-work on lighting and spending several hours fixing them.
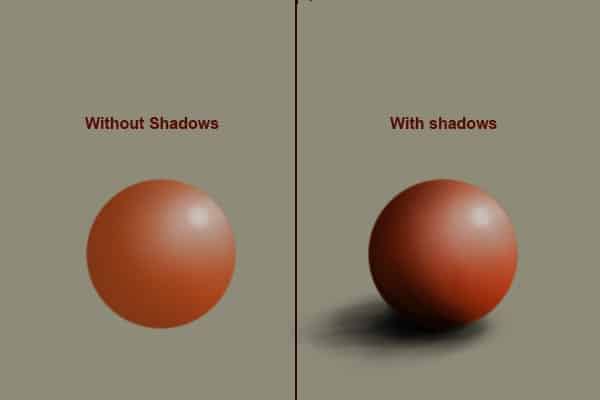
ShadowProper shadows is a very important factor that gives an object realism. It gives depth to the scene and give it natural look. Poor shadows can make whole scene fake looking and objects hanging in the space without shadows. Always double-check the shadows, focus on details how shadows forms in different light source.
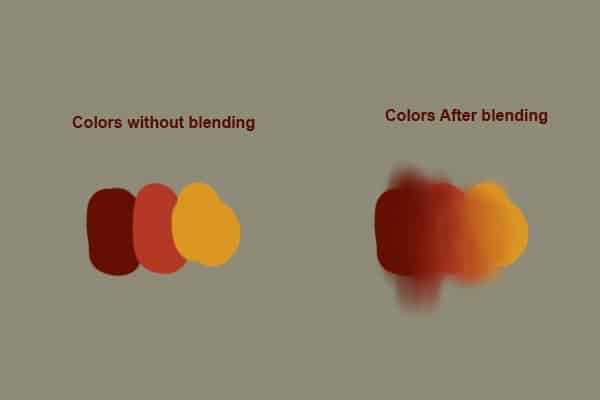
BlendingSmooth blending of colors is very important to get the desired result. Without proper blending your scene may look unfinished and crowded with brush strokes. There are several methods of blending the colors. You can blend your colors with blending tools or you can use a soft brush & color picker to blend your colors.
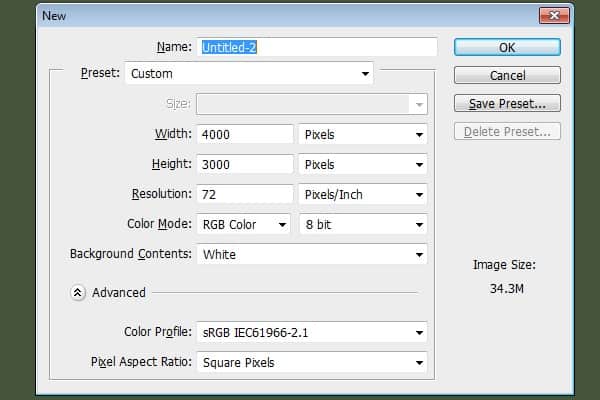
Step 2Now we are aware about the painting basics that are crucial for a good digital painting. Let’s start by creating a new document of size 3000 X 4000 pixels dimension. It’s better to start with a large document because you won’t like to recreate the whole art again when you want to print it in bigger size.
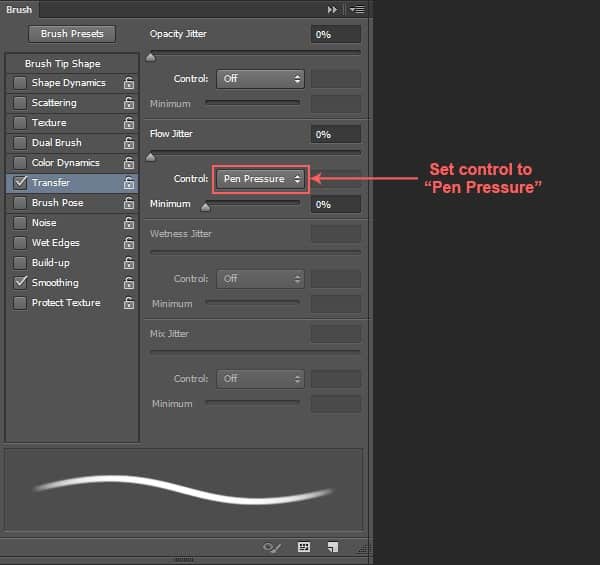
Step 3In this tutorial we are going to use brush tool extensively and a tablet to use the brush tool at its full potential. Select a hard round brush by pressing “B”, now press F5 to access brush panel. Set the ‘Flow Jitter’ to pen pressure and check ‘smoothing’ on.
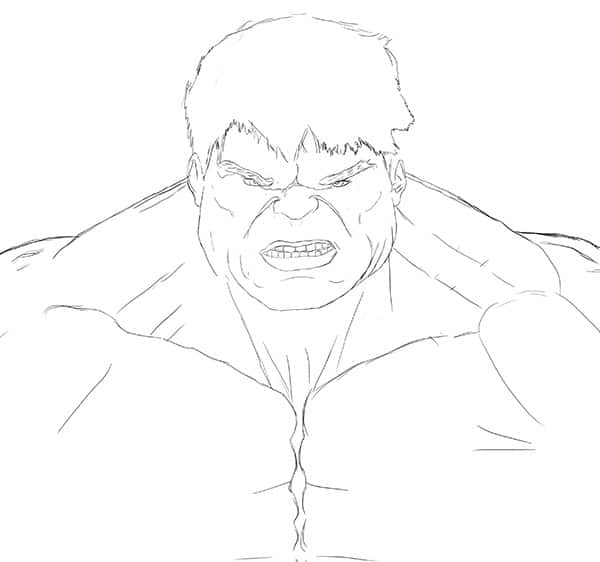
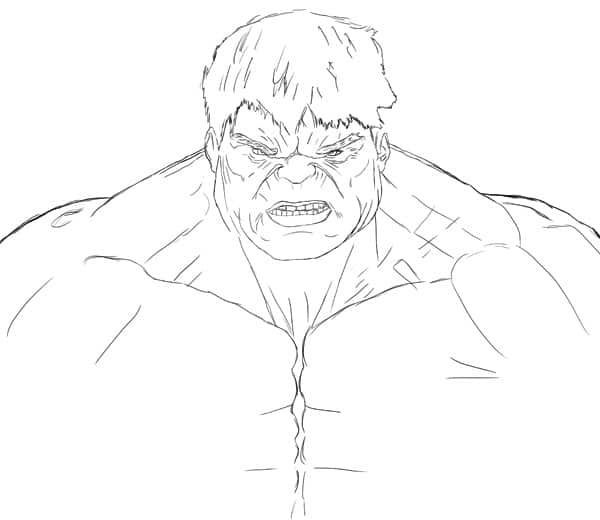
Step 4Set your brush size to 4 pixels and start sketching rough outline of the character. This is a rough sketch hence you need not to spend too much time to make your stroke perfect. Just rough stroke would work.
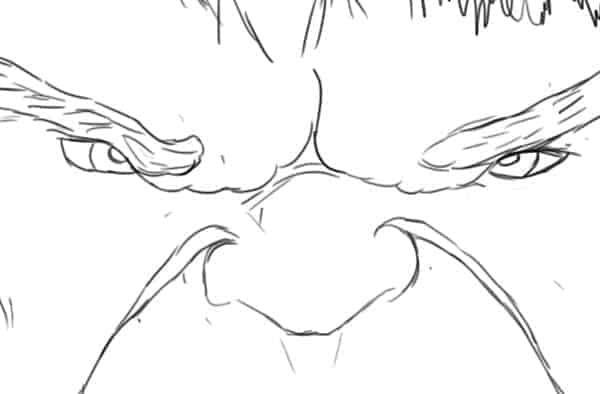
Step 5Change the brush size to 3 pixels and add some more details in the character to get all features you want. Add more wrinkles to face to get perfect expression. Duplicate sketch layer two-three times to make your light strokes in the sketch visible. Now we are ready to add colors to it.
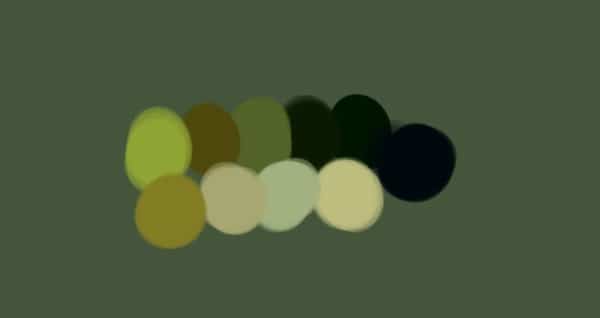
Step 6 Choosing a color palateChoosing a color palate is an important step that help choosing right color for your artwork. Hence, decide your colors early would be helpful. Set some neutral color like #46563c as background and choose a soft round brush. Now start adding colors with large soft round brush. Try different colors for lights, shadows, hair areas then pick colors from color picker tool to create your colors palate. Don’t worry about roughness or imperfection because we are not coloring our character right now, but deciding right colors palate to start with. Here, I created my color palate in the same way.
Here I created my color palate in the same way.
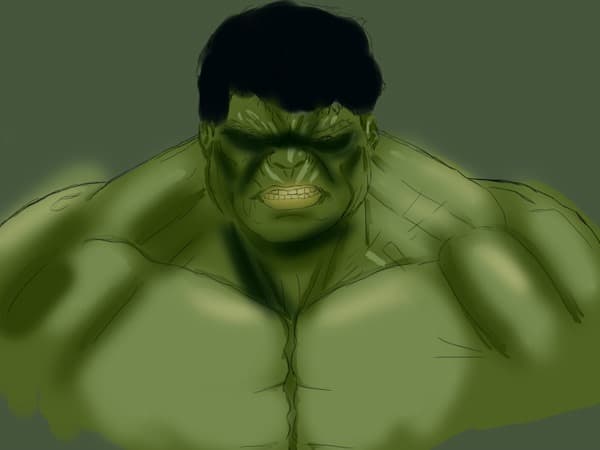
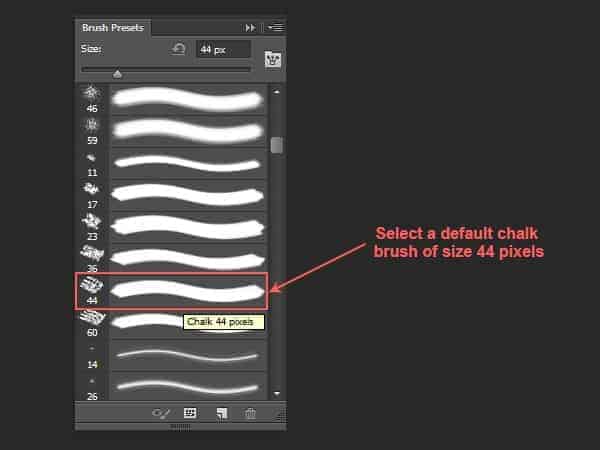
Step 7 Blocking the colorNow we have our color palate and we can start adding colors to our character. Delete the layer in which you added colors to make your color palate. Select a default chalk brush of size 44 pixels, set its color to #506320 and add this color to character as base color. Change the brush color to #01080b and define the hair area. Change the size of brush where needed to speed your coloring process.
|
| You are subscribed to email updates from Photoshop Tutorials To stop receiving these emails, you may unsubscribe now. | Email delivery powered by Google |
| Google Inc., 20 West Kinzie, Chicago IL USA 60610 | |



0 comments:
Post a Comment