Fog Brushes – Pelleron @dA
Step 1 – Preparing Sky
Download all the images listed as Tutorial Resources. Create a new document in Photoshop and drag a photo of “sky 1″ into it. Place it in the top left corner and name in LEFT SKY.
Note: I really recommend to name all the layers in your photo manipulations. It makes the orientation easier and quicker. You’ll know once you have to work with 50+ layers!
Right click on LEFT SKY and duplicate the layer. Name the new layer RIGHT SKY and move it to the top right corner. You should get something similar to the picture below.
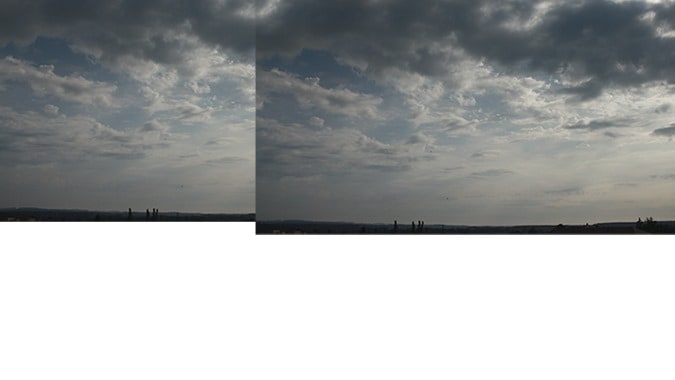
Now you need to blend these two layers together. Add a layer mask to RIGHT SKY. You can find the button “Add layer mask” on the bottom part of your Layers palette (if you don’t see this palette simply press F7 on your keyboard and it will appear). You can see the button on the picture below.

Grab the Brush Tool (B), pick black color and set the Opacity on 100%. Make sure the layer mask is active – just click on it.
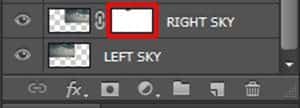
Paint over the left edge of RIGHT SKY with the black brush to blend the layers together.
Note: You can get similar effect with the Eraser Tool (E) by simply erasing all the necessary parts. But beauty of using layer masks lies in fact that the edit is nondestructive and you can always go back and adjust whatever you want. It’s a good practice and made doing photo manipulations lot easier!
Step 2 – Adding Ground
Drag a photo of the ground into your new photo manipulation and place the layer on the top of all layers. Name this new layer GROUND and resize it if necessary.
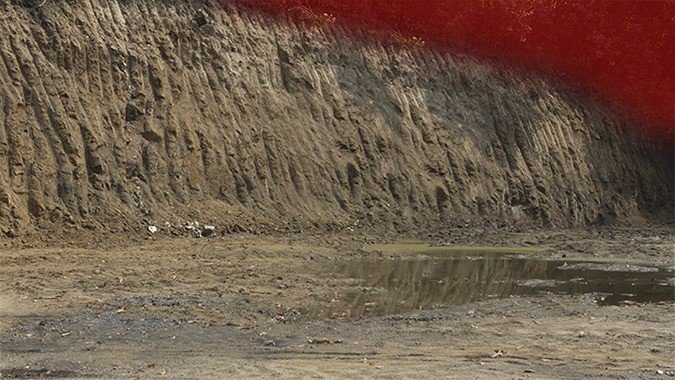
As you can see there is no visible sky which you’ve added in previous step. You’ll fix it by adding layer mask to the GROUND. The process is exactly the same as in the previous step.Grab the Brush Tool (B). Set its Hardness on 0%, Opacity on 100% and pick black color. Paint over the upper part where sky should be visible. On the picture below you can see what area I mean. It’s highlighted with red color.
To add a bit magical atmosphere lower Opacity of you brush on about 35% and with black color gently paint over the mountains. Thanks to it it will look like they disappear in the thick clouds. You can get the idea of what I mean on the following picture: Paint over the areas highlighted with red color.
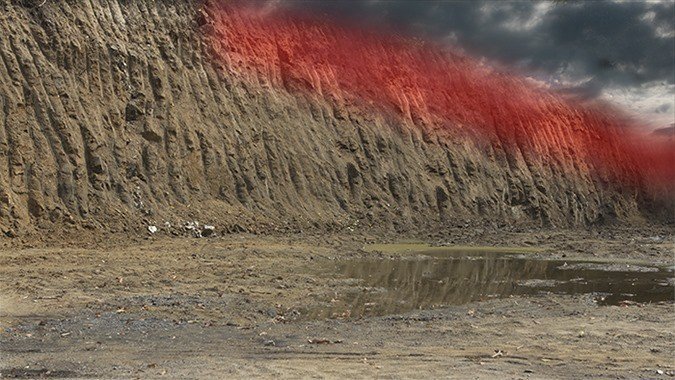
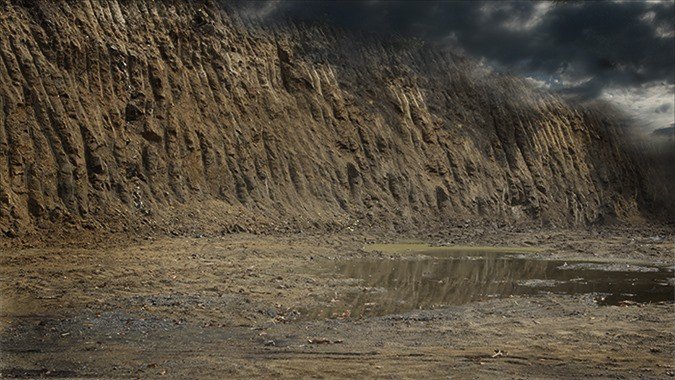
After this step your photo manipulation should be similar to the photo below.
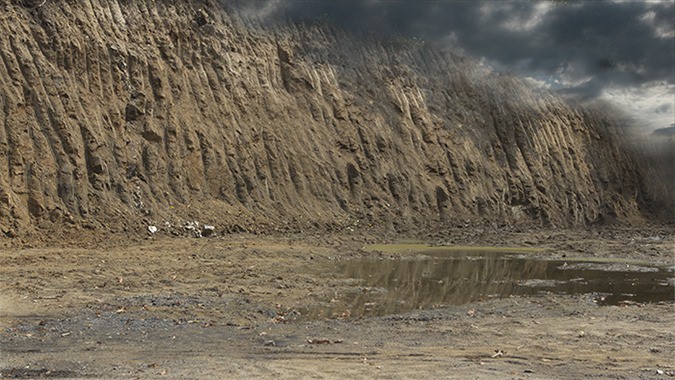
Step 3 – Cleaning the Ground
There are some distracting elements on the ground and mountains. You’ll get rid off them in this step. You can see them on the picture below.
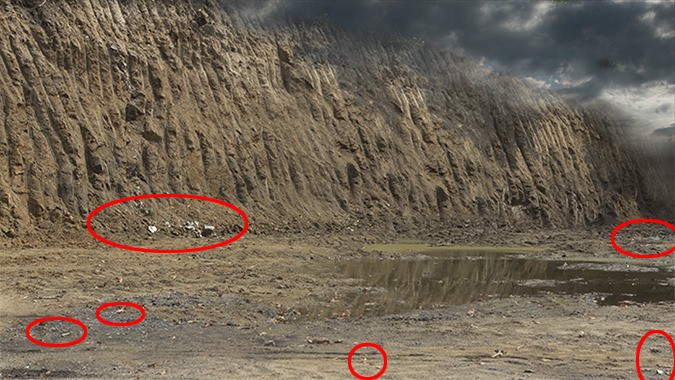
Add new layer on the top of all layers and name it CLEANING. Grab the Stamp Tool (S) and start removing the unwanted objects. Use different cloning sources to avoid repetitive patter to get the most realistic result.
Note: You could start cloning on the GROUND layer directly. But if you add new empty layer above you’ll always be able to change or hide anything on that layer. It’s the same “non destructive” philosophy as using layer masks instead of the Eraser Tool (E).
Step 4 – Balancing Lightness
If you look at the photo of the ground you notice the bottom part is lighter than the upper part. It causes that the photo looks flat and perspective isn’t distinctive enough. You’ll fix this problem in this and some of the following steps.
Let’s focus on darkening bottom part of the GROUND. Add new adjustment layer Levels on the top of all layers. (You can find the button “Add adjustment layer” on the bottom part of your Layer palette next to the “Add layer mask” button you’ve used in some of the previous steps.)
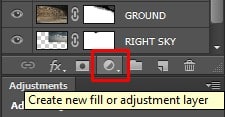
Set the Input Levels on 0; 0,2; 255. Grab the Paint Bucket Tool (G) and fill the layer mask of this adjustment layer with solid black color. It causes that the adjustment becomes invisible.
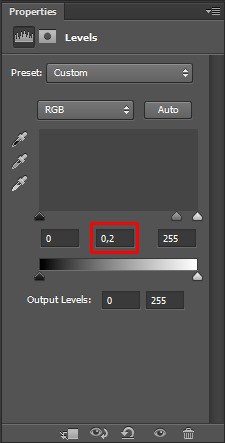
Grab the Brush Tool (B), lower its Opacity on 5%, pick white color and start painting over the areas you want to make slightly darker (by painting with white you’re making the adjustment visible again). On the following photo you can see the areas you should focus on.
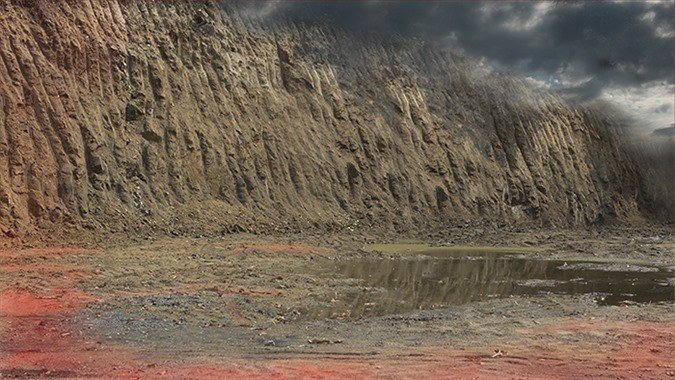
Step 5 – Adding Vignette
To add more dimension to your photo manipulation you’ll add vignette in this step.
Note: Adding vignette is a great way to add dimension to your photo manipulations. But don’t over do it! There should always be very smooth transition between darker edges and central part of the image.
Add adjustment layer Levels on the top of all layers and this time set the Input Levels on 0; 0,7; 255.
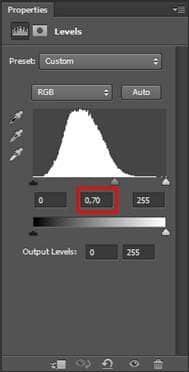
You want to darken only the edges of the picture and the central area should remain the same as before this adjustment. To achieve that activate the Elliptical Marquee Tool (M) and select rounded area in the center of the image. Below you can see where I mean.
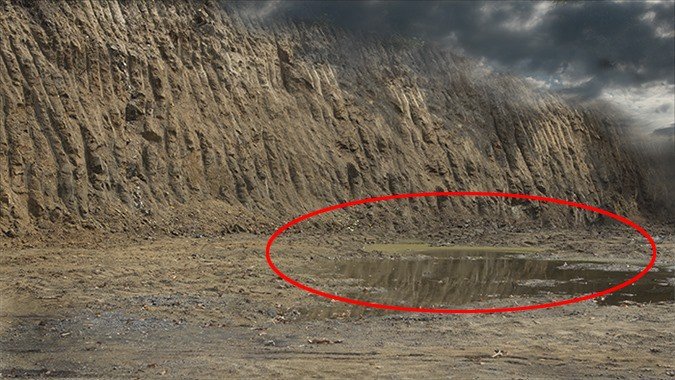
Make sure the layer mask of this adjustment layer is activated (click on it) and go to Select > Modify > Feather. The path may differ depending on what version of Photoshop you’re using. You can also simply press Shift+F6 to activate it. Set the value Feather on about 50 pixels and press OK.

Feathering makes the edges of the selection more softer.
Now press Shift+F5 on your keyboard to activate Fill window and select Black in Use list. Press OK.
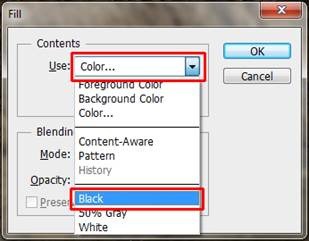
Adjustment disappears on the part you’ve filled with black color which means that borders are darken and centre remains the same.
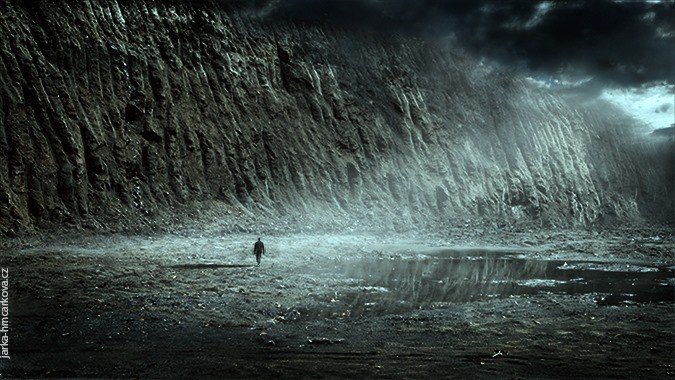
On the following picture you can see how your photo manipulation should look like so far.




0 comments:
Post a Comment