


Photoshop Tutorials: Create a Surreal Photo Manipulation of a Monk in the Caves | |
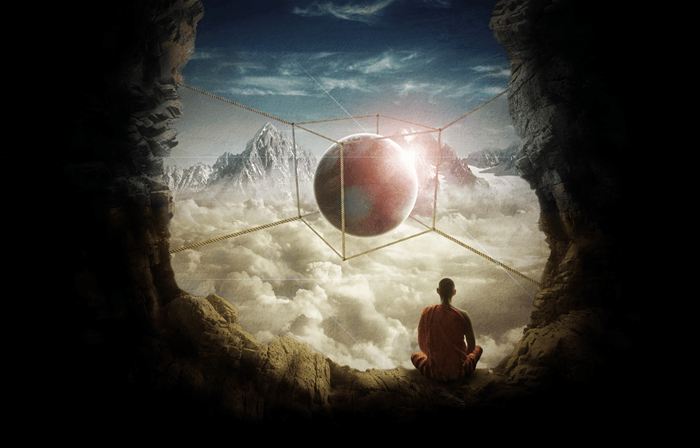
| Create a Surreal Photo Manipulation of a Monk in the Caves Posted: 08 Jul 2013 05:26 PM PDT Preview of Final Results
Tutorial Resources
Step 1: Creating a new photoshop fileCreate a new photoshop file using the settings indicated in the picture below. I named my file "Surreal Manipulation Tutorial" but that's up to you.
Step 2: Adding the clouds and the skyLet's start off adding the sky to our manipulation. Go to File – > Place, and choose the "Sky2" image, mentioned in the resources of this tutorial.
If everything went well, this is what you should see in your screen:
Now click anywhere in the image, hold the Shift key (so it will translate only in one axis at the time) and drag it a little bit down.
To confirm the changes just hit Enter, or click in that little check sign on the top bar:
Now repeat the process to our second cloud stock (I called it Sky on the resources list). Place the image(File->Place) and drag it down while holding the Shift key again.
This is how your layers panel should be looking like so far:
Let's add one more image before we start the manipulation. Place the "Field" image (File -> Place) and drag it past the top part of our canvas.
And here's the four layers we should have so far:
Maybe you don't have the Background layer, but if you do, you can delete it now because we won't be using it. Just click it and drag it to the rubbish bin.
Now place the last image we added (the Field) behind our cloud layers. Just click and drag it to the end of our layers panel.
While we're at it, let's also rename all the layers so far so we don't get lost in the manipulation process. Double click the name of a layer to change it.
By the end of this step, this is what your canvas should be looking like:
Step 3: Adjusting the clouds and the skyIt's looking pretty bad so far, right? But don't worry, we'll fix that. Create a layer mask in the "Cloud 2" layer by clicking in the button that looks like a camera on the layers panel.
Now get the Brush Tool (Shortcut: B), right click anywhere inside the canvas and select a soft round brush (Hardness:0%). Make sure the opacity of your brush is at 100% (just below the Window menu button on the top bar).
Don't worry about the size of the brush, but remember this shortcuts: · To increase the size of a brush hit ] · To decrease the size of a brush hit [ We're going to be painting with black (to hide unwanted parts of our image non-destructively). To quickly get black as your foreground color just hit "D" on the keyboard. When painting a layer mask, you can hold Alt/Opt and click it to see exactly what you've painted. What you should aim for in this step is to hide the corners of the image, the sky part of the clouds, and blend the clouds of this layer with the clouds of the layer below. To do this last step (the blending of clouds), you can lower the opacity of your brush to something around 10~25%. Here is what my layer mask looks like if I click it while holding Alt/Opt.
And here is the result of this layer mask:
Now we're going to do the same thing with the other clouds layer (Cloud 1), but this time we are only going to erase the sky part of the layer. So repeat the same steps, create a new layer mask, and paint the sky part with black to hide it.
Here is the result:
Now let's improve our sky a little bit. Select the Sky layer (from the Field stock), and add a Black & White filter. You can do that by clicking in the circle button in the layers panel:
Now select the Green Filter from the presets and clip this adjustment to the layer below (good photoshop practice). You can do that by clicking in the first button in the Properties window of this adjustment (the button with a square and an arrow next to it). Also, bring the opacity of this layer to 80%, and the Fill to 75%.
The second adjustment we will add to that layer is a Curves adjustment layer. Click in the same button you clicked before, but choose Curves this time.
With the RGB curve selected (default), add two points to it and change its shape to something like mine in the image below. Remember to clip this adjustment to the layer below as well (by clicking in the same button we did before).
Here is the result, and how your layers should look like so far:
To finish our sky, let's add a layer to correct the lighting of it. Press Ctrl/Cmd+Shift+N and chose the following settings for this new layer:
Now grab the Dodge Tool (Shortcut: O). Make sure the range is set to Midtones, and the Exposure is around 10%.
With the Lighting layer selected, start paining the areas of the sky that should be lighter. To paint the darker areas we need to use the Burn Tool, which can easily be accessed by holding Alt/Opt while you're painting. This also works the other way around, if you have the Burn Tool selected and hold Alt/Opt you'll start using the Dodge Tool. Try to create a good contrast between the dark and light areas, cause that's what's going to make this adjustment looks good, don't be afraid to zoom in in some areas to do some details. Here is what my Lighting layer looks like in normal mode:
And here is the result of it:
Let's clean our workspace a little bit. Select all the layers we created so far by clicking in the first one, holding Shift, and then clicking on the last one. Then, drag all of them to that little folder in the layers panel, which will create a new group with all of them. You could also select them and use the shortcut Ctrl/Cmd+G. Name this new group Sky/Clouds.
|


| You are subscribed to email updates from Photoshop Tutorials To stop receiving these emails, you may unsubscribe now. | Email delivery powered by Google |
| Google Inc., 20 West Kinzie, Chicago IL USA 60610 | |


0 comments:
Post a Comment