Photoshop Tutorials: Create This Striking Fairy Tale Photo Manipulation in Photoshop |  |
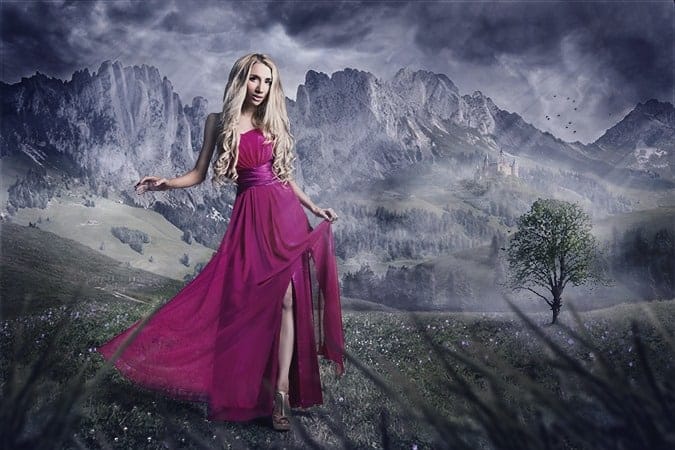
| Create This Striking Fairy Tale Photo Manipulation in Photoshop Posted: 26 Aug 2013 12:58 AM PDT Preview of Final Results
Tutorial Resources
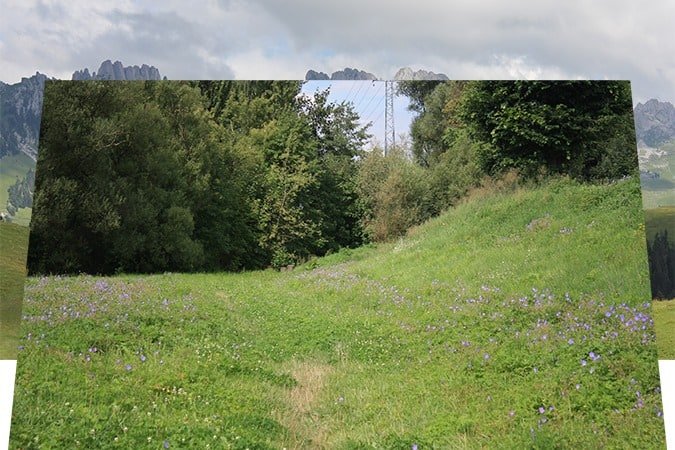
Step 1 – Creating BackgroundDownload two stock photos of background and drag them into a new document in Photoshop. The photo with meadow should be above the photo with mountains. Name the top layer MEADOW and the layer under MOUNTAINS.
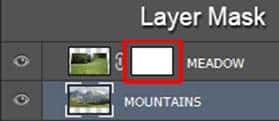
As you can see from the photo above some blending needs to be done to make the background realistic looking. Add new layer mask to MEADOW. You can find the button “Add layer mask” on the bottom part of the Layers palette. If you don’t see this palette go to Window > Layers or simply press F7 on your keyboard and it appears.
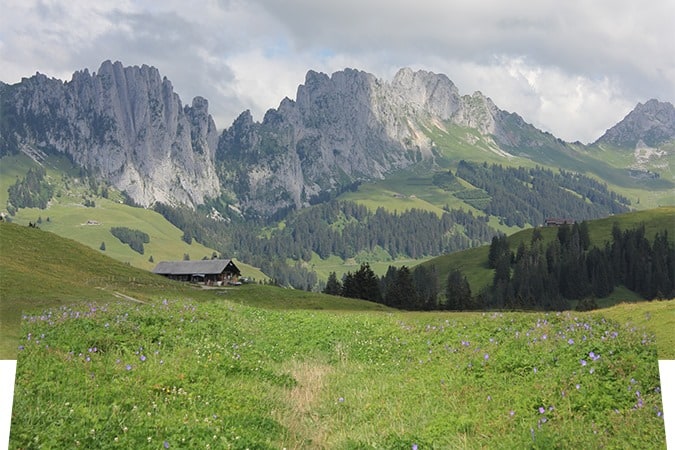
Grab the Brush Tool (B), select some soft round brush, set its Opacity on 100% and pick black color. Make sure layer mask is active by clicking on it and start painting over the areas you want to make invisible.
You should end up with picture similar to the one below.
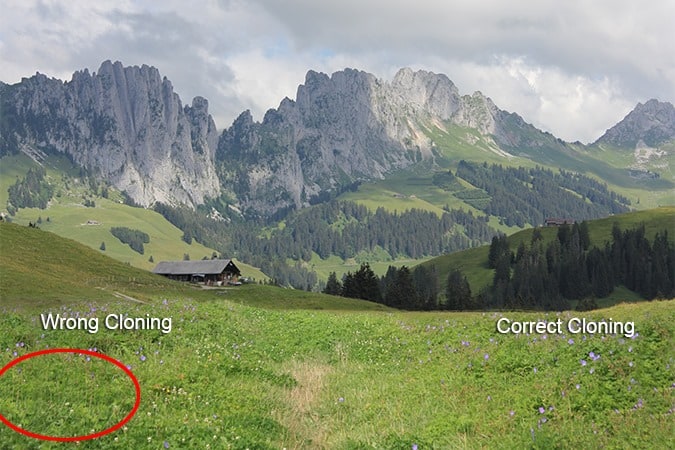
Step 2 – CloningAs you can see there are missing parts of grass in the bottom right and left corner. You’ll add them in this step. And you’ll also clone away the cabin on horizon. You’re making fantasy looking photo manipulation and modern cabin doesn’t fit the concept. Add new empty layer on the top of all layers and name it CLONING. Grab the Stamp Tool (S), select some grass as cloning source and clone to the empty spaces in the corners. Often change the cloning source to avoid getting repetitive pattern. It doesn’t look realistic. On the following photo you can see the example of wrong cloning with repetitive pattern (left corner) and correct cloning (right corner).
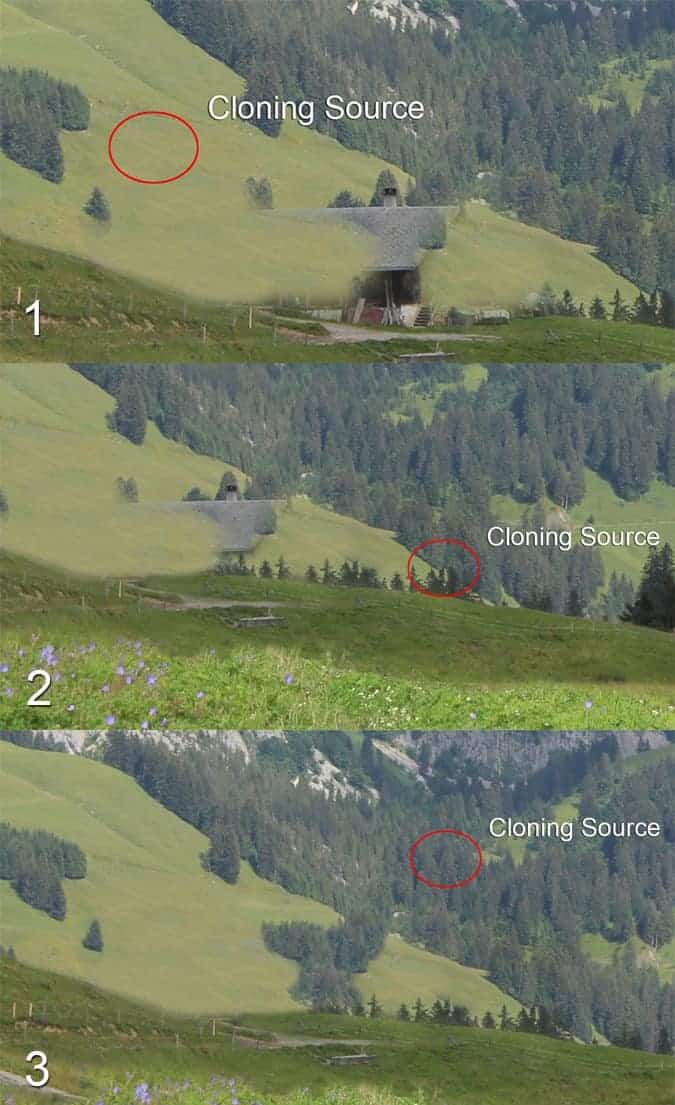
It’s bit more complicated to clone out the cabin because there isn’t enough cloning sources you could use. Look at the following picture to see how you should proceed.
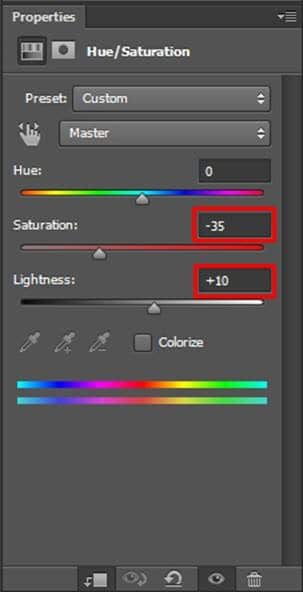
Step 3 – Adding CastleThis step is really quick and easy. You’ll just add castle on one of the mountains in the background to create more fairy tale-ish atmosphere. Download photo of the castle listed in the beginning of the tutorial and drag it into your photo manipulation. Place it on the top of all layers and name it CASTLE. Press Ctrl+T to activate the Free Transform Tool and resize it on proper size. Hold Ctrl on your keyboard while doing it to remain constant proportions. To blend it properly with the rest of the image cut out the background. Use any method you’re comfortable with – e.g. the Lasso Tool (L), the Eraser Tool (E) or the Pen Tool (P). As you can see right now castle is too dark and saturated and doesn’t fit well to the rest of the image. Fix it by adding new adjustment layer Hue/Saturation (you can find the button “Add new adjustment layer” next to the “Add layer” button you’ve used in previous steps). Set the value Saturation on -35 and Lightness on +10.
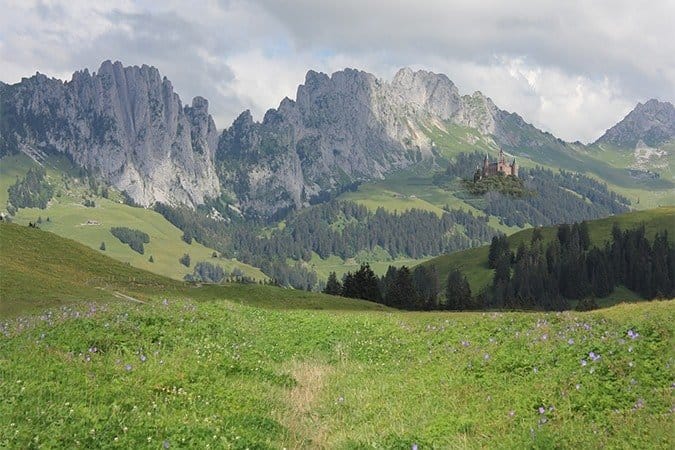
Right now the adjustment layer affects all layers below itself. But you want to adjust only CASTLE and not the rest of the image. To achieve that right click on the adjustment layer you’ve just added and select Create Clipping Mask. After this step your photo manipulation should be similar to the one below.
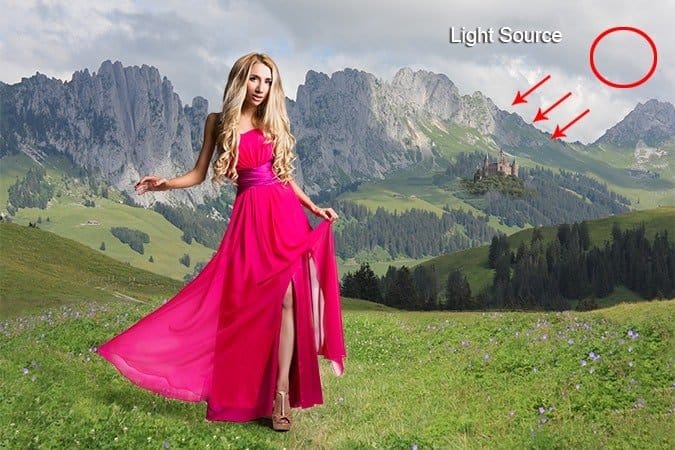
Step 4 – Adding a WomanDownload photo of a woman listed in the beginning of the tutorial and drag in into your photo manipulation. Place it on the top of all layers and name it WOMAN. To blend this layer properly with the rest of the image you need to do two things. First add shadow under her and second blend the clothing better because now its obvious that the woman was shot in the studio (see white color behind the fabric). In this step you’ll add the shadow and in next you’ll blend the dress better. Create new empty layer under WOMAN and name it SHADOW. If you look at the mountains in the background you can see that sun hits them from right side of the image. That is our main light source and shadow of the woman should be casted in the opposite direction. Grab the Brush Tool (B), select some soft round brush and set the Opacity on about 15%. Press Alt on your keyboard to activate the Eye Dropper Tool (I) and pick some very dark blue color from the picture. Then paint shadow similarly as the one shown on the following picture.
|
| You are subscribed to email updates from Photoshop Tutorials To stop receiving these emails, you may unsubscribe now. | Email delivery powered by Google |
| Google Inc., 20 West Kinzie, Chicago IL USA 60610 | |




0 comments:
Post a Comment