Photoshop Tutorials: Create a Pixel-Perfect Social Icon Using Vectors |  |
| Create a Pixel-Perfect Social Icon Using Vectors Posted: 21 Mar 2013 10:52 PM PDT Preview of Final Results
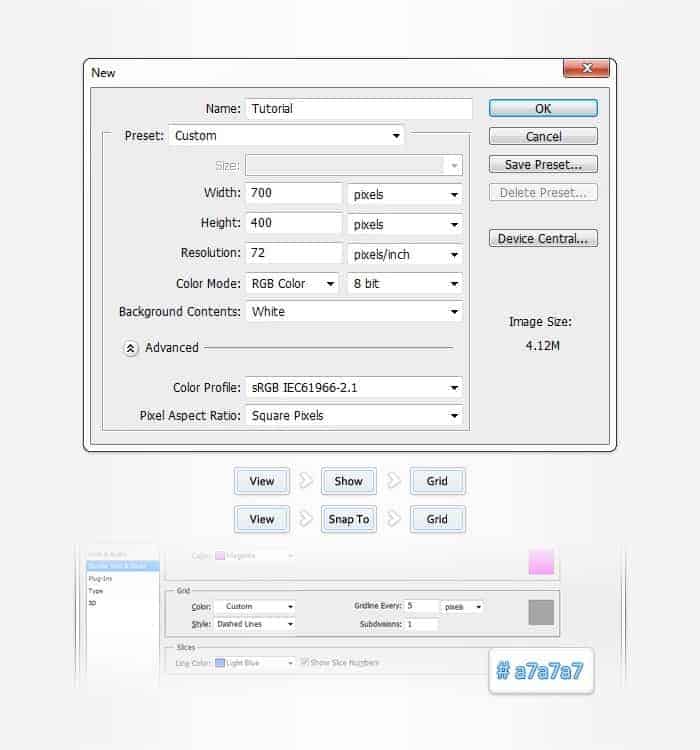
Download the PSDStep 1Open Photoshop and hit Control + N to create a new document. Enter all the properties shown in the following image and click OK. Enable the Grid (View > Show > Grid) and the Snap to Grid (View > Snap To > Grid). For starters you will need a grid every 5px. So go to Edit > Preferences > Guides, Grid & Slices and focus on the Grid section. Enter 5 in the Gridline Every box and 1 in the Subdivision box. Also, set the grid color at #a7a7a7. Once you set all these properties click OK. Don’t get discouraged by all that grid. It will ease your work later. You should also open the Info panel (Window > Info) for a live preview with the size and position of your shapes.
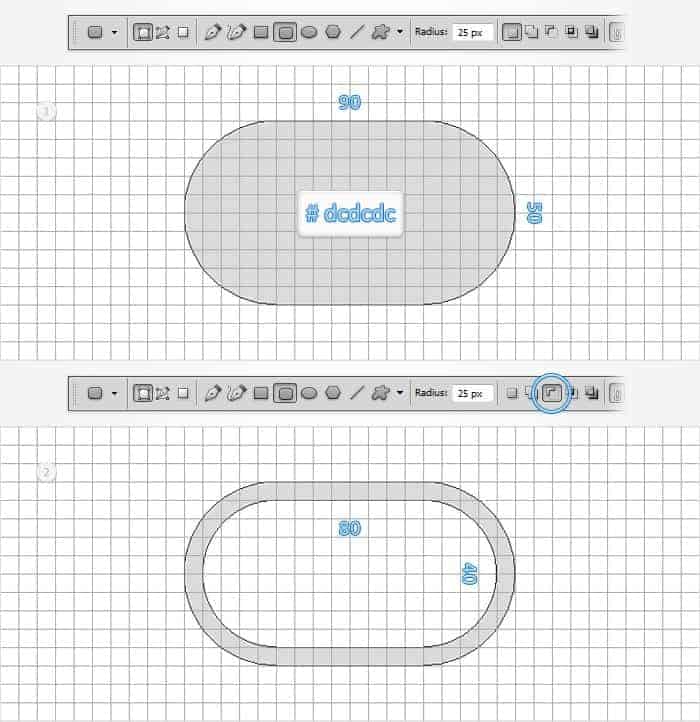
Step 2Set the foreground color at #dcdcdc, pick the Rounded Rectangle Tool, focus on the top bar and set the radius at 25px. Create a 90 by 50px vector shape and make sure that it stays selected. Continue with the Rounded Rectangle Tool, check the Subtract button from the top bar and draw an 80 by 40px vector shape as shown in the second image.
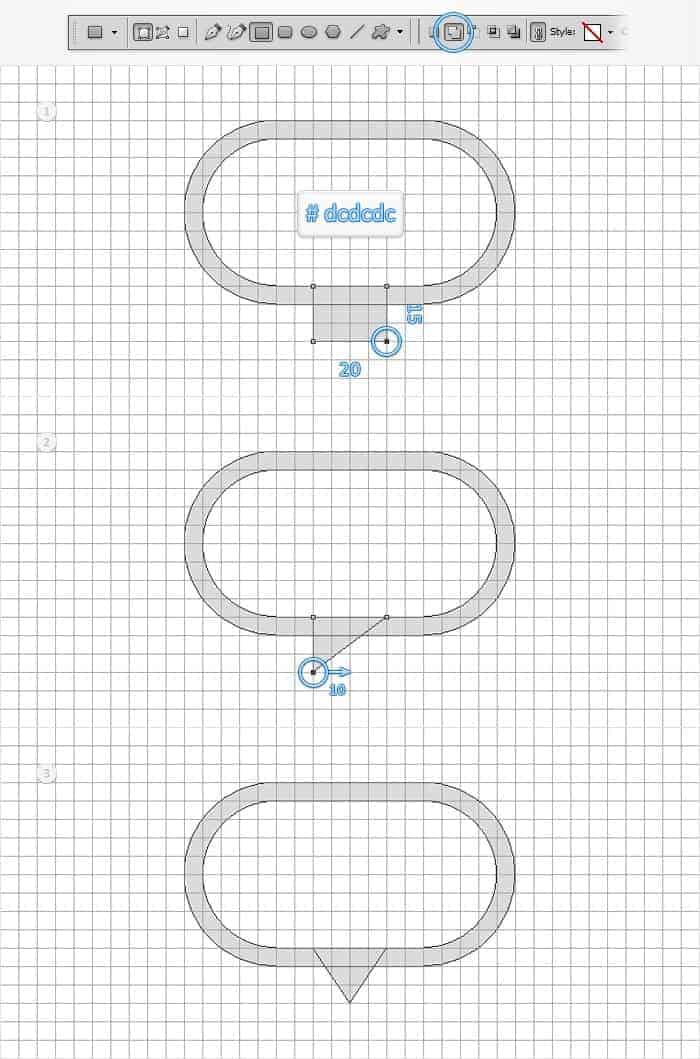
Step 3Reselect the vector shape made in the previous step and pick the Rectangle Tool. Check the Add button from the top bar and add a 20 by 15px vector shape as shown in the first image. Focus on this little rectangle, grab the Delete Anchor Point Tool and simply click on the bottom, right anchor point (highlighted in the first image) to remove it. Switch to the Direct Selection Tool, select the other bottom anchor point (highlighted in the second image) and drag it 10px to the right. In the end things should look like in the third image.
Step 4Focus on the Layers panel and double click on the vector shape made in the previous step to open the Layer Style panel. Activate the Inner Shadow, the Inner Glow, the Gradient Overlay and the Stroke then enter the properties shown in the following images.
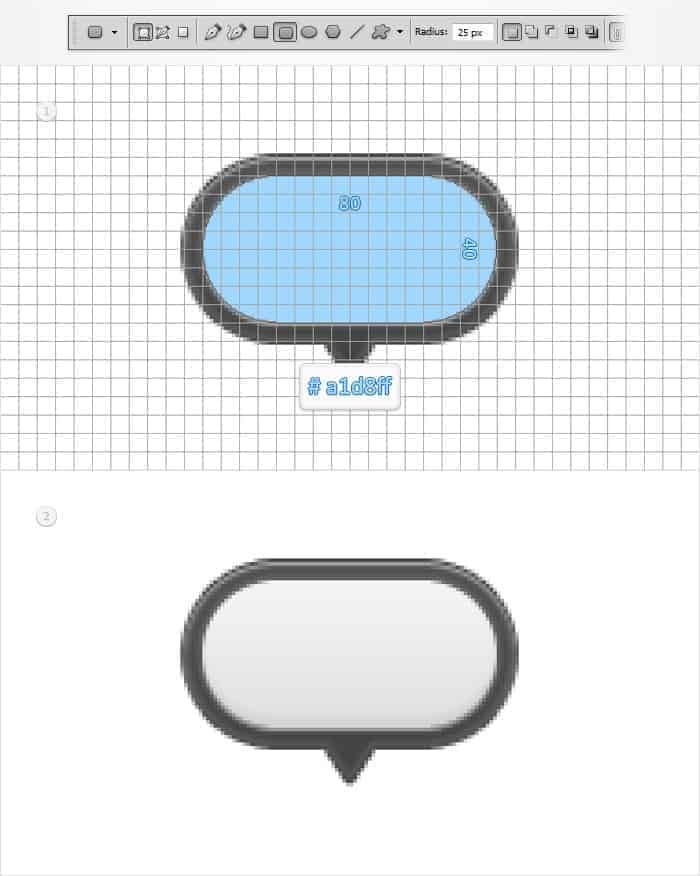
Step 5Set the foreground color at #a1d8ff and pick the Rounded Rectangle Tool. Make sure that the radius is set at 25px, create an 80 by 40px vector shape and place it as shown in the first image. Open the Layer Style window for this new shape and enter the properties shown in the following images.
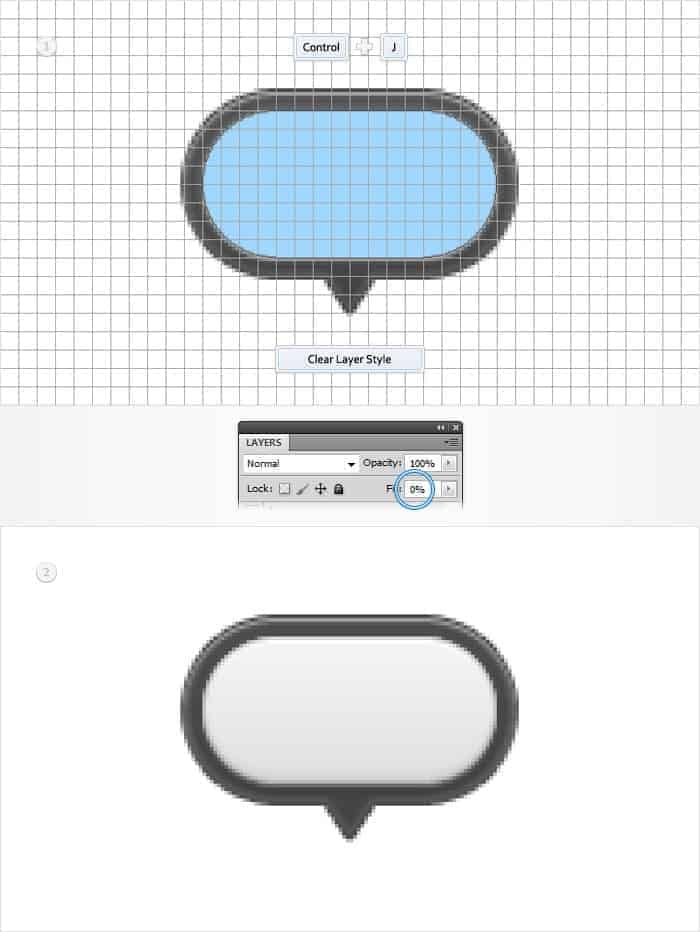
Step 6Duplicate the vector shape made in the previous step (Control + J). Focus on the Layers panel, right click on this copy and go to Clear Layer Style. Select this copy, lower its Fill to 0% then open the Layer Style window and enter the properties shown in the following images.
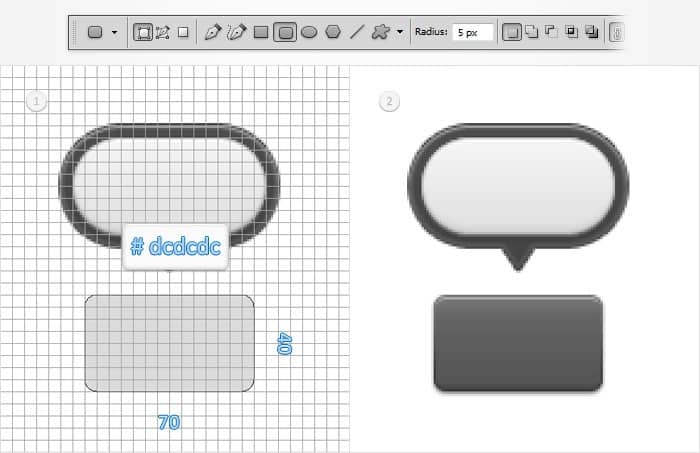
Step 7Set the foreground color at #dcdcdc, pick the Rounded Rectangle Tool and set the radius is set at 5px. Create a 70 by 40px vector shape and place it as shown in the first image. Open the Layer Style window for this new shape and enter the properties shown in the following images.
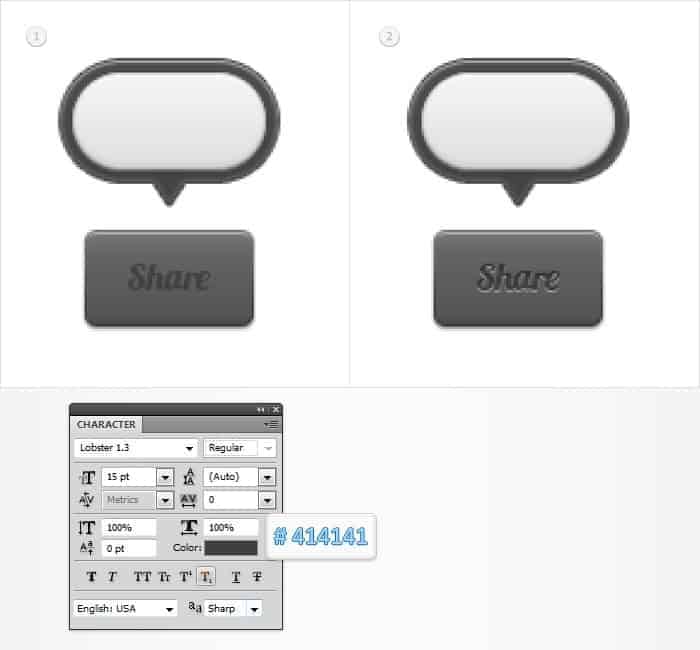
Step 8Using the Type Tool add the “Share” piece of text and place it as shown in the first image. Use the Lobster font with the size set at 15pt and the color at #414141. Open the Layer Style window for this little piece of text and enter the properties shown in the following images.
|
| You are subscribed to email updates from Photoshop Tutorials To stop receiving these emails, you may unsubscribe now. | Email delivery powered by Google |
| Google Inc., 20 West Kinzie, Chicago IL USA 60610 | |





0 comments:
Post a Comment