Photoshop Tutorials: How to Create an Autumn Fairy Photo Manipulation |  |
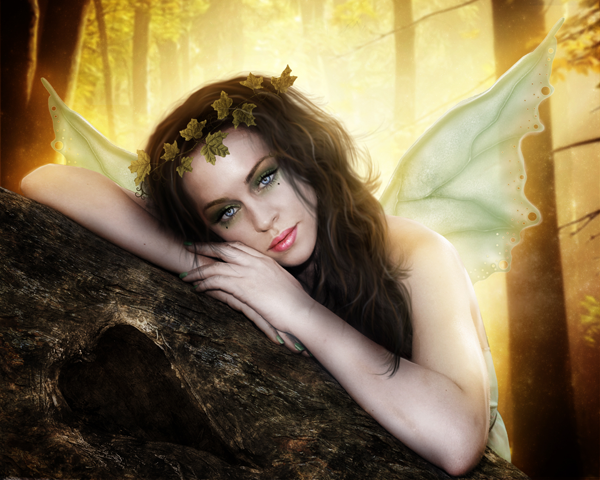
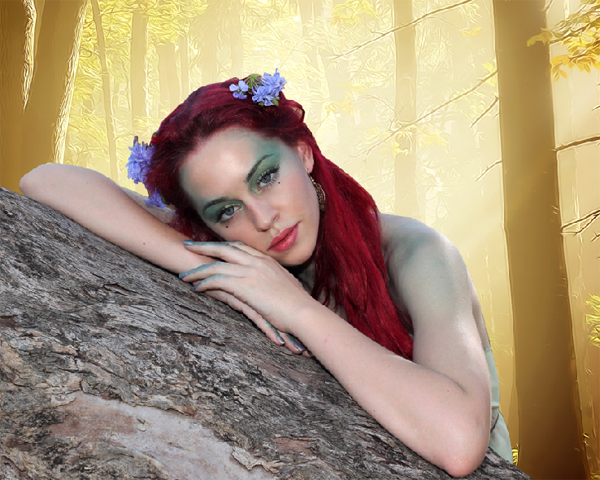
| How to Create an Autumn Fairy Photo Manipulation Posted: 03 Dec 2012 11:47 AM PST Preview of Final Results
Autumn Fairy Photoshop Tutorial
Tutorial Resources
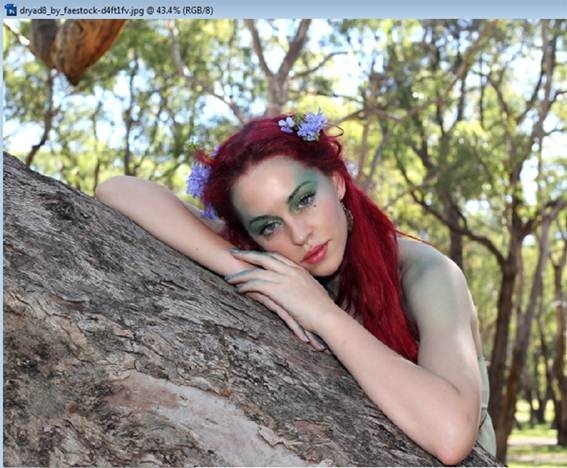
Step 1 – ModelChoose the model.
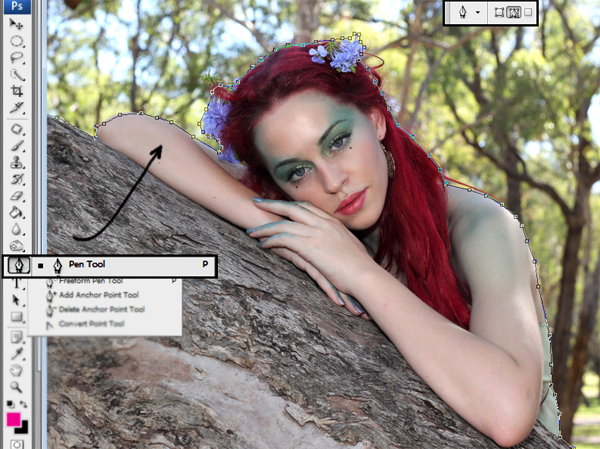
Step 2 – Select the modelUse the Pen Tool to select the model. Make sure the option is in “Paths” like you see in the little box below.
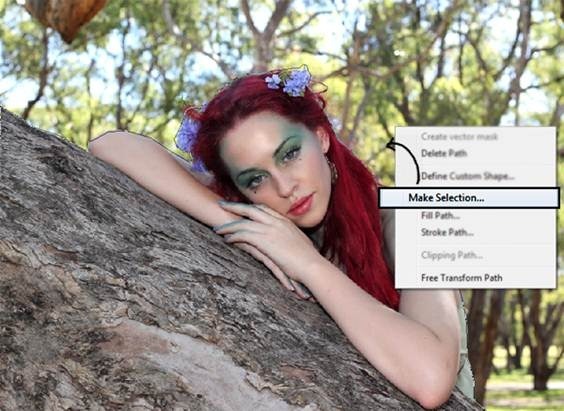
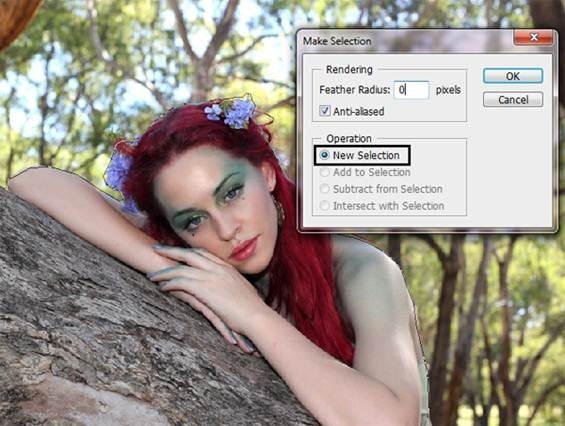
Step 3 – Make the Selection.When you end with the selection press right click. Now in the menu you have on the screen choose the option make selection.
Choose the option New Selection and press ok.
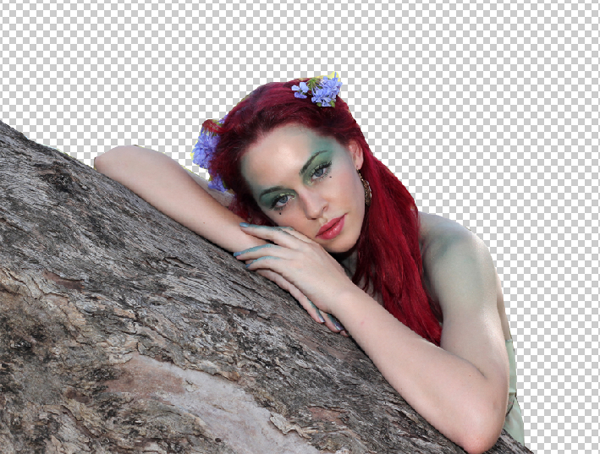
Step 4 – Subtract model from the backgroundPress Ctrl+J to duplicate the model’s selection you made before. The result has to be like this:
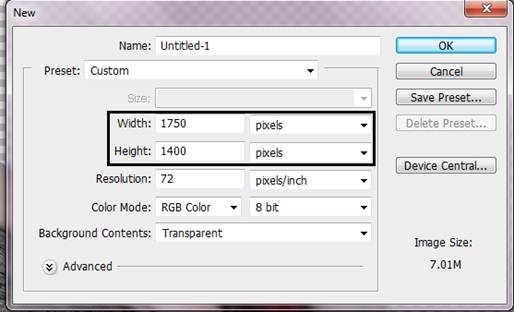
Step 5- Open a new fileTo open a new file go to the menu File – New or press Ctrl+ N. The resolution is Width : 1750 x Height: 1400 pixels.
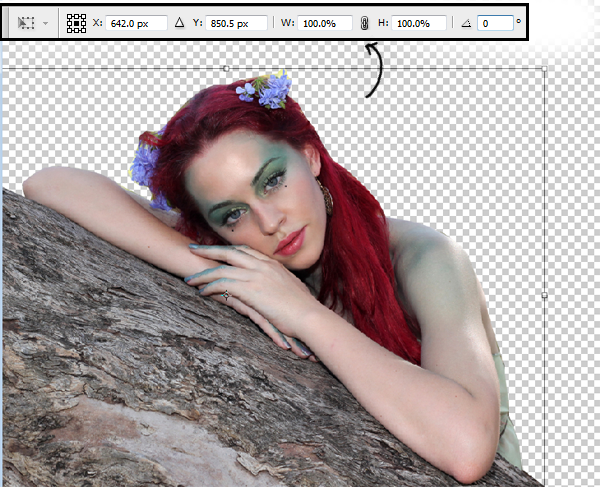
Step 6 – Resize the model.Now put the model in the new file and change the size to fit this resolution. To change the size press Ctrl + T (Free Transform).
Step 7 – Find a BackgroundIn this case you can use a forest that doesn’t have to many branches, because the main focus is going to be the model.
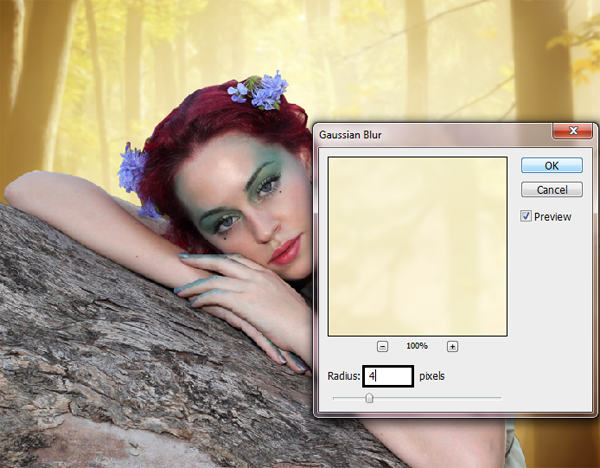
Step 8 – Gaussian Blur.Apply blur to the background. Go to filter – Blur – Gaussian Blur. Add 4 of radius.
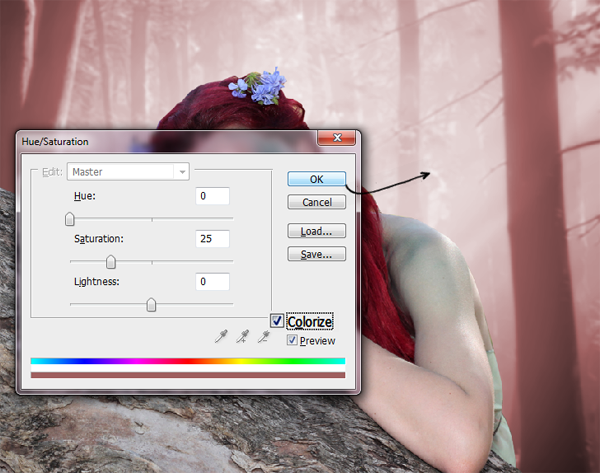
Step 9- ContrastDuplicate the background layer, press Ctrl + J. and change the layer color, to do this go to Image – Adjustments – Hue/Saturation or press Ctrl+ U. Press the option colorize and press ok.
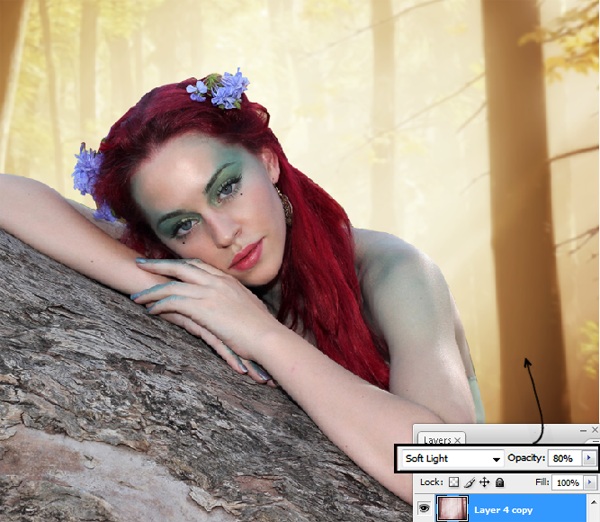
Step 10 – Change layer modeNow change the layer mode to Soft light. And reduce the opacity to 80%.
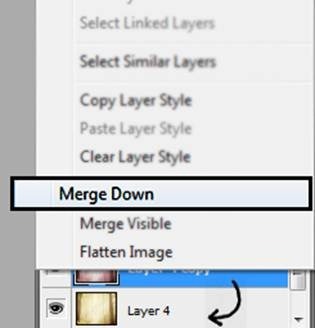
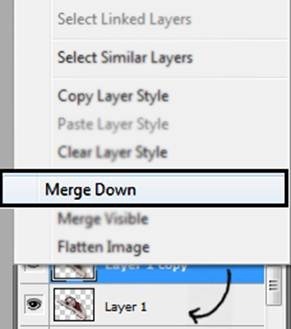
Step 11 – Merge layers.To merge layers together, press right click in the layer and choose the option merge down. In this way you are only going to have one layer of the background.
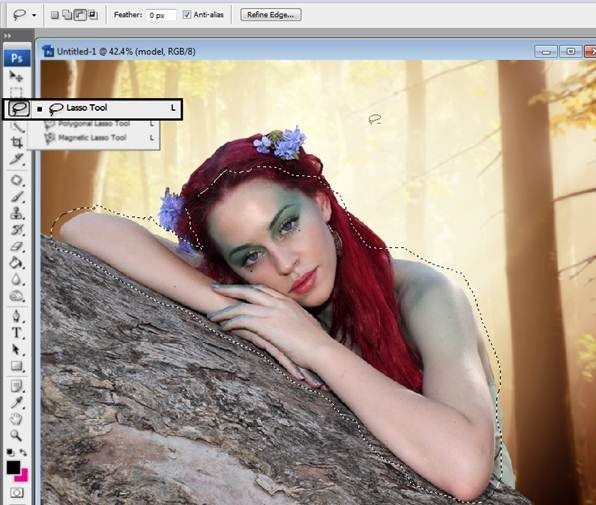
Step 12 – Model’s SkinSelect model’s skin with the lasso tool. After you finish the selection press Ctrl+J to duplicate the selection.
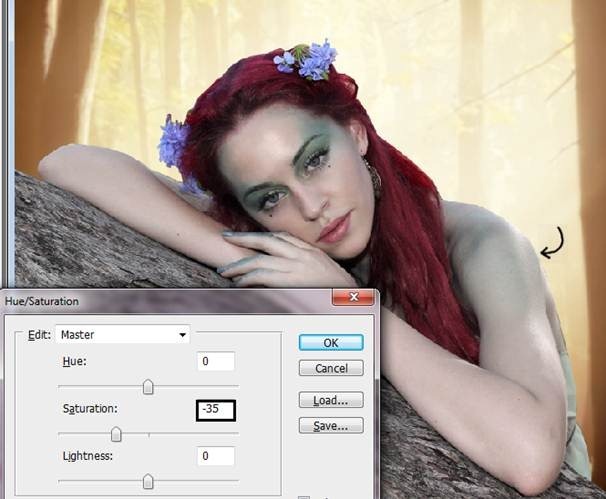
Step 13- Reduce Saturation.Go to Image – Adjustments – Hue/Saturation (Ctrl +U) and in the option Saturation put -35, press ok to save the changes.
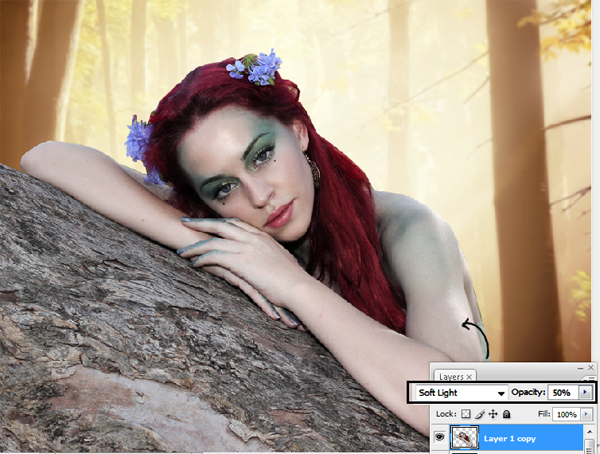
Step 14- More ContrastDuplicate that layer and change the layer mode to Soft light and reduce the opacity to 50%.
Step 15- Merge the layerRight click over the layer and choose the option merge down.
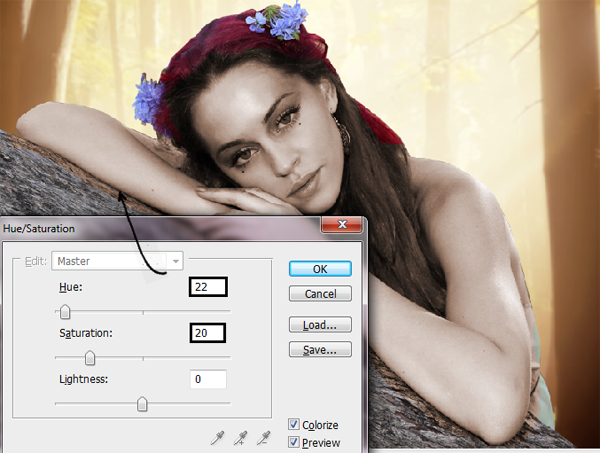
Step 16 – Change skin color.Duplicate the model’s skin layer pressing Ctrl + J. Then go to Image – Adjustments – Hue/Saturation or press Ctrl + U. Press the option colorize and in Hue put: 22 and in saturation 20.
|
| You are subscribed to email updates from Photoshop Tutorials To stop receiving these emails, you may unsubscribe now. | Email delivery powered by Google |
| Google Inc., 20 West Kinzie, Chicago IL USA 60610 | |



0 comments:
Post a Comment