


Photoshop Tutorials: Create a Skeuomorphic Wedding CD Cover Using Only Nondestructive Layers | |

| Create a Skeuomorphic Wedding CD Cover Using Only Nondestructive Layers Posted: 16 Nov 2012 04:00 PM PST Download the PSDSkeuomorphic Wedding CD Cover Photoshop TutorialTutorial Resources
Step 1Create a new 3000×3000 pixels document. Fill it with black. If your background is white, you can just press Ctrl/Cmd+I to invert your layer.
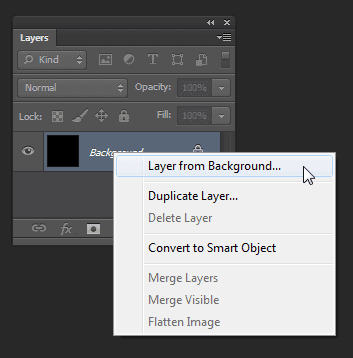
Step 2To start everything off, let's create a black background with a subtle gradient. There are several ways to do this from using the Gradient tool to adding a nondestructive Gradient fill layer. The best way though is to add a gradient overlay layer style. You should use layer styles whenever you can because, unlike creating adjustment layers, they don't add to the number of layers you have. As with any PSD, the background layer is always locked. To add layer styles, you will need to unlock it by right-clicking and choosing "Layer from Background".
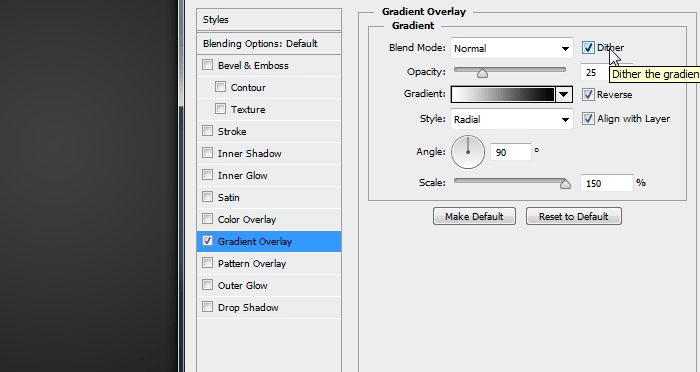
Now go to Layer > Layer Style > Gradient Overlay. Use the settings from the image below. The Dither setting is new in Photoshop and it adds speckles to your gradient to make it look smoother.
Step 3If you look closely at the gradient, you can still see banding even though we enabled dithering. This is completely normal and to fix it, we'll use a trick web and interface designers use – adding noise. The noise we add will hide the banding and give it a nice texture.
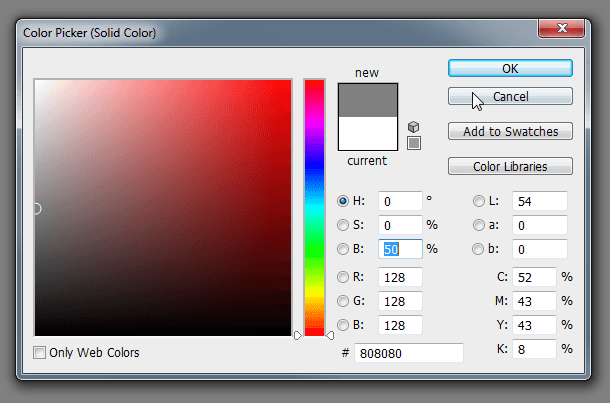
First, create a new Solid Color Fill Layer (Layer > New Fill Layer > Solid Color). Set the hue & saturation to 0 and brightness to 50%. This will give you 50% gray.
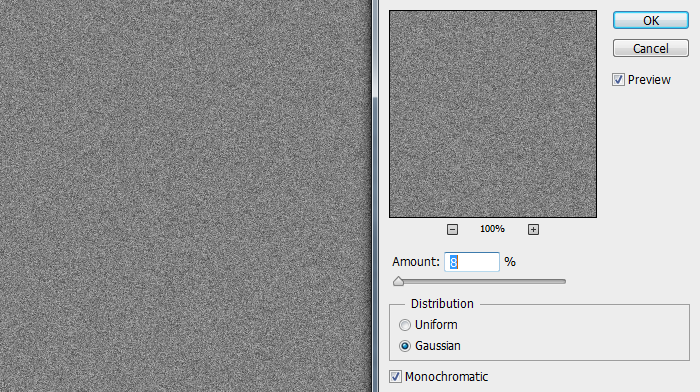
Step 4Now we're going to add some noise with the Noise filter. Photoshop has a small problem where you can't apply filters to Fill Layers. To overcome this, you can either rasterize the layer or convert it to a Smart Object. It's better to convert it to a Smart Object because it lets you apply filters nondestructively. Convert your layer to a Smart Object by going to Layer > Smart Objects > Convert to Smart Object. Next, go to Filter > Noise > Add Noise. Set the amount to 8%, distribution to Gaussian, and enable the Monochromatic option.
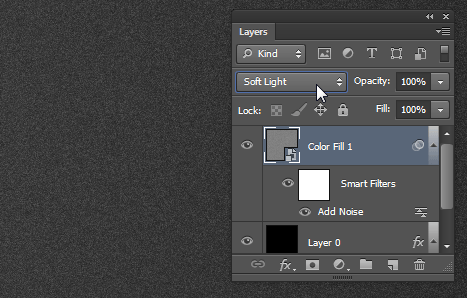
Step 5Change the blending mode to Soft Light. Now you can see the grainy texture mixed in with the gradient.
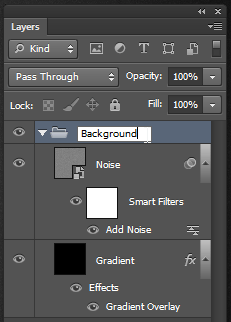
Step 6We're done with the background and to keep things organized, we will rename and group the layers. Start by renaming the bottom layer to "Gradient" and top layer to "Noise". Next, select both layers (hold Ctrl/Cmd to select multiple layers) then group them (Ctrl/Cmd+G). Rename this group to Background.
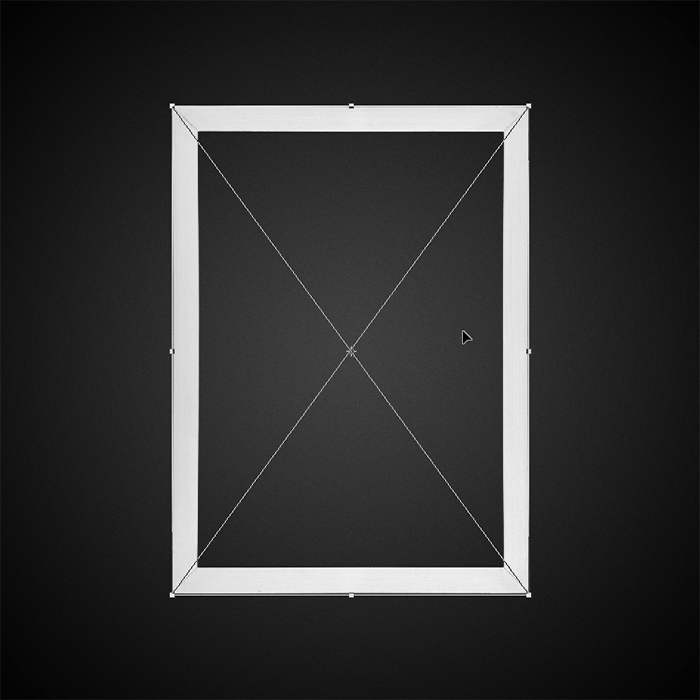
Step 7Next, we're going to place some picture frames. From the Picture Frames packages, place any picture frame you'd like to use. I recommend sticking with the rectangular picture frames. My favorites are the Brushed Aluminum and Smooth Aluminum picture frames because they stand out from the dark background. To place the picture frames, go to File > Place, browse for the picture frame image, then click OK. Resize the picture frame so that it fits in the center. Hold the Alt and Shift key while resizing – the Alt key lets you resize the image towards or away from the center and the Shift key maintains the aspect-ratio of your image. Press Enter to apply the transformation. Note: When you use the File > Place command (instead of copying/pasting), Photoshop will automatically place your photo as a Smart Object. This lets you resize/transform the layer as much as you like without losing image quality. See this image for an example.
Step 8With the Move tool selected (V), hold Alt+Shift then drag the picture frame towards the right. Holding the Alt key while using the Move tool will duplicate it in a new layer. Holding the Shift key constrains your movement horizontally, vertically, or diagonally (45°). Once you've copied a picture frame to the right-side, do the same thing to create another picture frame on the left side.
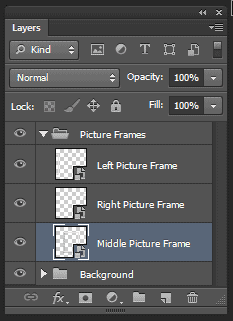
Step 9Rename your layers to Left/Right/Middle Picture Frame then group them into a Picture Frames group. To group the layers, hold down the Ctrl/Cmd key and select the three layers then press Ctrl/Cmd+G to group them.
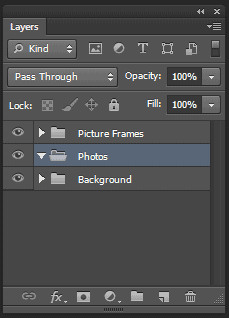
Create a new group (Layer > New > Layer Group) and rename it to Photos. Position this group below Picture frames.
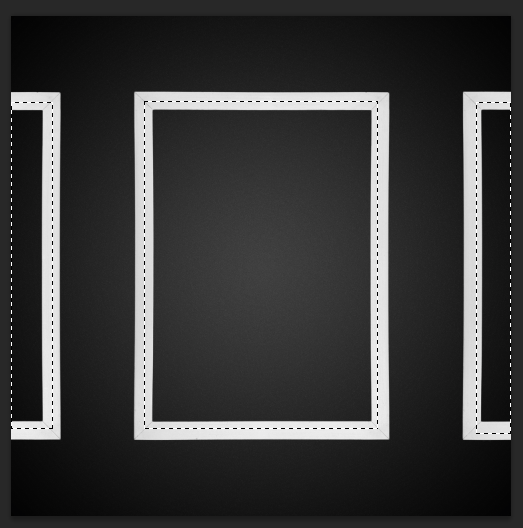
Step 10Use the Rectangular Marquee tool to create a selection near the picture frame like shown in the image below. The selection doesn't have to be precise; it just needs to be a little extended from the middle.
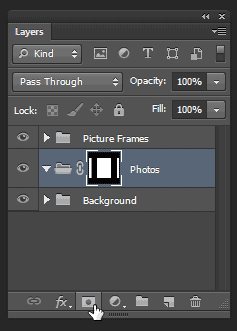
Step 11With the Photos group selected, click on the Add Layer Mask button. This will create a layer mask from the selection you made in the previous step.
|


| You are subscribed to email updates from Photoshop Tutorials To stop receiving these emails, you may unsubscribe now. | Email delivery powered by Google |
| Google Inc., 20 West Kinzie, Chicago IL USA 60610 | |


0 comments:
Post a Comment