


Photoshop Tutorials: How to Create an Awesome See-Through Water Horse in Photoshop | |

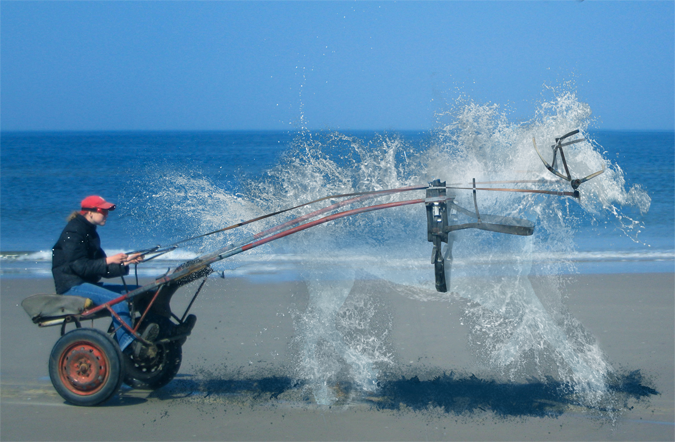
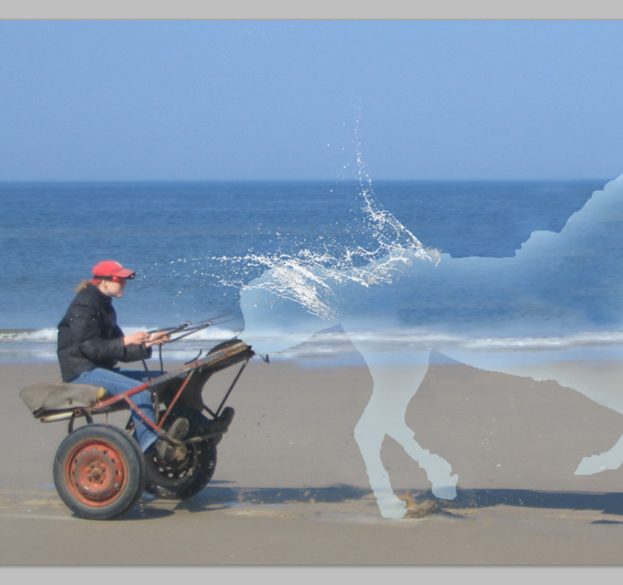
| How to Create an Awesome See-Through Water Horse in Photoshop Posted: 11 Feb 2013 11:46 AM PST Preview of Final Results
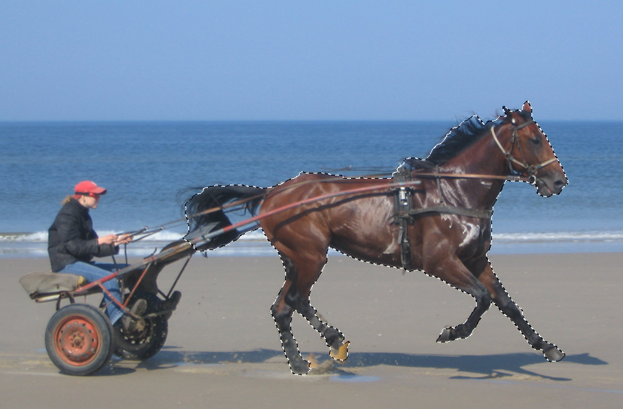
Download the PSDWater Horse.zip | 32.98 MB Water Horse Photoshop TutorialTutorial ResourcesStep 1So, how do we transform a normal horse into a water horse? Well, first let's open the image "Horse". It is a very nice photo, full of dynamism and movement, almost begging for a cool photo manipulation. If you followed my previous tutorials on photoshoptutorials.ws you probably know how to make a fire horse and an ice horse so this should give yet another horse transformation solution.
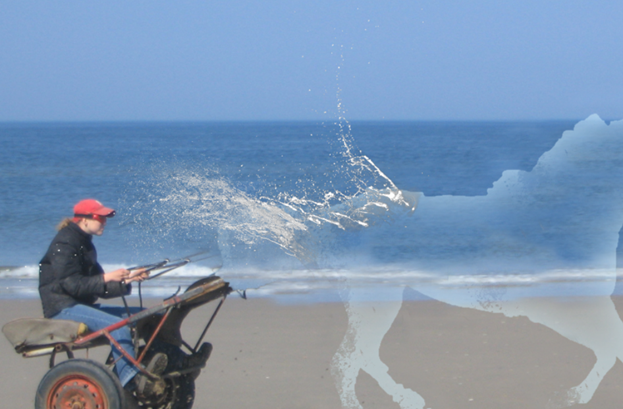
Step 2The first thing we should do it is to get rid of the horse and replace him with the background. Use the Lasso Tool (L) or the Quick Selection Tool to make a rough selection of the horse.
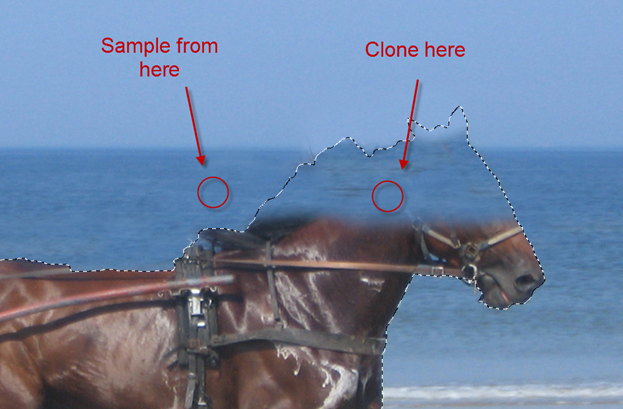
Step 3Now that we have a selection let's select the Clone Stamp tool and start cloning from outside the selection and painting inside. Try to keep the sampling and cloning on the same line (don't sample from the sky and clone way down where the sea should be). You can see in the image below that I replaced the head of the horse with the sea and the sky. To sample with the Clone Stamp tool Alt-click on the desired location.
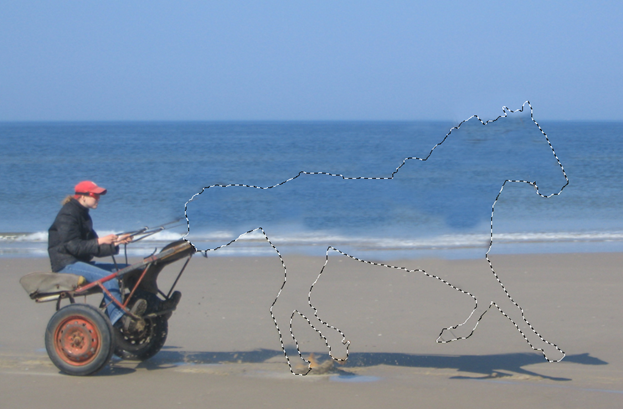
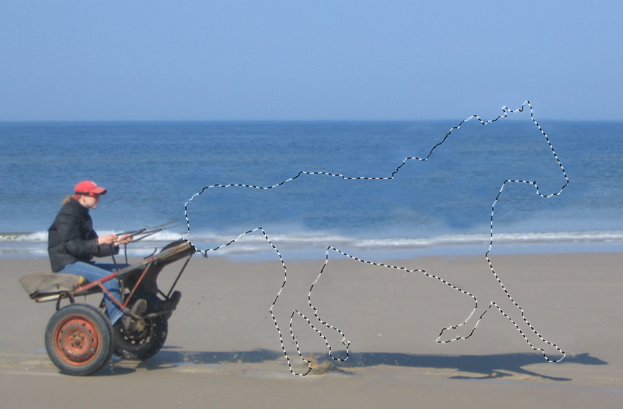
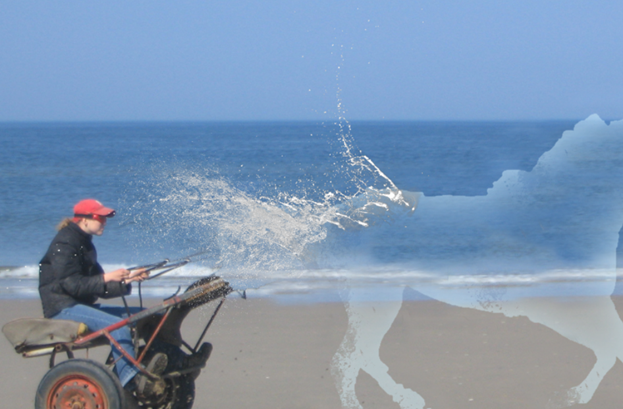
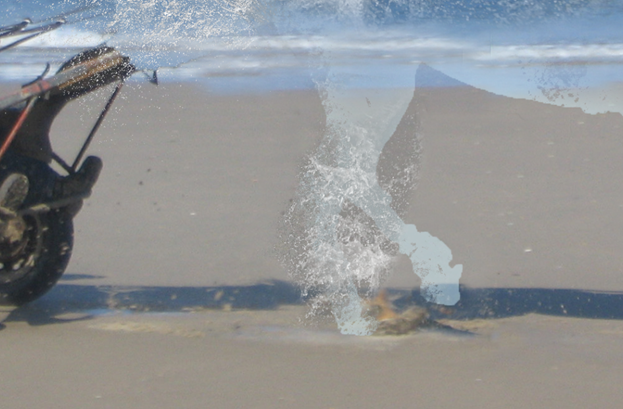
Step 4In the image below notice how I finished cloning and sampling the horse. The results are not perfect but I decided not to invest too much time because this area will be partially visible anyway. Now it is a good time to save the selection of the horse because we will make good use of it in a next step. To save a selection choose Select > Save Selection and write a name.
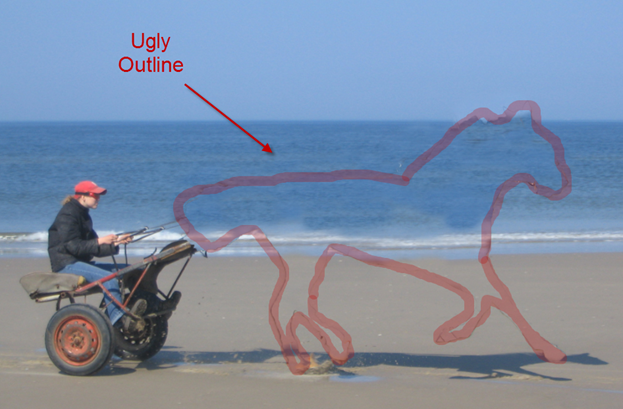
Step 5Press Ctrl + D to deselect. Notice that we have a dark, ugly line contouring the horse. Get rid of it by selecting the Clone Stamp tool again and carefully sample and clone. Take it slow, don't hurry and if you made a mistake it is better to go a step back (Ctrl + Z or Ctrl + Alt + Z for multiple steps) then try and work over it.
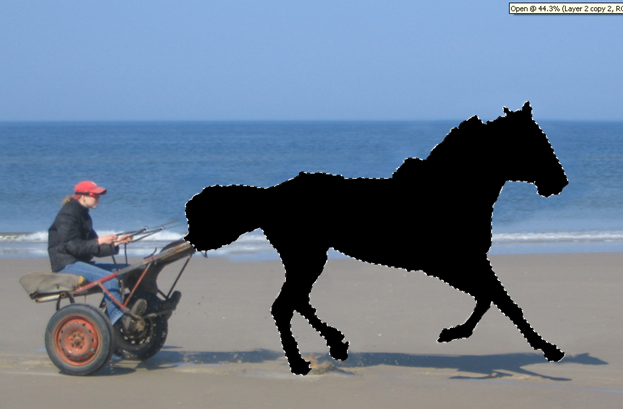
Step 6Remember that I told you to save the selection of the horse in step 4? Now it's time to use it. Load the selection by choosing Select > Load Selection and from the drop down menu select the name you used to save it in step 4.
Step 7Create a new layer by pressing Ctrl + Shift + Alt + N and press Alt + Backspace to fill the selection with the foreground color. It doesn't really matter what color it is.
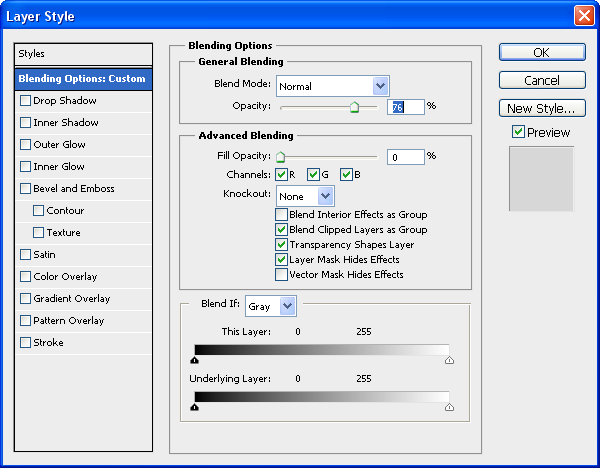
Step 8.Name the layer you created on the previous step "Horse Glue" (sounds strange but this will be the layer that will glue together all the splashes of water and make it feel like a real horse and not just some random drops of water) or any other name and double click on it to enter the Advanced Blending Options screen. Here I want you to drop the Fill to 0% and the Opacity to 75%. In case you didn't know Fill controls the opacity of the layer itself while Opacity controls the opacity of the layer and of the layer effects together. So if you lower the Fill to 0% the color that you used to fill the horse selection with and that represents the pixels of the layer will be rendered invisible but the future layer effects will be fully visible. Cool, huh?
Step 9Now check the Inner Glow box and use the settings you see below. Noticed that I chose a light cyan-blue color that will best suit our water horse. Once you are done press Ok.
Step 10You can see below that now we have a foundation on which we will build our water structure. In the next step I will explain you haw to select drops of water and we will start building the water horse.
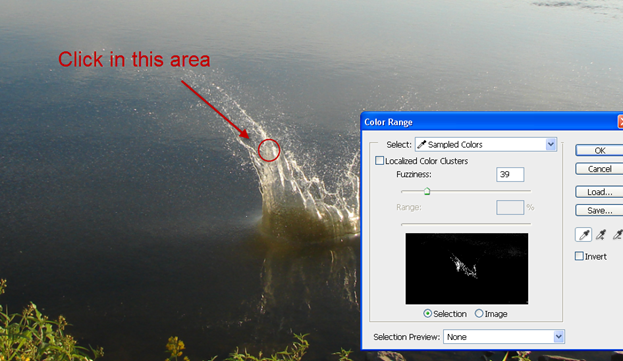
Step 11Open file "Splash2" and choose Select > Color Range. Click once in the area pointed below until the preview in your little screen on the Color Range window looks like mine below. Basically we are trying to select as much as possible of the white water splash without selecting other stuff. The preview in the little screen shows us what selection we have made by using the same principle as a layer mask: white reveals and black conceals. So everything white will be selected and black will not be selected. Gray means that the selection will be partial. The Color Range works by selecting pixels based on the place you click. So if you clicked in the area shown below it will try to select only the white splash without the green water surface or the plants. Don't be afraid to click multiple times until you obtain the desired effect. Once you're done click Ok and you will have a selection.
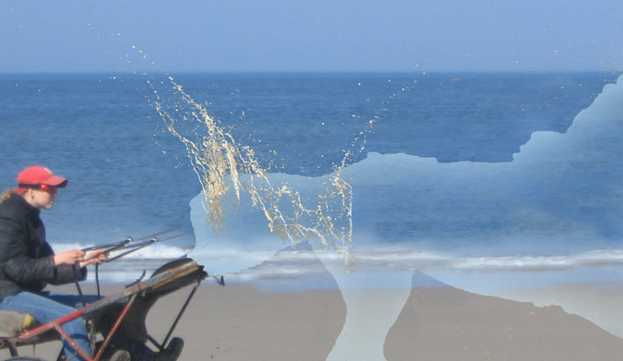
Step 12Press Ctrl + C to copy the selection and Ctrl + V to paste it into our document. You can see that it looks yellow and a bit dark. We will correct this in the next step.
Step 13Press Ctrl + Shift + U to desaturate the splash. This will get rid of the ugly yellow color. Still, the image look pretty gray. To increase the luminosity and contrast let's use a Curves Adjustment. We won't use adjustments layers for this because we will have a lot of water splashes and the multitude of clipped adjustments layer will clutter the document without offering a real advantage. I am all for non-destructive editing and I usually use adjustment layers as much as possible but sometimes a good old simple Curve will do just fine. So choose Image > Adjustments > Curves and drag the curve upwards to increase the lightness. Also drag the right slider a little towards the left to increase contrast. You can see that the splash it is already looking better.
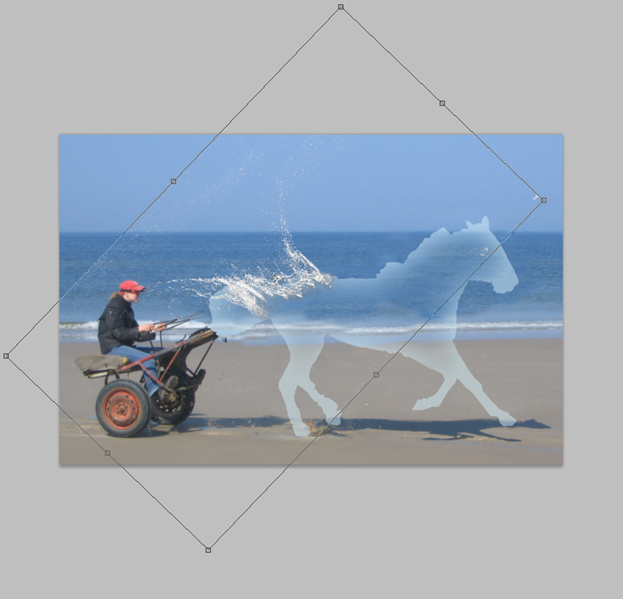
Step 14Now it's time to position the water splash. Press Ctrl + T and rotate the splash to match the picture below and press Enter.
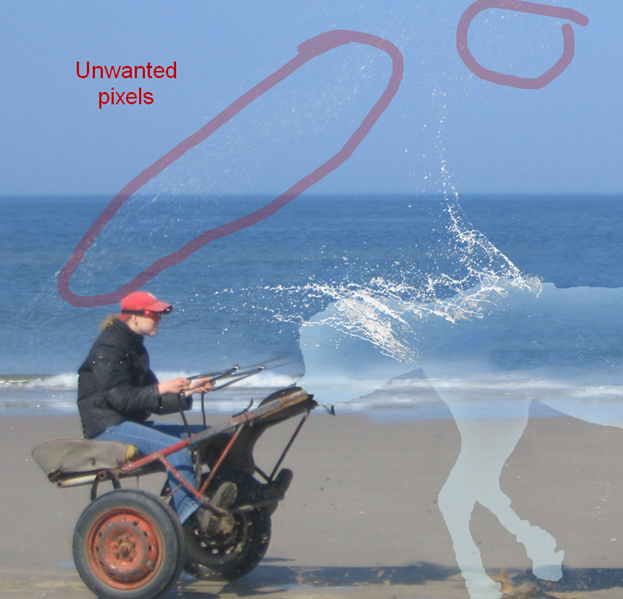
Step 15If you will take a closer look at the splash you will notice some unwanted pixels from our Color Range selection. To get rid of them we will use a layer mask.
Step 16Choose Layer > Layer Mask > Reveal All to add a layer mask. I strongly advise you to assign a keyboard shortcut to this very useful command so you can have at you fingertips all the time. Choose a round black soft brush tool and paint in the layer mask the highlighted areas from above and any other unwanted residual pixels. Also if you have any straight lines try to paint over them so the image doesn't look fake. Now the splash look nice and tidy.
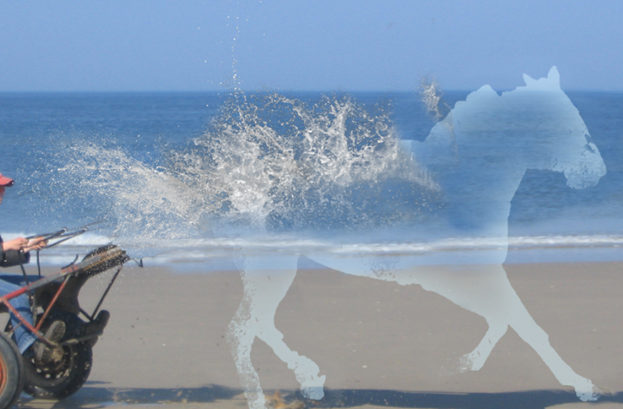
Step 17I will not repeat all the steps above for each water splash – this will take a lot of useless writing. Instead I will only show you the placement of each water splash. If you will follow the recipe from the above steps you should be fine. To recap: Step 18Let's make the back of the horse. Place "Water Splash 3" like shown below
Step 19Duplicate "Water Splash 3" layer by pressing Ctrl + J and move rotate it slightly to the left. Step 20Place "Water Splash 4" on the back of the horse. Step 21Duplicate "Water Splash 4" by pressing Ctrl + J and make it smaller. Place it on the back foot. |


| You are subscribed to email updates from Photoshop Tutorials To stop receiving these emails, you may unsubscribe now. | Email delivery powered by Google |
| Google Inc., 20 West Kinzie, Chicago IL USA 60610 | |


0 comments:
Post a Comment