Preview of Final Results

Red Riding Hood Photoshop Tutorial
Tutorial Resources
Step 1
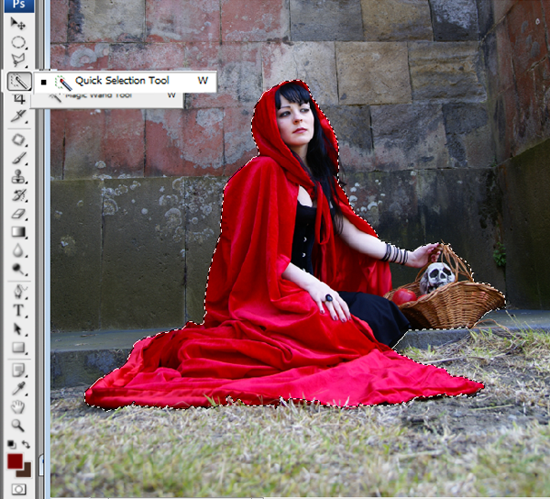
Extract the model from the original image; I used the Quick selection tool to make this, because there’s a lot of contrast between the model and the background. So this will make it easier.
Step 2
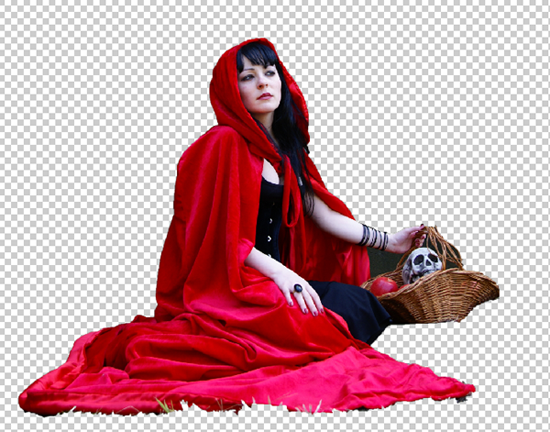
After your selection is done. Press CTRL + J to duplicate the selection, and you will have something like this:
Step 3
Then you can fix little details from the basket with the polygonal lasso tool.
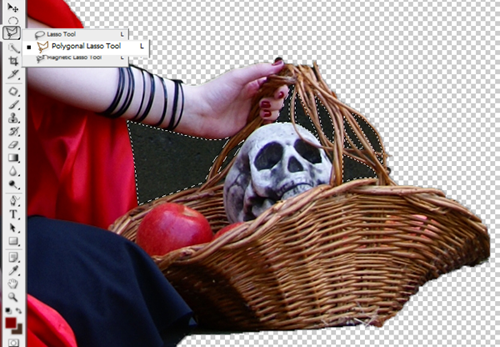
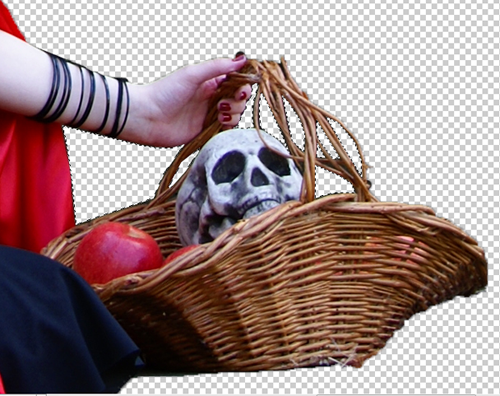
Press delete to erase the selection.
Step 4
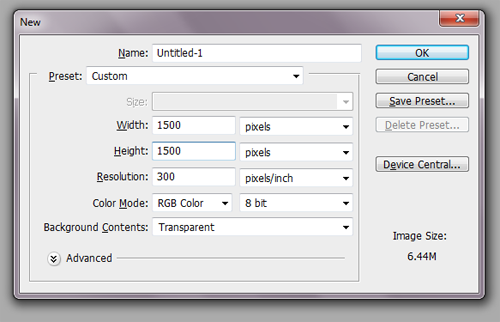
Press CTRL + N to open a new file with 1500 x 1500 pixels.
Step 5
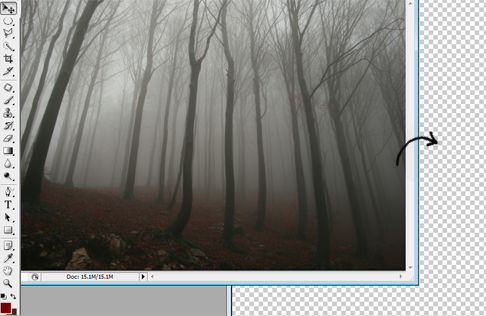
Open the forest stock and with the move tool put it in the new file you opened before.
Step 6
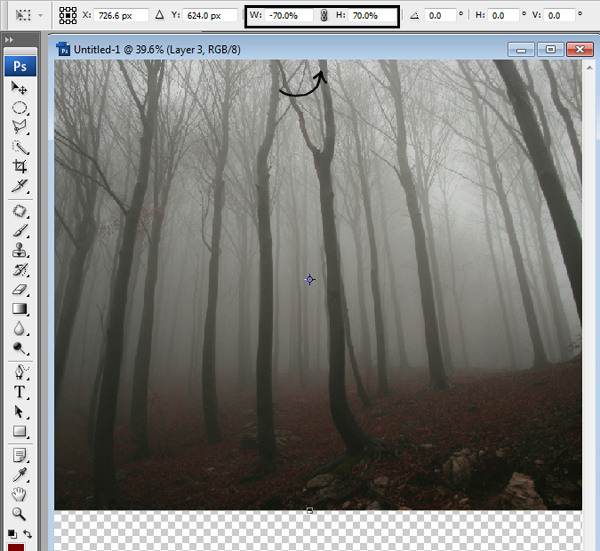
Change the size of the forest pressing CTRL + T then in the options you find in the upper side of the image put W: -70 and H: 70. That will reduce the image to a 70% of the original side. Press Enter to apply the changes.
Step 7
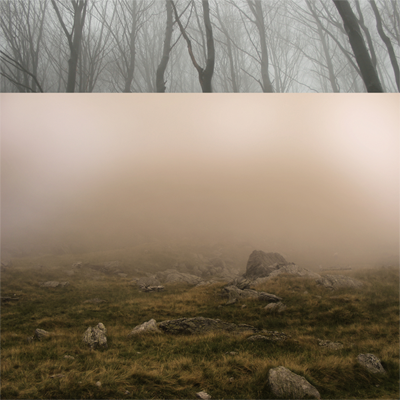
To make the field, I used this image.
Step 8
Erase a part of the field with the eraser tool.
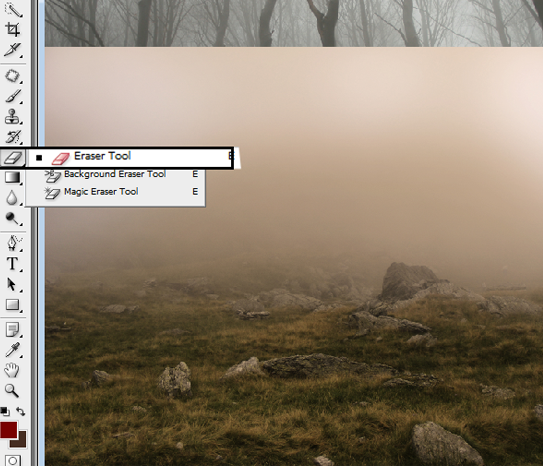
You’ll get something like this:
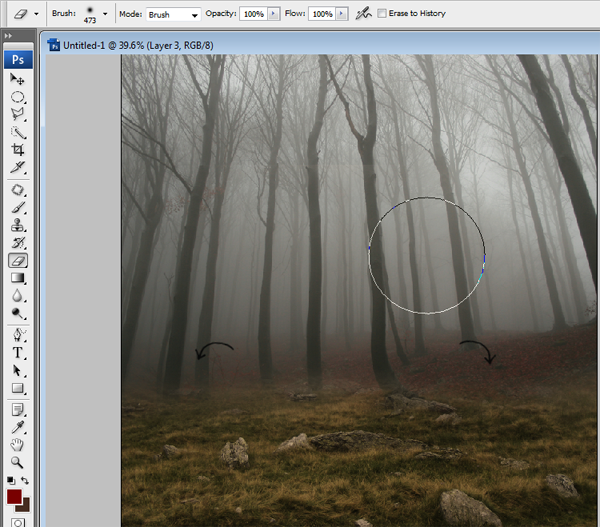
Step 9
Then you have to change this layer color. To do it press CTRL + U, and click the option colorize.
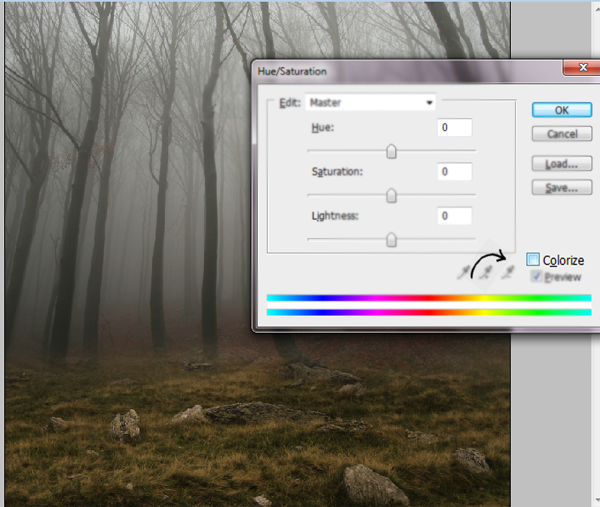
Now we are going to put the option Hue at 13, the option saturation at 28 and the lightness in -15.
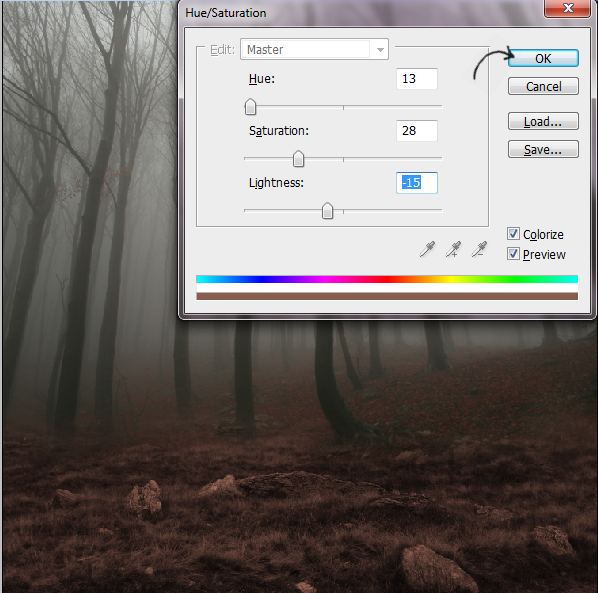
Step 10
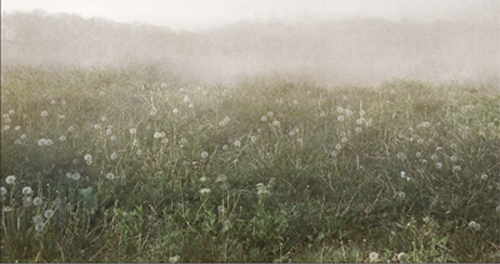
Now we are going to add the flowers layer.
Step 11
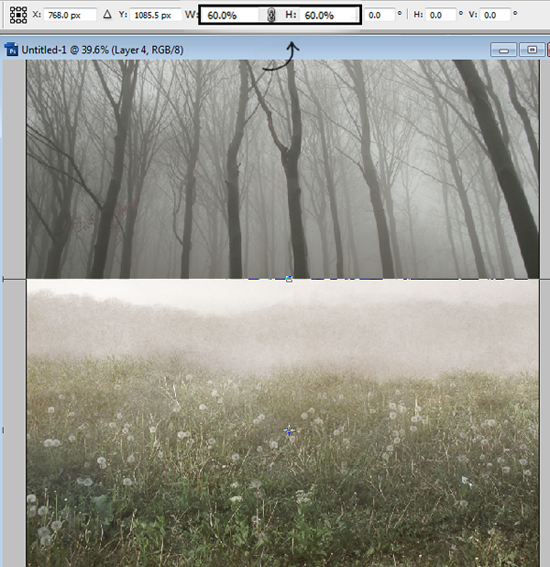
After adding the new layer, you have to change the size once again pressing CTRL + T. Until you get the desired result. In this case I reduce the size to a 60%.
Step 12
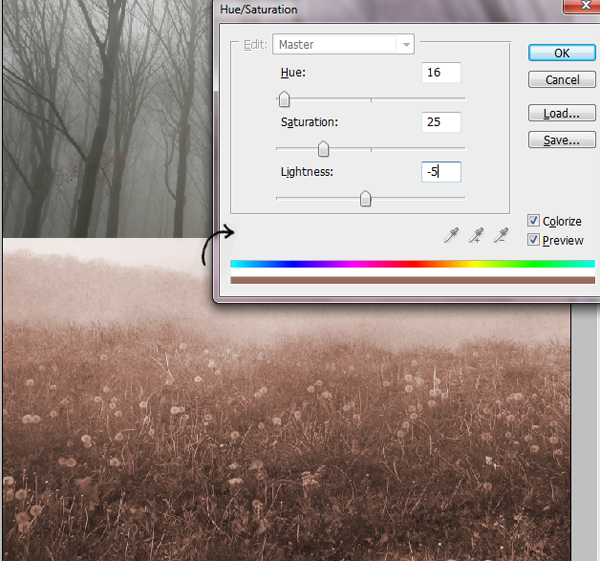
Let’s change the color again to get that brownish tones. Press CTRL+ U and click in colorize. I used Hue: 16 Saturation: 25 and Lightness: -5.


0 comments:
Post a Comment