Photoshop Tutorials: How to Create an Apocalyptic Sci-Fi Photo Manipulation in Photoshop |  |
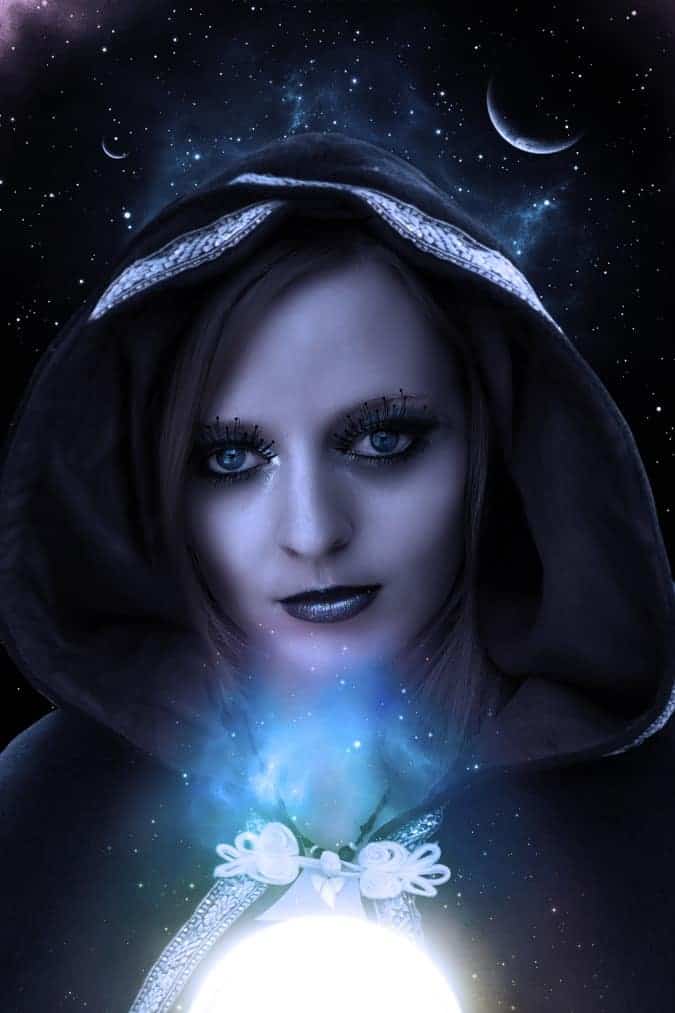
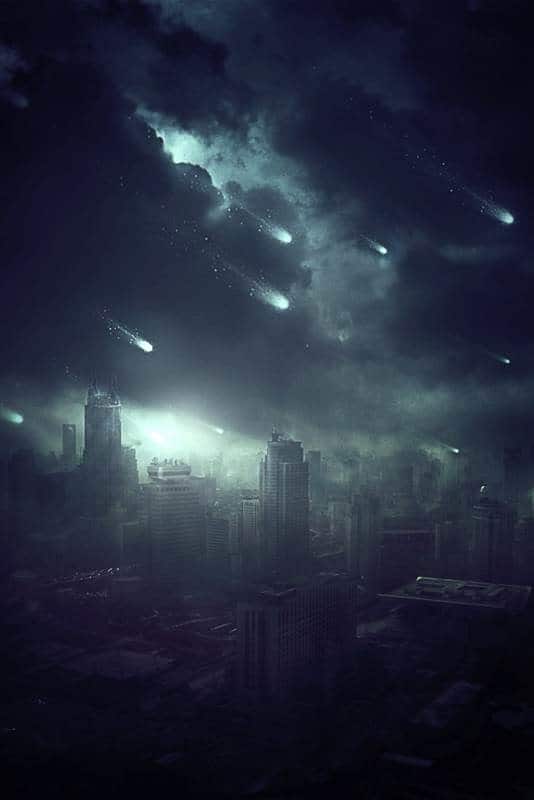
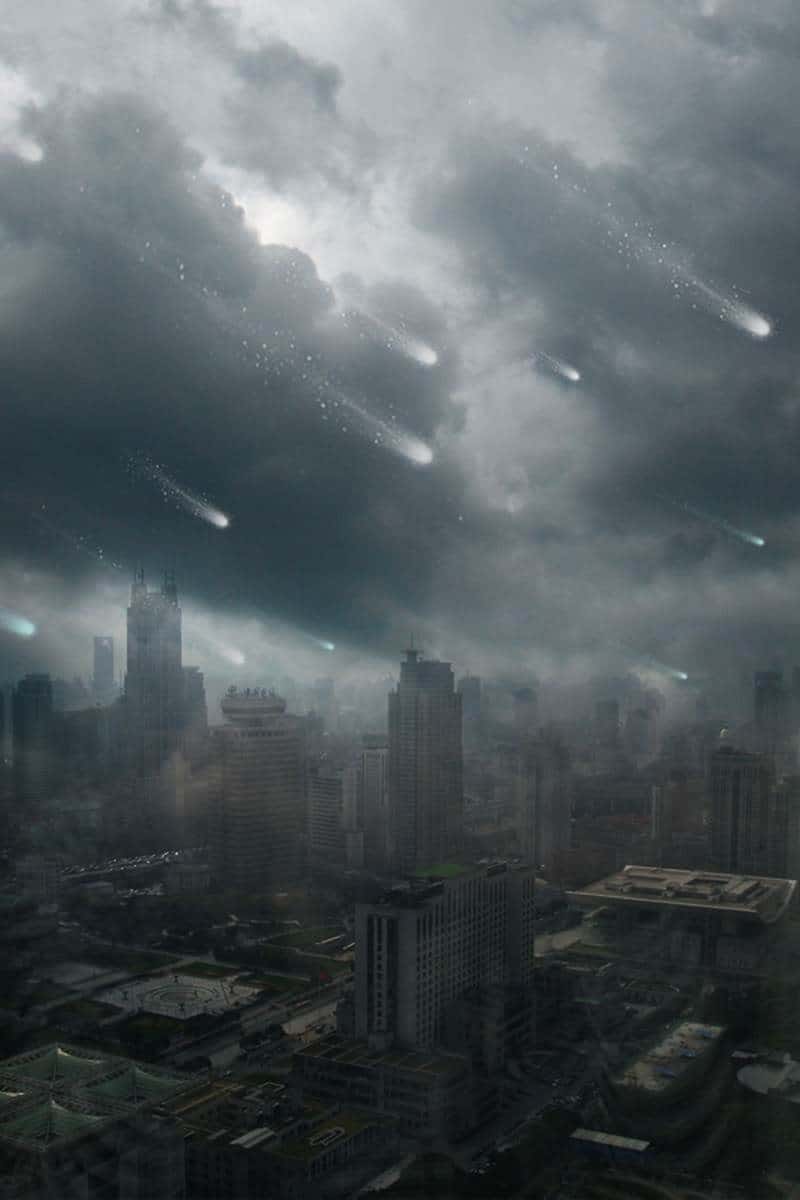
| How to Create an Apocalyptic Sci-Fi Photo Manipulation in Photoshop Posted: 30 Sep 2013 02:37 AM PDT Preview of Final Results
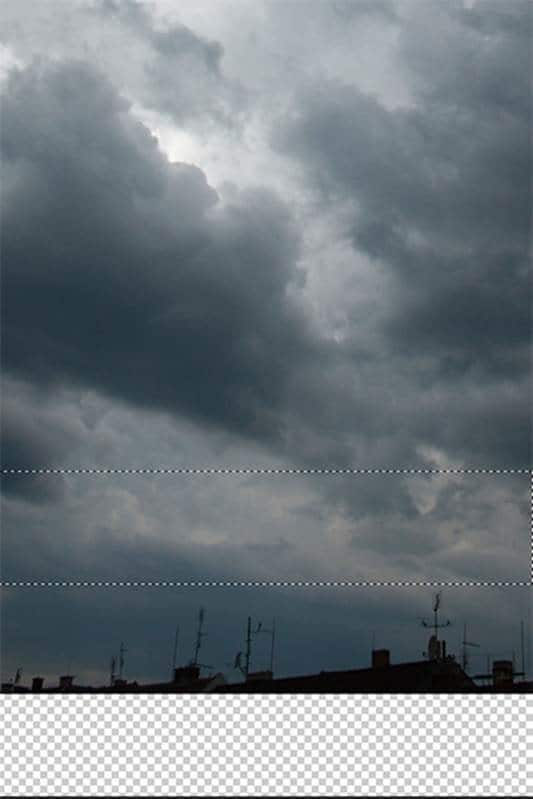
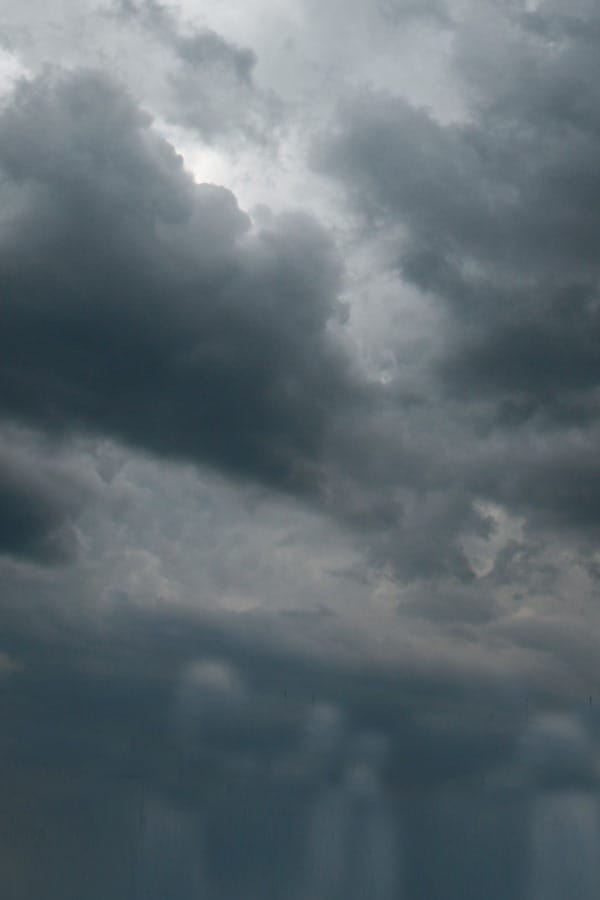
Tutorial ResourcesStep 1 – Creating BackgroundCreate new document in Photoshop. Download photo of the sky listed in the beginning of the tutorial and drag it into your new Photoshop document. Name this new layer SKY. It’s a great habit to name all your layers because once you create something more complicated it saves you lot of time finding some layer you want to adjust. Grab the Marquee Tool (M) and select down part of the sky without the rooftops. Press Ctrl+C to copy the selection and then Ctrl+V to paste it.
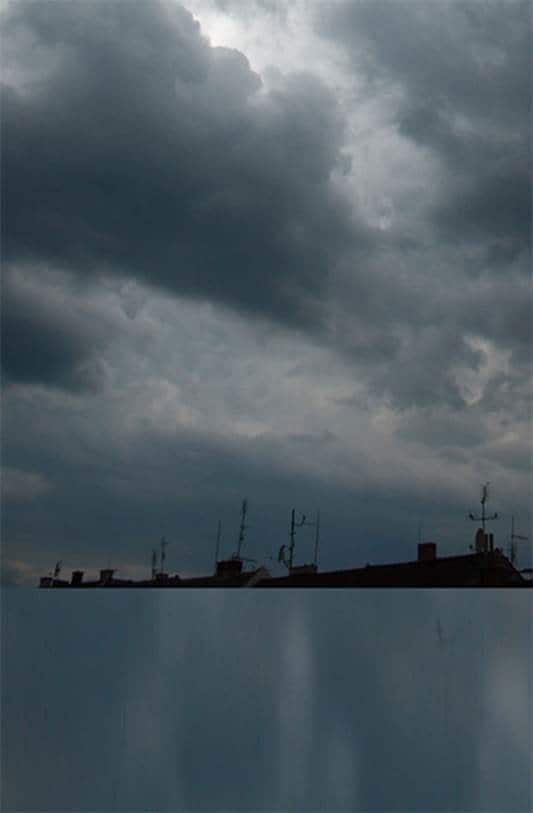
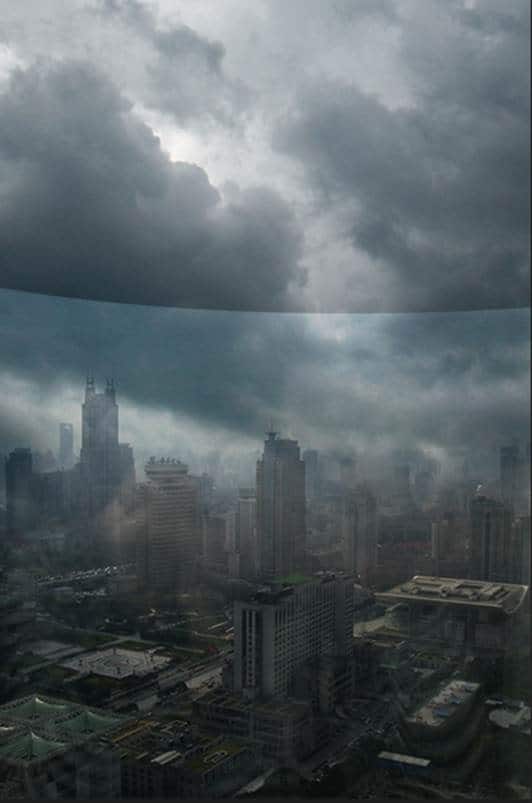
Place this new layer under SKY and name it BACKGROUND. Go to Edit > Free Transform or press Ctrl+T on your keyboard to activate the Free Transform Tool. Drag the bottom part of BACKGROUND to the bottom part of the image. On the photo below you can see what I mean.
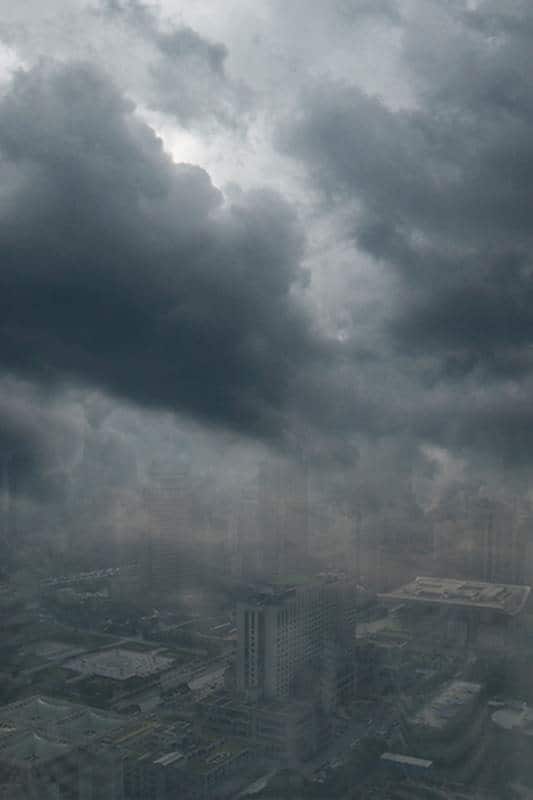
It’s just a base over which you put the skyscrapers so you don’t need to worry that it looks weird. Add new empty layer on the top of all layers and name it RETOUCH. Grab the Stamp Tool (S) and clone out the rooftops. After this step your image should look similar like the one below.
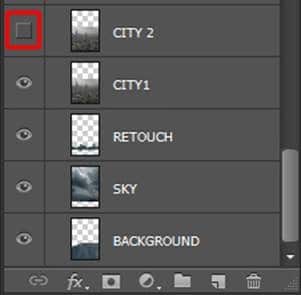
Step 2 – Adding CityIn this step I’ll show you little trick how to add photo of a city to this photo manipulation very easily and seamlessly without some complicated and time consuming masking. Download picture of the city listed in the beginning of the tutorial and drag it into your photo manipulation. Place it on the top of all layers and name it CITY 1. Right click on this layer and select option Duplicate layer. Name this new layer CITY 2 and place it on the top of all layers. Now let’s move on blending. You created two layers of the city because each one of them you’ll blend bit differently to achieve the best effect. Make CITY 2 invisible to be able to see only CITY 1 (click on the eye icon left to the layer name).
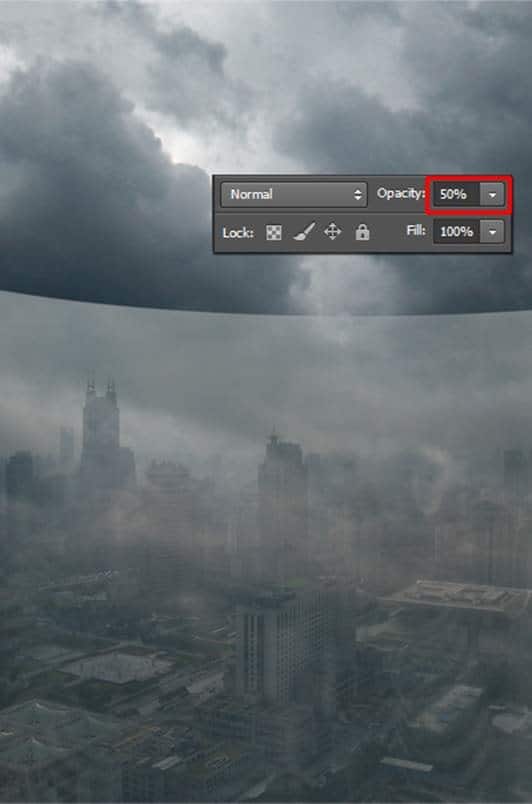
Click on the layer CITY 1 and lower its Opacity on 50%. You can find this option in top right corner of Layers palette.
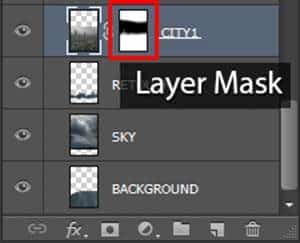
As you can see there is harsh transition between CITY 1 and rest of the image. To blend it better add layer mask to CITY 1. You can find the button Add layer mask on the bottom part of the Layers palette.
Grab the Brush Tool (B), select some soft round brush and lower its Opacity on about 70%. Pick black color. Make sure the layer mask is activated (click on it) and paint over the upper part of CITY 1 to create smooth transition between this layer and the rest of the image.
You should blend the layer similarly as on the following picture.
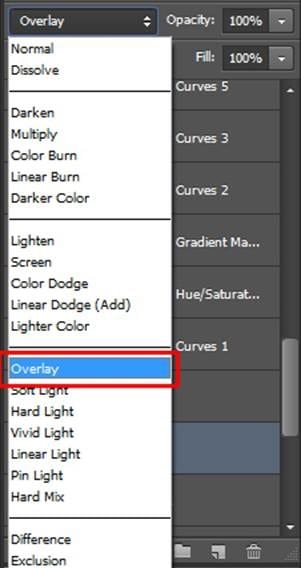
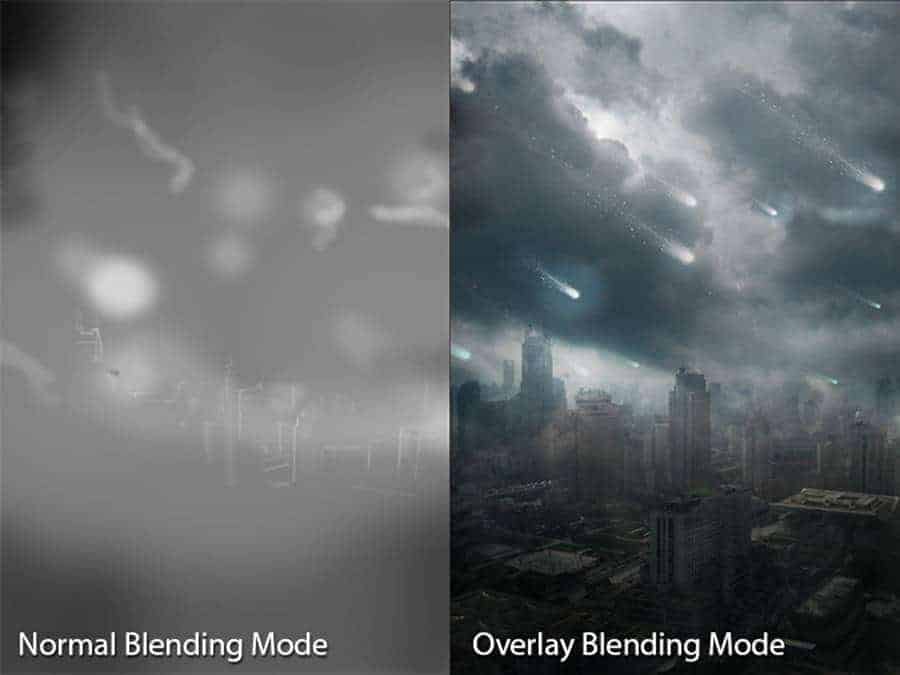
As you can see the city is barely visible right now. Here comes the second layer with city in play. Make CITY 2 visible again and change its Blending Mode on Overlay. Below you can see how this additional layer affects the photo manipulation.
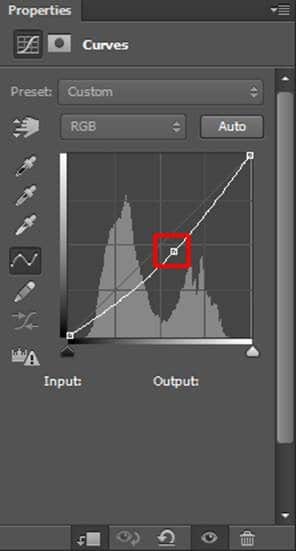
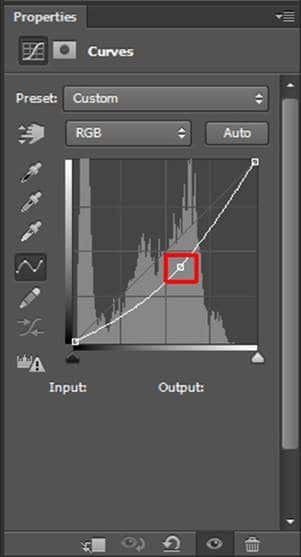
There is the harsh transition between CITY 2 and the rest of the layers. Add new layer mask to CITY 2, grab the Brush Tool (B) with the same settings as before and blend it properly. Step 3 – Darkening CityIn this quick step you’ll make city little bit darker. Add new adjustment layer Curves above the layer CITY 1 and set it as on the following image.
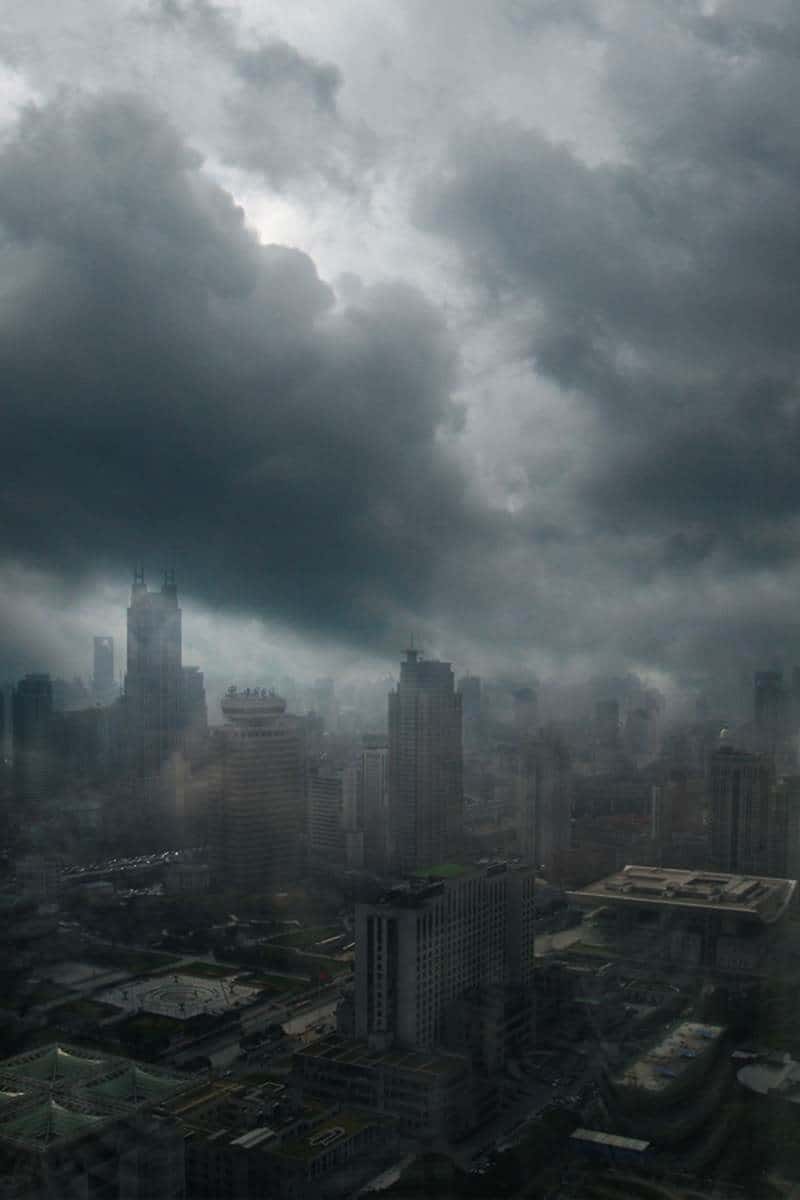
To affect only CITY 1 and not all layers under this adjustment you need to create Clipping Mask from it. Right click on the adjustment layer you’ve just created and simply select the option Create Clipping Mask. You can see result of this step on the following image.
Step 4 – Adding MeteorsDownload Meteor brushes listed in the beginning of the tutorial and install them into Photoshop. Create a new layer on the top of all layers and name it METEORS. Grab the Brush Tool (B) and pick meteor brush from the set of brushes you've just installed. Let me give you three tips to make the meteors realistic looking:
On the following picture you can get the inspiration where you should paint the meteors.
Step 5 – Adding Lights and ShadowsIn this step you’ll start creating more interesting lights and shadows to create more dramatic atmosphere. You’ll continue with this process in some of the following steps. Add new empty layer on the top of all layers and name it e.g. LIGHTS 1. Grab the Paint Bucket Tool (G). Pick mid grey color (#808080) and fill the layer with it. To blend it well with the rest of the image change its Blending Mode from Normal to Overlay.
Grab the Brush Tool (B), select some soft round brush and lower its Opacity on 15%. Pick white color and start painting over the areas which should be lighter:
After you’re done pick black color and darken bottom part of the image and top left corner to make the image more balanced looking. If you’re not sure where to paint look at the picture below for inspiration.
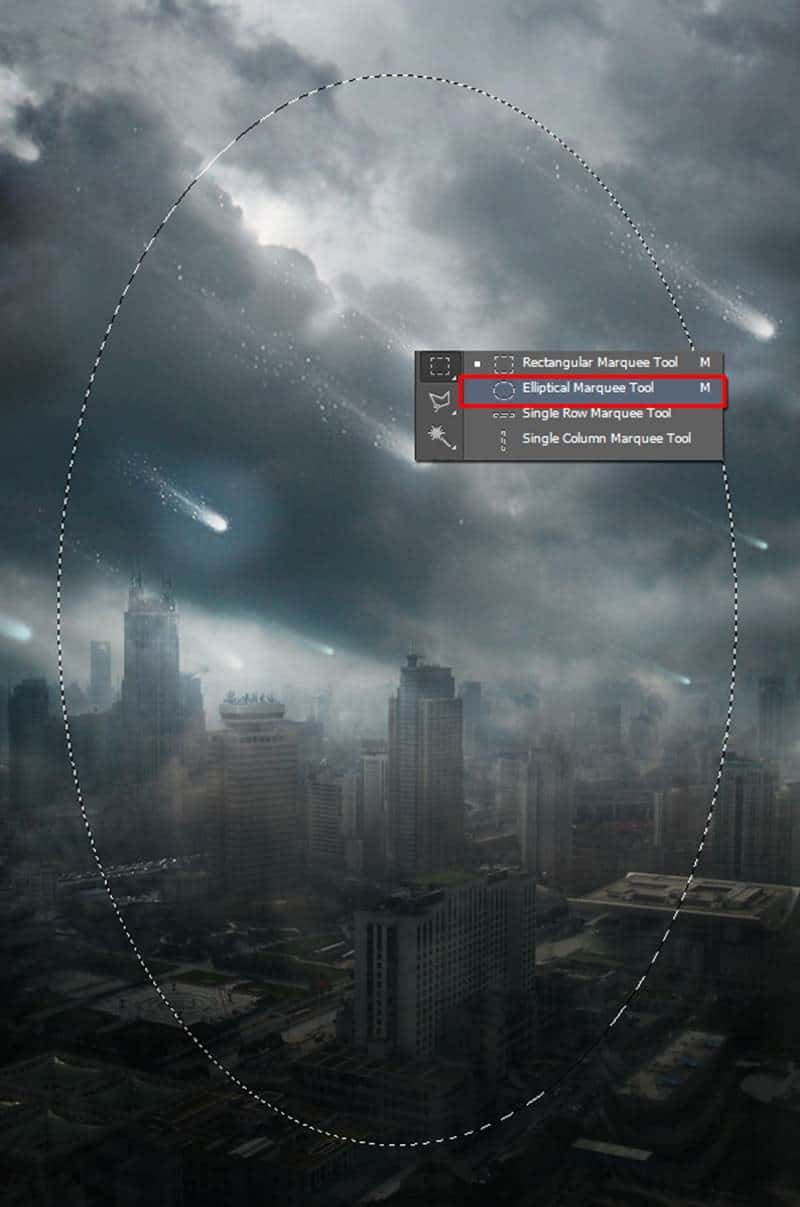
Step 6 – Adding VignetteIn this and some of the following steps you’ll focus on color adjustments. Let’s start with adding gentle vignette. I really like adding vignette to my pictures because it’s a great way how you can lead viewer’s eye in the center of the image. Grab the Elliptical Marquee Tool (M) and select center of the image.
Now you want to make the selection smoother. To do that you need to feather it. Go to Select > Modify > Feather… (path may differ in different versions of Photoshop, this one is for CS6) or press Shift+F6 to activate the Feather Selection window. As Feather Radius set about 40pixels and press OK.
Go to Selection > Inverse or press Ctrl+Shift+I to invert the selection you created. With the mask active add new adjustment layer Curves on the top of all layers and set it as on the following picture.
Because of the active mask the adjustment layer makes only the edges of the picture darker and the center remains same as before. |
| You are subscribed to email updates from Photoshop Tutorials To stop receiving these emails, you may unsubscribe now. | Email delivery powered by Google |
| Google Inc., 20 West Kinzie, Chicago IL USA 60610 | |


![11[3] 11[3]](http://www.photoshoptutorials.ws/wp-content/uploads/2013/09/113.jpg)

![1[3] 1[3]](http://www.photoshoptutorials.ws/wp-content/uploads/2013/09/13.jpg)
![4[3] 4[3]](http://www.photoshoptutorials.ws/wp-content/uploads/2013/09/43.jpg)
