Pages

Pages

Friday, May 31, 2013

Photoshop Tutorials: Enter Now to Win 1 of 4 Creative Market Bundles worth $850 Each

Photoshop Tutorials: Enter Now to Win 1 of 4 Creative Market Bundles worth $850 Each

Link to Photoshop Tutorials

Enter Now to Win 1 of 4 Creative Market Bundles worth $850 Each

Posted: 30 May 2013 06:41 PM PDT

70+ Products from 10 Independent Creatives

The Creative Market Bundle is the perfect bundle for designers, artists, and photographers. You can get beautiful handcraft icons, premium WordPress themes, amazing Photoshop actions + brushes, fonts, and more! These items would normally cost you $850 if you were to buy it separately but with the Creative Market Bundle, you can get all $850 worth of products for $39 or less. This deal expires soon so be sure to get one before it ends. We're also giving out 4 copies free on our website so fill out the simple form at the bottom of this page for a chance to win.
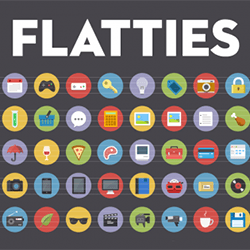
UIParade

100 royalty-free flat icons and the amazing Pixel Dropr Photoshop plugin worth $27.

Tom Anders

An exclusive bundle of 188 Photoshop actions worth $64.

Design Wall

The full Design Wall collection of 7 WordPress themes worth $262.

Kyle Benson

5 fantastic fonts worth $62.

SparkleStock

300+ Photoshop actions and 112 Photoshop brushes worth $63.

Pixlsby.me

The entire Pixlsby.me shop – 2367 icons and 4 UI kits worth $212.

Lil Squid

A remarkable vector UI kit, fonts, and more worth $24.

Liam McKay

50 subtle grunge brushes, 50 seamless grunge patterns, the IconJar icon set, and the most recently released Brisk Responsive WordPress Theme worth $21.

SeanWes

2 Super cool fonts and hi-res subtle grunge vector textures worth $21.

Viktor Hanacek

3 WordPress themes, 1 Tumblr theme, 3 PSD templates, 16 backgrounds, and business card mockups worth $54.

Get the Creative Market Bundle on Dealotto

Get 70+ items worth $850 for $39 or less.

PS: Want another chance to win? We're running also this giveaway on our Facebook page.

Thursday, May 30, 2013

Site Updates

Site Updates


A real review of 24hourprint.com

Posted: 29 May 2013 07:47 PM PDT

Articles
Finding a reliable online printing service? You might want to read my review of 24hourprint.com.

Tuesday, May 28, 2013

Photoshop Tutorials: Create Your Own Custom Landscapes in Photoshop

Photoshop Tutorials: Create Your Own Custom Landscapes in Photoshop

Link to Photoshop Tutorials

Create Your Own Custom Landscapes in Photoshop

Posted: 27 May 2013 12:51 PM PDT

Preview of Final Results

final-results


Tutorial Resources


Step 1

Open the image ‘Landscape 1′.

001


Step 2

Open the image ‘Lanscape 2′ and place it above the ‘Landscape 1′ like you see below.

002


Step 3

Place your mouse on the ‘Landscape 2′ image and add a clipping mask by clicking the button I show you below.

003


Step 4

Now we have to delete the unwanted parts of ‘Landscape 2′ image by painting with black on the clipping mask.

I painted with a big soft brush at 100%. When I was closer to the image below I set the Opacity of the brush at 20% so that the blending is better. We want the effect that it’s only one image!

004


Step 5

We have now to fix the light of this field. Add a Curves Adjustment Layer only for the ‘Landscape 2′ image and set it like you see below. (Output 110; Input 141).

005

006


Step 6

Open the image ‘Mountains’ and place it above everything.

007


Step 7

Now we have to fit this image with the rest. You have to activate only the first layer (like shown below).

008


Thursday, May 23, 2013

Photoshop Tutorials: Freebie: 8 Cinematic FX Photoshop Actions

Photoshop Tutorials: Freebie: 8 Cinematic FX Photoshop Actions

Link to Photoshop Tutorials

Freebie: 8 Cinematic FX Photoshop Actions

Posted: 22 May 2013 11:19 PM PDT

Cinematic FX Preview

Using snapshot prerendering, you can switch between the effects as your video is playing. This is extremely convenient and a huge time saver.

There are 8 cinematic effects. The warm/cool effects uses the same color tone as the 2012 movie, "Skyfall". Other sampled effects are "Surreal" from “Alice in Wonderland" (1951 film), Process 2 from "The Phantom of the Opera" (1925 film), “and "Old Film" from "The Sound of Music" (1965 film).


Premium Version

In the premium version, you get access to 19 cinematic color effects and 6 tonal adjustments. You can see all the effects in the video below.


Download Cinematic FX Photoshop Actions

8 Cinematic Effects

19 Cinematic Effects + 6 Tonal Adjustments

Monday, May 20, 2013

Photoshop Tutorials: Photoshop Matte Painting in Easy Steps

Photoshop Tutorials: Photoshop Matte Painting in Easy Steps

Link to Photoshop Tutorials

Photoshop Matte Painting in Easy Steps

Posted: 20 May 2013 12:00 AM PDT

Preview of Final Results


image002


Tutorial Resources


Step 1 – Size

Open the background stock. The size of the stock is width: 2250px and Height: 1500px.

image003


Step 2 – Smart Object

Transform the background into a smart object. Pressing right click in the layer thumbnail and selecting the option Convert to smart object.

image059


Step 3 – Smart Object

Press double click in the smart object thumbnail.

image060


Step 4 – Edit

Now a new window will pop up. This allow you to edit the smart object. So press ok.

image006


Step 5 – Duplicate

Now press Ctrl+J to duplicate the layer in case you need to go back to the original image.In this layer you will use the patch tool to hide undesired parts of the image.

image007


Step 6 – Duplicate and Change color

Press Ctrl+J to duplicate the layer and then press Ctrl+U and in the option saturation put -70. The image will have this color.

image008


Step 7 – Save

The the changes you made to the smart object  press ctrl + S and close the window.

image009


Step 8 – River

Now go to folder you have the stocks and grab the image of the river. You will see that the image is an smart object itself, you can change the size clicking in the corners.

image061


Step 9 – Layer Mask

Create a layer mask to erase the undesired parts of the image. Pick a soft round brush to paint over the parts you want to remove. You will have something like this:

image062


Step 10 – Hue and Saturation

Go to Create a new fill or adjustment layer and click in the option Hue/Saturation.

image063

Reduce the Saturation to -60.

image064


Step 11 – Apply to one object

To Apply the changes only in the layer of the river you have to press right click over the Hue and Saturation layer and select the option Create Clipping Mask.

image065


Step 12 – Duplicate

Now go back to the Background image and duplicate the layer pressing Ctrl+J and then change the layer mode to soft light.

image015