Pages

Pages

Thursday, August 30, 2012

Site Updates

Site Updates


Where is the cheapest place to buy stock photos?

Posted: 30 Aug 2012 01:59 AM PDT


See how I calculate the pricing per photo for 3 sites to find the cheapest place to buy stock photos!

Photoshop Tutorials: How to Create a Vintage Postcard in Photoshop

Photoshop Tutorials: How to Create a Vintage Postcard in Photoshop

Link to Photoshop Tutorials

How to Create a Vintage Postcard in Photoshop

Posted: 29 Aug 2012 07:49 PM PDT

Video Tutorial


Download the PSD

Postcard.zip | 25.4 MB


Wednesday, August 29, 2012

Photoshop Tutorials: Freebie: 24 Seamless Bokeh Textures

Photoshop Tutorials: Freebie: 24 Seamless Bokeh Textures

Link to Photoshop Tutorials

Freebie: 24 Seamless Bokeh Textures

Posted: 28 Aug 2012 02:22 PM PDT

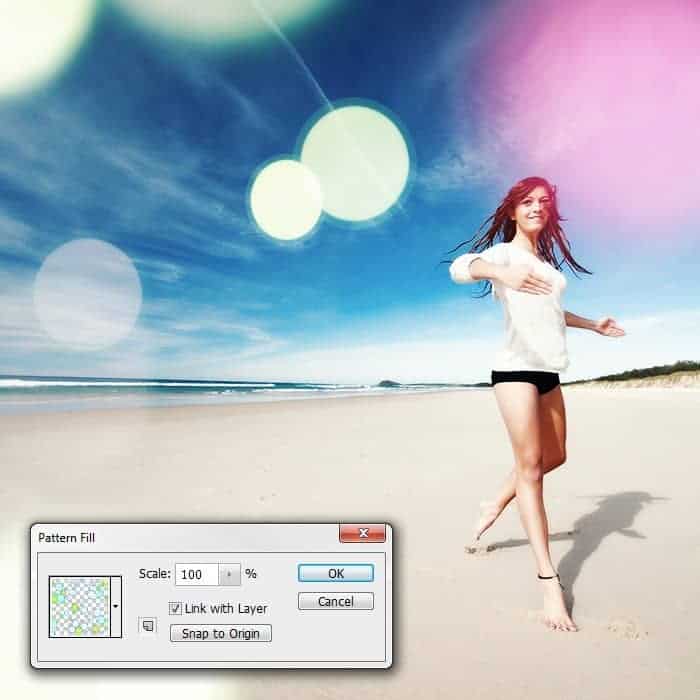
Bokeh Texture Examples


How to Use

The quick way – Place as Smart Object:

  1. Open the image that you want to add bokeh textures to.
  2. Go to File > Place. Pick the bokeh texture you want to use then click OK.
  3. Change the blending mode of the bokeh layer to Screen or Linear Dodge.

The better way – Place as Pattern

  1. Inside Photoshop, open the Bokeh texture that you want to use.
  2. Go to Edit > Define Pattern. The image is now saved as a pattern in Photoshop. Close the bokeh image without saving.
  3. Open the image that you want to edit.
  4. There are several ways to use Photoshop patterns and the easiest is to add a Pattern Fill adjustment layer. Go to Layer > New Fill Layer > Pattern. The Pattern Fill window will open – just click OK for now.
  5. Change the blending mode of the pattern fill layer to screen.
  6. Double-click back on the Pattern Fill layer to edit it. With the Pattern Fill window opened, click and drag the canvas to move the position of the bokeh. Adjust the scale setting to your likings. Click OK to apply the changes. Because these textures are seamless, you can move and reposition the texture any way you like.

Download Bokeh Textures

24 Seamless Bokeh Textures


400 Seamless Bokeh Patterns


Tuesday, August 28, 2012

Photoshop Tutorials: Create a Photo Manipulation of an Angel Holding a Torch

Photoshop Tutorials: Create a Photo Manipulation of an Angel Holding a Torch

Link to Photoshop Tutorials

Create a Photo Manipulation of an Angel Holding a Torch

Posted: 27 Aug 2012 01:27 PM PDT

Preview of Final Results
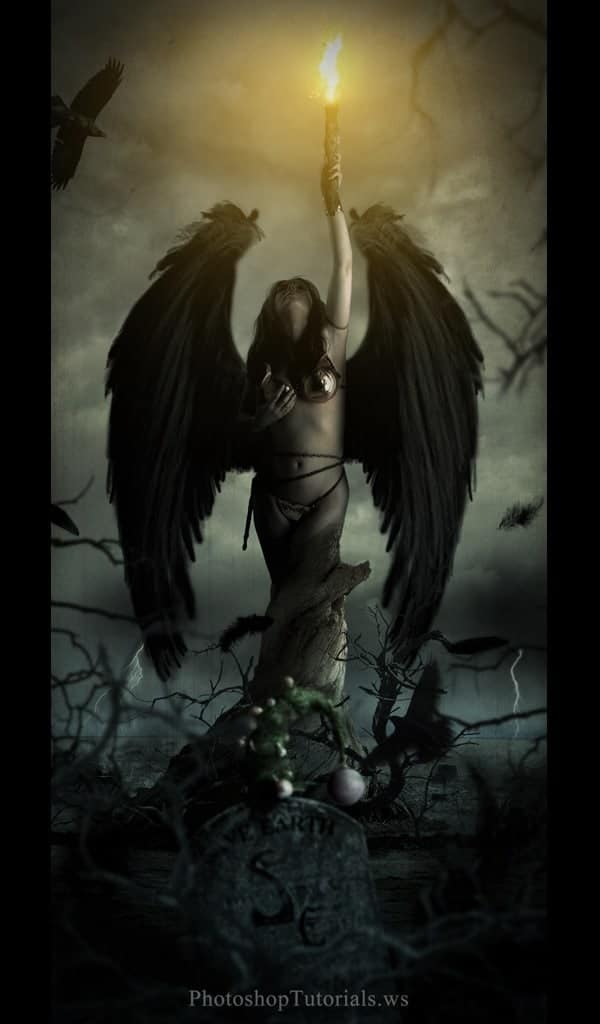
final-results

Angel Torch Photoshop Tutorial


Resources


Step 1

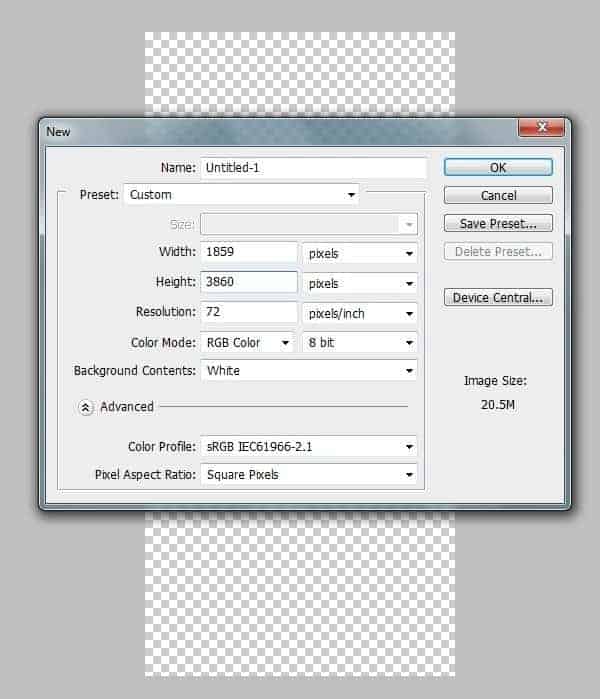
Create a new canvas with the dimensions Width=1859px and Height=3860.
1


Step 2

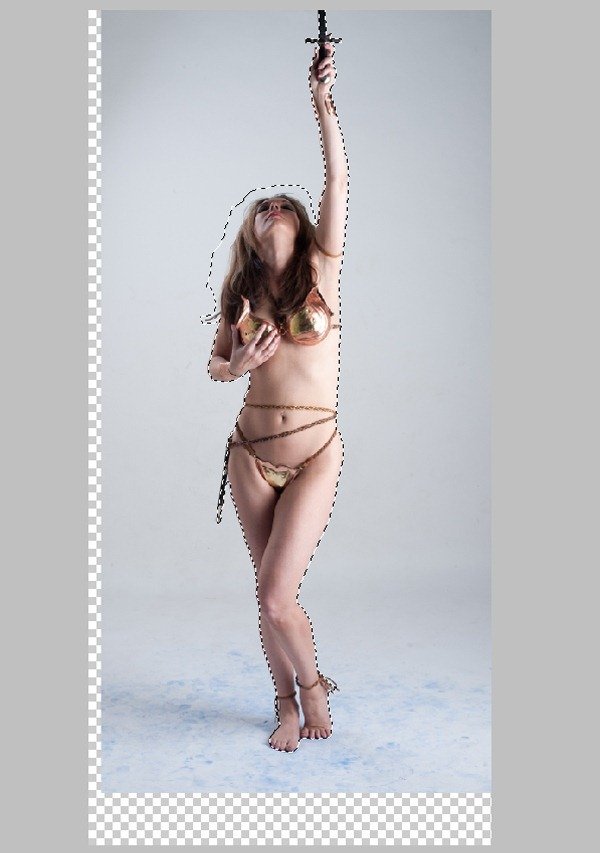
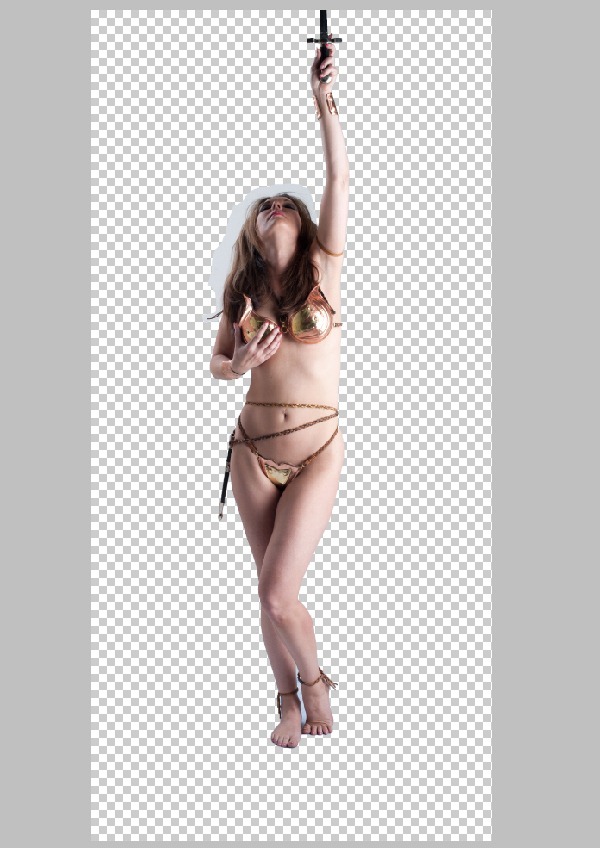
Import the image of the Woman on to the canvas and create a mask around her body. Select the mask around the hair very roughly as shown. Then separate the selection into a new layer.
22-1


Step 3

In this step we are going to us the Refine Edge Tool to mask out the hair of the women with every detail.

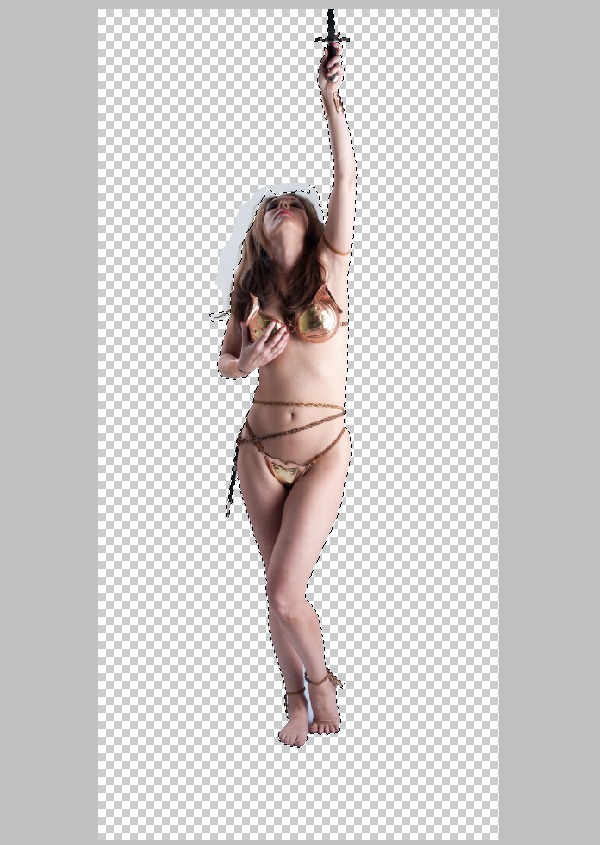
  1. Select the mask around the woman as shown using the Magic Wand Tool (W).
3

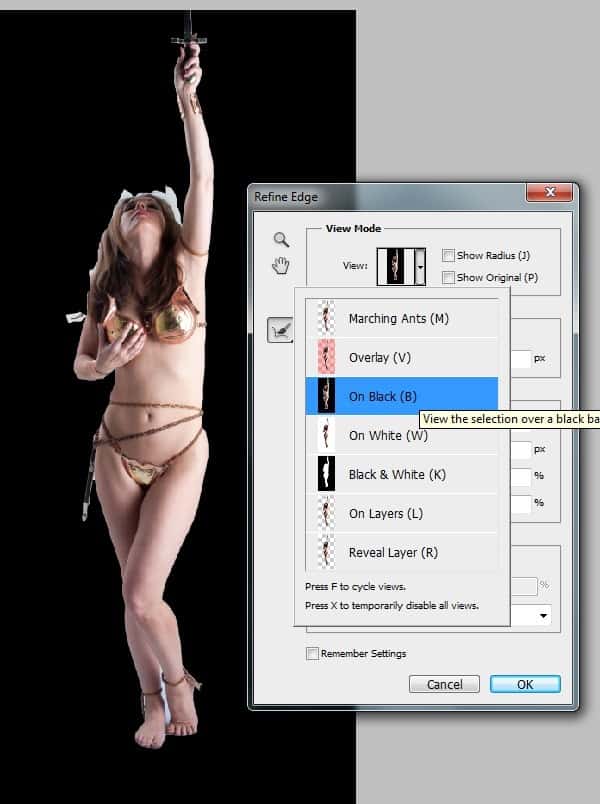
2) Now select the Refine Edge from Select>Refine Edge and select the On Black (B) from the View drop down list for a better view of the edge details.
3-1

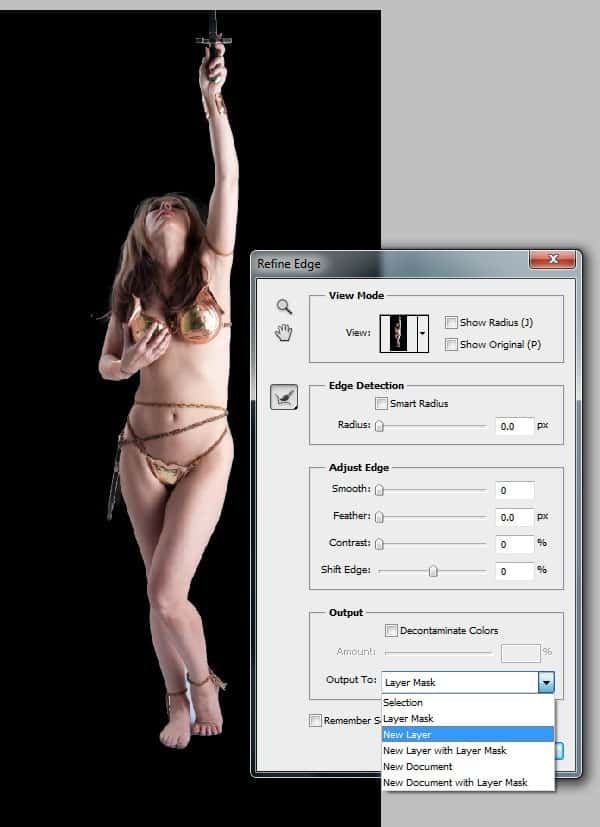
3) Now by using the Refine Radius Tool graze the edges of the hair and select New Layer from the drop down list of ‘Output To’ and press OK to see the magic of the tool.
3-2


Step 4

In this step we are going to color correct the image of the women.

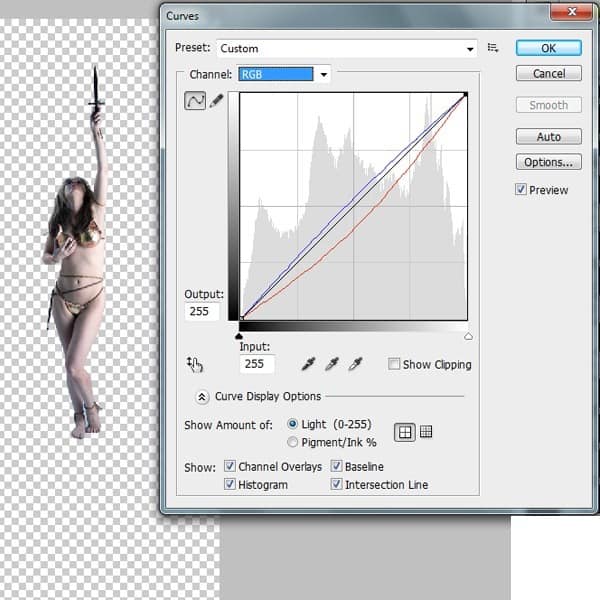
  1. With the women layer selected go to Image>Adjustments>Curves and set the Red and Blue curves as shown.
4

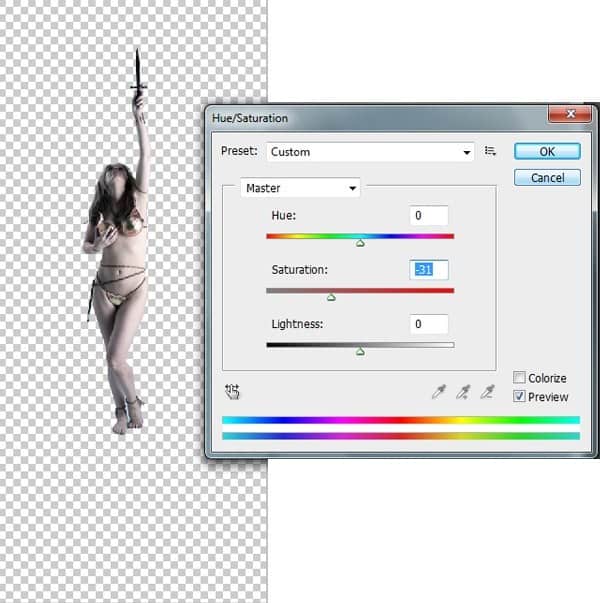
2) Now by using the Hue/Saturation De-Saturate the image to -31.
4-1

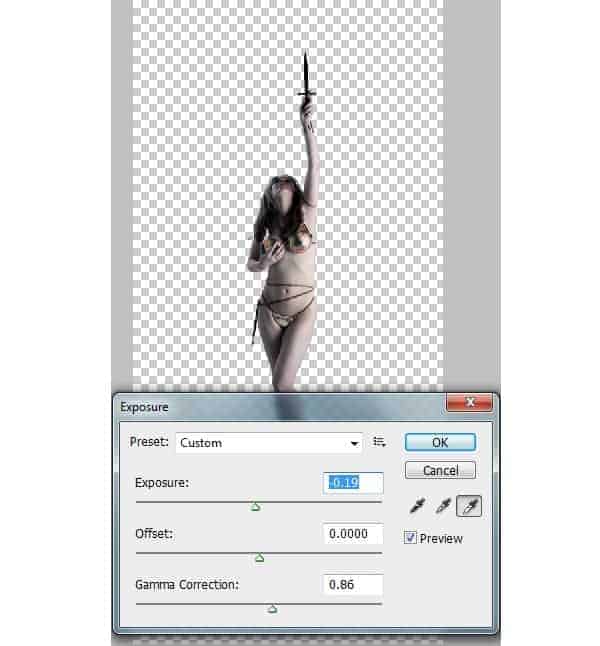
3) To enhance the dark shadows on the women go to Image>Adjustments>Exposure and set the Exposure=-0.19 and Gamma Correction=0.86.
4-2


Step 5

In this step we are going to create a tree bark in such a way to illustrate the women evolving from it.

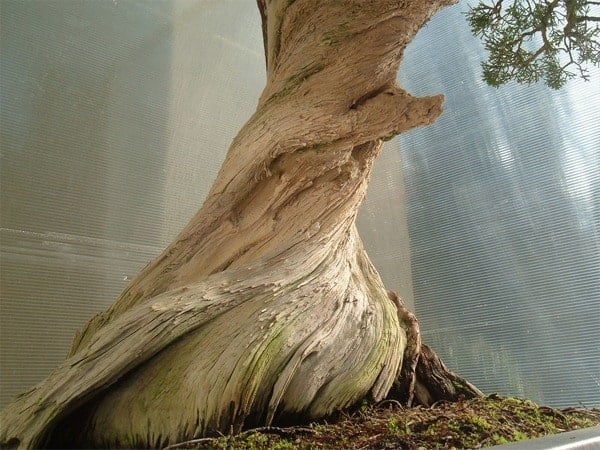
  1. Import the image of the Bonsai Bark and mask out the bark into a new layer using the Lasso Tool (L).
5

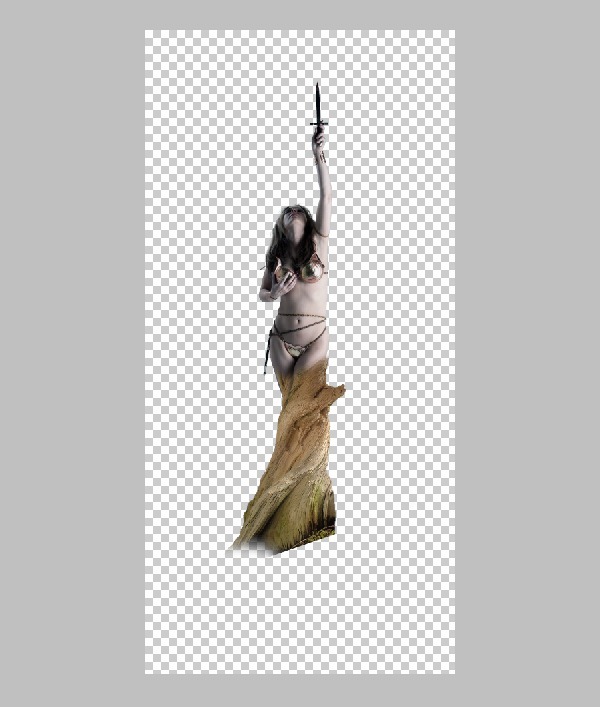
2) Now import the bark on to the working canvas and place it on the legs of the women as shown. Then erase the top end of the bark with Soft Round Brush.
5-1

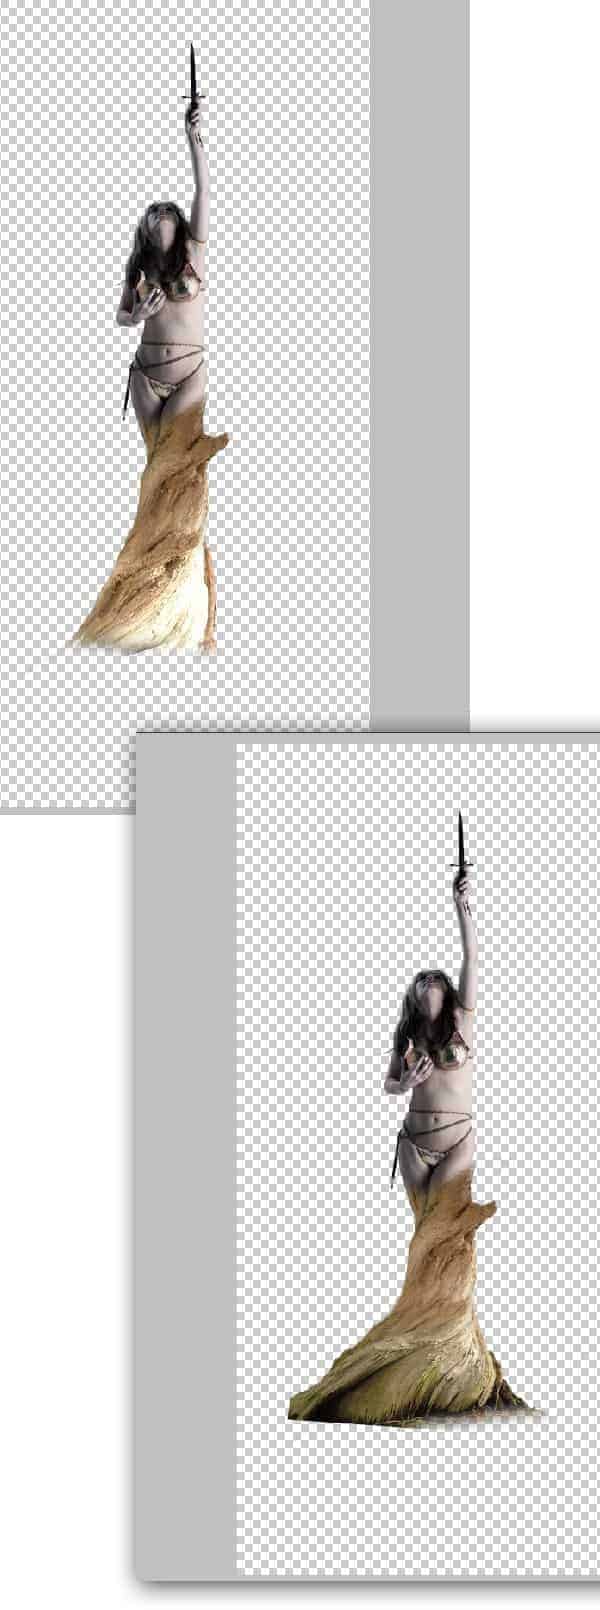
3) Similarly import the bark again and complete the bark as shown.
5-2


Step 6

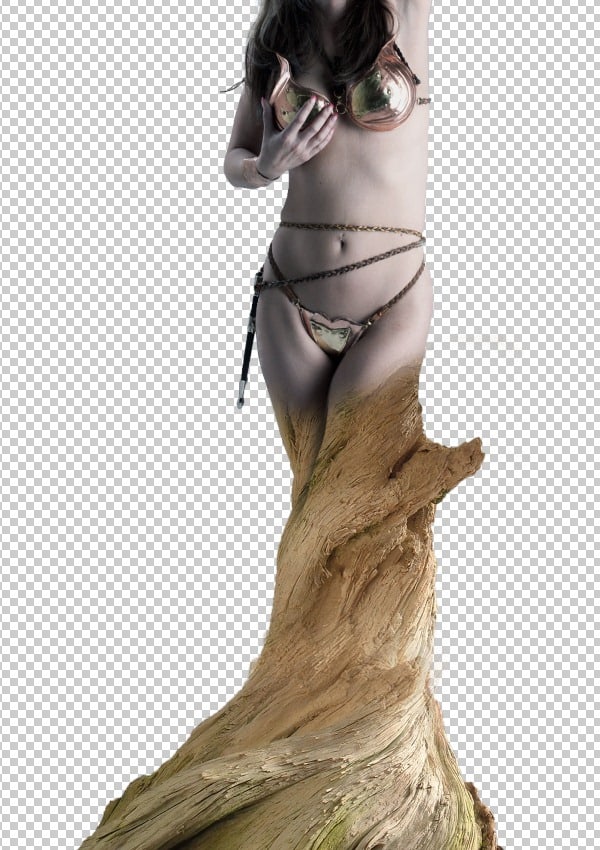
Since the woman is evolving from the bark we must show the semi evolution effect at the point of evolution.
-Create the shadow line of the leg on to the bark as shown. This creates an illusion of the fold on the bark that is caused during the evolution of the women.
6


Step 7

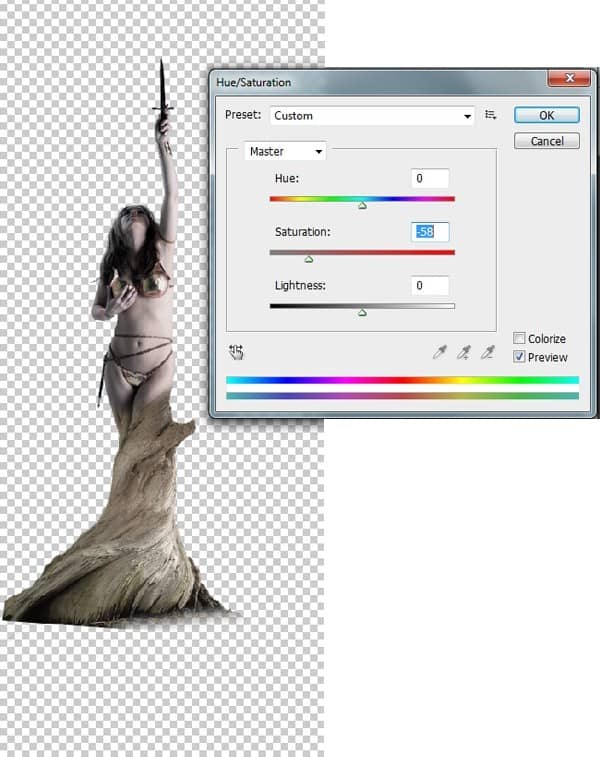
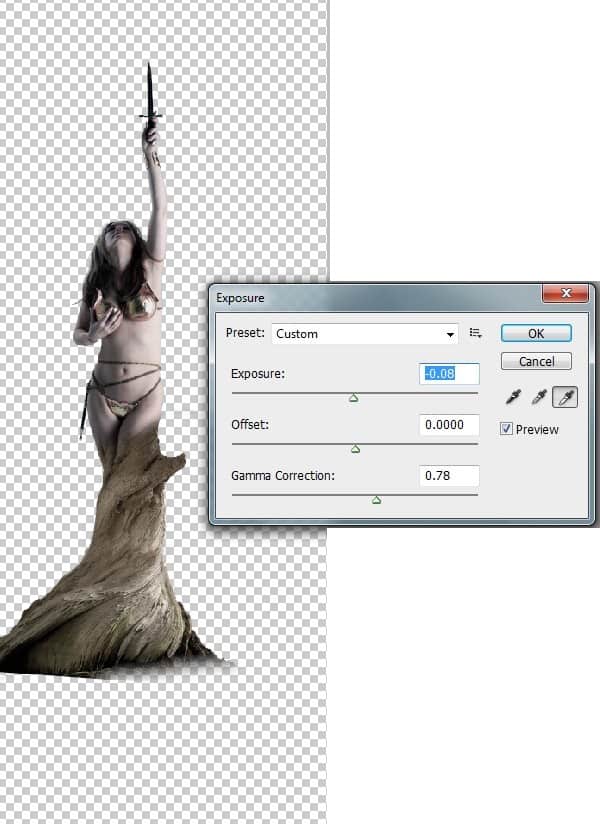
Now we need to color correct the bark in-order to blend with the women.

1) Merge the entire bark layer and go to Image>Adjustments>Hue/Saturation and de-saturate the image to -58.
7

2) Nowby using the Exposure Set Exposure=-0.08 and Gamma correction=0.78 to enhance the shadows on the bark.
7-1